What Causes Thermostat to Stick and How to Fix It
A practical guide to diagnosing and fixing thermostat sticking issues, with safe, step-by-step troubleshooting for homeowners.

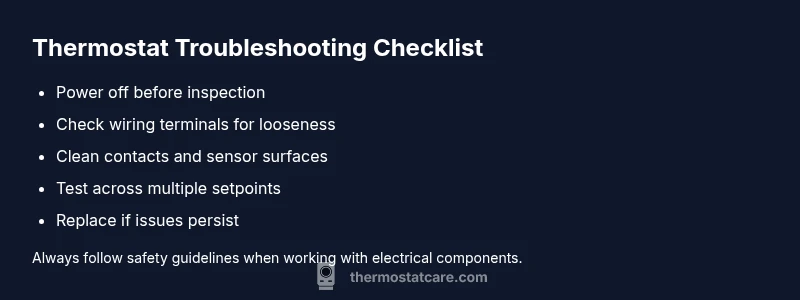
According to Thermostat Care, most thermostat sticking is caused by dirty contacts or aging switch mechanisms. Quick fixes: power off the system, remove the faceplate, gently clean dust from contact surfaces, reseat wires, and reassemble. If the lever still sticks after cleaning and testing, consider replacement or contact a professional for a safety-assisted diagnosis.
What Causes Thermostat to Stick
Understanding what causes thermostat to stick is essential for choosing the right fix. According to Thermostat Care, aging switches and accumulated dust on internal contacts are common culprits that make a thermostat feel stiff or unresponsive. In practice, you’ll often see a thermostat respond slowly, jump settings, or fail to hold a programmed temperature. The most frequent offenders are mechanical wear inside the switch, a dirty contact surface, and improper mounting that allows the armature to bind. While many homeowners blame the thermostat, the underlying problem is usually mechanical or electrical, not the programming itself. By isolating the most likely causes, you can avoid unnecessary replacements and focus on practical fixes.
Next, explore the three most common contributors: 1) dirt and dust that builds up over time, especially on older models; 2) wear and fatigue of the temperature-sensing switch; 3) loose wiring or poor connections that create intermittent contact. Each of these issues has a straightforward, safe remedy you can try before deciding on a full replacement.
Common Symptoms and Why They Matter
A thermostat that sticks often shows predictable symptoms. The most obvious is resistance when you try to move the dial or touchscreen, followed by delayed changes when you adjust the set temperature. You may notice abrupt jumps as the system catches up, or it might repeatedly revert to a previous setting despite your input. These symptoms matter because they point to the likely root causes rather than a bad program or a dead battery (if your model uses one). Recognize patterns: sticky physical movement usually hints at mechanical wear or surface dirt, while erratic responses near the edges of the setpoint suggest a sensor or wiring issue. By documenting what you observe, you’ll help yourself or a technician diagnose the problem faster and reduce unnecessary replacements.
Safety First: When to Turn Off Power and What to Inspect
Safety is non-negotiable when working with thermostats. Before touching any wires, switch off the circuit at the HVAC panel and the thermostat’s power source if applicable. Use a non-conductive tool and avoid touching terminals directly. Inspect the thermostat’s mounting and enclosure for signs of moisture, corrosion, or damage. If you see burnt marks, melted insulation, or a buzzing or warm outlet, stop and call a licensed electrician or HVAC technician. While simple cleaning and reseating can be done by homeowners, more invasive repairs belong to professionals. Document the model number, age, and any symptoms to share with the pro so they can assess whether the unit needs replacement or a deeper repair.
Physical Causes: Dirt, Dust, and Wear
Dust accumulation over years can settle into the mechanical linkage, causing sluggish movement or stickiness. This is especially common in older, line-voltage or heat-only thermostats where the contact surfaces are exposed to air flow. In many cases, a gentle cleaning with compressed air and a soft brush is enough to restore smooth operation. Worn-out mechanical components, such as the bimetallic strip or glide bar, will lose elasticity and produce sticking even after cleaning. If wear is the culprit, the long-term fix is replacement with a unit that matches your HVAC system and load. Always unplug or power down before attempting any internal cleaning, and avoid aggressive sprays that could damage electronics.
Electrical Issues: Wiring, Contacts, and Controller Board
Loose, frayed, or corroded connections create intermittent contact that presents as sticking or unresponsiveness. Check the thermostat’s wire terminals for signs of discoloration, looseness, or burned plastic. If you see any corrosion or a loose wire, secure or replace the terminal and retest. In some models, the control board or relay can develop cold solder joints or fatigue, causing intermittent stutter in the signal. Replacing the thermostat or professional repair may be required if the board is failing. When handling electrical components, always ensure power is off and follow the manufacturer’s safety guidelines. Documenting model and voltage can help a tech source compatible parts quickly.
Environmental Factors: Placement, Temperature, and Humidity
Location matters. A thermostat placed in direct sunlight, next to a heat register, or in a drafty corner can misread ambient temperature and behave as if it’s stuck between settings. Humidity can cause condensation inside the housing, particularly in damp basements or humid climates, which may affect the sensor or the electronics. Relative temperature swings can also confuse older sensors, making the unit feel sticky or slow to respond. To minimize these effects, position the thermostat away from heat sources, ensure proper airflow around the device, and consider a thermostat with built-in humidity tolerance if your home experiences variable conditions. Regularly checking location during seasonal changes is a smart maintenance habit.
Diagnostic Approach: How to Systematically Check
A methodical diagnostic flow helps you distinguish root causes without guesswork. Start with the simplest checks: verify power is present, confirm battery status if your model uses replaceable cells, and inspect the faceplate for damage. If issues persist, test the wiring connections and ensure the screws are tight. Clean contacts with a gentle brush or compressed air, then reseat the wires and reassemble. Re-test across a few setpoints to observe whether the stickiness occurs consistently at a particular range. If the problem continues, compare behavior with a known-good thermostat of similar type to determine if replacement is warranted. At this stage, if you are unsure about electrical safety or if there are signs of damage, seek professional help to avoid hazards and incorrect repairs.
When to Replace or Call a Pro
If cleaning and tightening connections do not resolve the problem within a reasonable number of attempts, replacement is often the most economical and reliable solution. An aging thermostat or a faulty sensor can waste energy and reduce comfort, especially in extreme weather. A professional can confirm whether the issue is with the thermostat, the wiring, or the HVAC system and recommend a compatible model for your system. A quick call to a licensed electrician or HVAC technician may save time and avoid risk, especially when dealing with high-voltage line-powered units or sealed electronics. Budget for installation costs and consider energy-saving models that integrate with your smart home for better long-term performance.
Prevention and Maintenance Tips
To prevent thermostat sticking in the future, perform a light cleaning and inspection every six to twelve months, particularly if you have an older unit. Keep the thermostat enclosure dry, avoid exposing it to direct sunlight, and check the wall for heat sources that could shift readings. When replacing, choose a unit with the same specs and proper compatibility with your HVAC system, and ensure you’ve updated any programmable features for your schedule. Regularly inspect wiring at the terminals, and if you notice any signs of wear, replace damaged wires or the entire unit promptly. With proactive maintenance, you can avoid sticking and improve overall system efficiency. The Thermostat Care team recommends scheduling preventive checkups as part of standard home maintenance.
Steps
Estimated time: 30-60 minutes
- 1
Power off and access the thermostat
Turn off the HVAC circuit breaker and remove the thermostat cover to expose internal components. Inspect for obvious damage or loose parts. Work in a dry, clean area to prevent moisture from contacting electronics.
Tip: Keep screws organized and take a quick photo of wire layout before disconnecting. - 2
Inspect wiring terminals and connections
Check all terminals for looseness, discoloration, or frayed insulation. Tighten screws to spec and reseat any loose wires. If a terminal is damaged, replace the wire harness or the entire terminal block as needed.
Tip: If you see burnt insulation, stop and call a professional. - 3
Clean contact surfaces and sensors
Use a can of compressed air and a soft brush to remove dust from contacts and sensing surfaces. Do not spray liquids directly onto electronics. Allow any residue to dry completely before reassembly.
Tip: Avoid aggressive scrubbing that could wear metal contacts. - 4
Reassemble and test
Reconnect any removed parts, replace the cover, and restore power. Test across multiple setpoints to see if the stickiness persists. If it sticks at a specific temperature, document the range for troubleshooting.
Tip: Test with the HVAC system running to observe real behavior. - 5
Evaluate need for replacement
If sticking continues after cleaning and tightening connections, weigh whether replacement or professional repair is more economical in your climate. Compare energy use and comfort with a new model.
Tip: Keep receipts and model numbers handy for comparisons. - 6
Schedule professional help if needed
For high-risk repairs or uncertain safety, contact a licensed electrician or HVAC technician. A pro can diagnose wiring faults, control-board issues, or compatibility with your HVAC system quickly.
Tip: Ask about energy-saving smart thermostats as a future upgrade.
Diagnosis: Thermostat sticks or drags when changing settings
Possible Causes
- highMechanical wear or internal binding of the switch
- mediumDirt, dust, or corrosion on contacts or sensor
- mediumLoose or damaged wiring / control board
- lowEnvironmental factors such as placement in a draft or humidity
Fixes
- easyPower down, inspect wiring, tighten connections, and reseat components
- easyClean contacts and sensors with compressed air or contact-safe cleaner
- hardReplace thermostat or repair switch/board if binding persists
Questions & Answers
What does it mean when a thermostat sticks?
A thermostat sticks when its internal mechanism isn’t moving freely, often due to dirt, wear, or wiring issues. This causes slow or inaccurate responses to setting changes.
A sticking thermostat usually means the internal mechanism isn’t moving freely, often from dust, wear, or loose wiring.
Can I fix a sticking thermostat myself?
Yes for basic cleaning and wiring checks on safe, non-high-voltage units. More complex repairs or internal component replacements should be handled by a professional to avoid safety risks.
You can try simple cleaning and checks if your unit is safe to access. For anything more complex, call a pro.
How can I tell if the problem is the thermostat or the HVAC system?
If the issue persists across multiple settings and the HVAC system cycles oddly, the thermostat is a likely culprit. If the system behaves inconsistently even with a different thermostat, the issue may be HVAC wiring or components.
If another thermostat behaves differently, the problem might be with the HVAC system itself.
When should I replace instead of repair a sticking thermostat?
If the unit is old, frequently failing, or replacement is cheaper than ongoing repairs, replacing with a modern efficient model is advised. A pro can help determine cost-effectiveness.
If repairs add up or the unit is aging, replacement is often the smarter choice.
Is a sticking thermostat dangerous?
Generally not dangerous, but it can cause uncomfortable temperatures or energy waste. In some cases, faulty wiring could pose a risk, so have it checked if you notice burning smells or overheating.
It’s usually not dangerous, but don’t ignore persistent issues—have it checked.
How often should I replace a thermostat?
Most homeowners replace thermostats every 10-15 years, depending on usage and model reliability. Upgrading to a newer smart or programmable model can improve comfort and efficiency.
Many homes upgrade every decade or so for better reliability and energy savings.
Watch Video
What to Remember
- Identify root causes before replacing parts
- Start with power-off safety and simple cleaning
- Tighten connections and reseat wiring if loose
- Call a pro if signs of damage appear or symptoms persist