Signs of a Stuck Thermostat: Quick Home Fix Guide
Learn to spot the signs of a stuck thermostat and fix common issues quickly. This Thermostat Care guide covers symptoms, safe checks, and proven steps to restore comfort in your home.

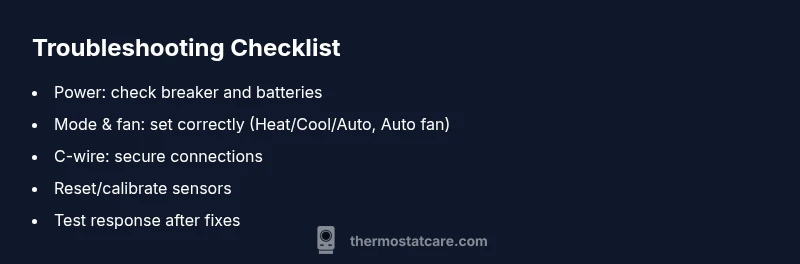
Most likely, your thermostat is stuck due to a faulty sensor or failing control board causing the HVAC to ignore temperature settings. Start by checking power and batteries, then verify mode and fan settings, and, if needed, reset the device or replace the thermostat. These steps are safe for many models, but if issues persist, call a pro.
Understanding the Signs of a Stuck Thermostat
The phrase "signs of a stuck thermostat" describes situations where your thermostat stops responding to setpoint changes, and the heating or cooling runs when it shouldn't. According to Thermostat Care, the most common indicators include a display that won't update, fan running continuously, temperature readings that drift from the room, or a schedule that ignores your taps. Recognizing these signals early can prevent energy waste and comfort loss. In many homes, a stuck thermostat is not a mysterious fault but a solvable issue with routine checks and a methodical approach. By staying organized and calm, you can isolate the problem without guessing, keeping the HVAC system safe and efficient.
Common Symptoms You Might Notice
- The system runs continuously or won’t turn on/off as commanded.
- Temperature shown on display disagrees with actual room temperature.
- The thermostat shows a blank screen or error codes that don’t disappear after a reset.
- Occupants feel uneven heating or cooling despite a set schedule.
- The fan stays on even when the system should be idle.
- Battery-powered units die suddenly or show low battery indicators.
These symptoms point toward common culprits like power issues, sensor faults, or wiring problems. Thermostat Care emphasizes checking for power loss at the panel, batteries, and the C-wire connections before concluding a device failure.
Why Thermostat Malfunctions Happen
Thermostat malfunctions usually stem from three broad areas: power, sensing, and control logic. A dead battery or a tripped circuit breaker can deprive the thermostat of power, causing erratic readings or a nonresponsive display. Faulty sensors inside the unit can misread room temperature, leading to over- or under-cooling. Loose or damaged wiring, especially around the C-wire, can confuse the control board and trigger sticking behavior. Finally, aging components or dust buildup can degrade performance over time. Understanding these roots helps you target the fix without replacing parts unnecessarily.
Quick Safety Checks You Can Do
- Turn off power at the breaker before inspecting the thermostat to avoid electrical shock.
- Check batteries (if your model uses them) and replace if needed.
- Confirm the thermostat’s mode (Heat, Cool, Auto) and fan setting (On/Auto) align with your comfort needs.
- Ensure programming is correct and not overridden by a temporary hold or schedule.
- Inspect the wiring terminals for loose or discolored wires; do not tighten if you’re unsure.
If the display remains blank or the temperature reading seems unrelated to reality after these checks, escalate to the Diagnostic Flow in this article.
Diagnostic Flow: Symptom to Diagnosis Overview
Understanding the symptom-to-diagnosis path helps you avoid jumping to conclusions. Start with the simplest checks, such as power, batteries, and mode, then inspect wiring for safety.
Step-by-Step: Fixes for the Most Common Cause
- Power cycle the thermostat by turning it off, waiting 30 seconds, and turning it back on.
- Replace batteries and ensure the thermostat is getting power from the HVAC system.
- Verify the C-wire is securely connected and the wiring is undamaged.
- Reset the thermostat to factory settings if supported, then re-enter your preferences.
- If readings still drift, recalibrate or replace sensors as needed.
- Test the system response by running cooling and heating tests across a few setpoints.
Prevention Tips to Avoid Future Sticks
- Schedule regular checks on batteries and wiring; clean the unit to prevent dust buildup.
- Keep the thermostat away from direct sunlight or heat sources that can skew readings.
- Use consistent setpoints and avoid frequent hold changes.
- If your unit is aging beyond its expected life, plan for a replacement rather than repeated repairs.
Steps
Estimated time: 40-60 minutes
- 1
Power cycle the thermostat
Turn off the thermostat, switch off the circuit breaker for 60 seconds, then restore power. This simple reset can clear minor control glitches and refresh readings.
Tip: Label the breaker or take a photo for future reference - 2
Check batteries and power supply
If your model uses batteries, replace with fresh ones. Confirm the wall power supply is delivering voltage by checking the display after a reset.
Tip: Use high-quality batteries and avoid mixed brands - 3
Verify mode, fan, and hold settings
Ensure the thermostat is in the correct mode (Heat/Cool/Auto) and that the fan is set to Auto. Remove any temporary holds that could override programming.
Tip: Disable vacation mode while testing - 4
Inspect wiring and the C-wire
Carefully inspect all visible wiring for loose connections or discoloration. Ensure the C-wire is securely attached to both the thermostat and the furnace/air handler.
Tip: Only handle wires with power off and use insulated tools - 5
Reset or calibrate sensors
If your thermostat offers sensor calibration, perform it according to the manual. If readings remain erratic, sensor replacement may be required.
Tip: Document readings before and after calibration - 6
Test system response
Return power and test several setpoints to confirm the system responds correctly. If the problem recurs, proceed to professional help and consider replacement.
Tip: Keep a log of test results
Diagnosis: Thermostat misreads or fails to respond to setpoints
Possible Causes
- highPower issue (dead battery, tripped breaker, or power loss)
- mediumSensor or temperature sensor fault
- lowWiring issue or loose terminals
Fixes
- easyCheck the circuit breaker and replace batteries if applicable
- easyReset or recalibrate the thermostat and verify sensor operation
- mediumInspect wiring terminals and tighten/repair damaged wires as needed
Questions & Answers
What are the most common signs of a stuck thermostat?
The most common signs are a nonresponsive display, temperature readings that don’t match the room, the HVAC running when it shouldn’t, and a thermostat that ignores the setpoint. Battery or power issues can also cause these symptoms.
Common signs include a nonresponsive display and HVAC running when not needed. Check power and batteries first.
Can I fix a stuck thermostat myself?
Yes, for many models you can perform basic safety checks, replace batteries if used, reset the unit, and verify wiring. If the problem persists, seek professional help.
You can often try simple safety checks, but if it keeps happening, call a pro.
When should I call a professional?
If power issues persist after resets, if wiring looks damaged, or if the thermostat still reads incorrectly after basic fixes, contact an HVAC technician for a diagnosis.
If in doubt, a professional can safely diagnose wiring and sensor problems.
Is a smart thermostat more prone to sticking?
Smart thermostats can be susceptible to sensor glitches or software bugs. A firmware update or reset often resolves the issue.
Sometimes smart thermostats glitch; a reset or update often fixes it.
Will a stuck thermostat cause higher energy bills?
Yes, if the thermostat causes the HVAC to run unnecessarily, energy use can rise. Fixing the thermostat helps restore efficiency.
Yes, unnecessary runs can raise bills until you fix it.
How can I prevent thermostat sticking in the future?
Regular maintenance, clean contacts, proper placement away from heat sources, and periodic calibration help prevent sticking.
Regular maintenance and proper placement prevent future issues.
Watch Video
What to Remember
- Start with power and mode checks first
- Sensor or control-board faults are common culprits
- Don’t ignore signs—early fixes save energy and comfort
- Only proceed with professional help when safety is a concern
- Keep a maintenance log to prevent future issues