Thermostat Problems: Urgent Troubleshooting Guide
Urgent, practical troubleshooting for thermostat problems. Learn a step-by-step diagnostic flow, safety tips, and maintenance habits to keep your climate control reliable in 2026.

Common thermostat problems usually stem from power, sensors, or wiring. Quick fixes: replace non-rechargeable batteries, confirm the thermostat is getting 24V from the HVAC control, and reset the device. Check that the thermostat wires are tight at both ends and that the furnace breaker is on. If the screen stays blank or readings are erratic, contact a professional.
Why thermostat problems happen
Many homeowners underestimate how a small device controls your comfort. In practice, most thermostat problems start with power supply or sensor issues, then spread to wiring or software settings. According to Thermostat Care, the leading causes are dead or weak batteries (for battery-powered models), tripped breakers or loose 24V supply, improper wiring connections, and restrictive airflow from HVAC components. Extreme temperatures, dust, and age can accelerate wear on the control board. Even a brief power interruption can reset memory or skew sensor readings, leading to inconsistent temperatures. In warm climates, sticky relays or aging capacitors inside the furnace can influence how the thermostat communicates. Regular maintenance reduces the odds of a surprise failure, and a quick battery swap can restore many units to normal operation. The goal of this guide is to help you identify the most common culprits quickly, so you can act with confidence and avoid a full system shutdown. Keep a small toolbox handy: a screwdriver, a multimeter, fresh batteries, and a flashlight help you inspect terminals and wires safely.
Safety first: what to check before you touch electrical components
Electric components can be dangerous if mishandled. Before you do anything, cut power to the thermostat from the main panel or at least switch off the corresponding circuit. Do not bypass safety features or force wires. With many units, loose screws at the thermostat base or old terminals can cause intermittent contact. Inspect the faceplate to ensure no exposed wiring is visible. If you see frayed insulation or scorching, stop and call a licensed technician. For battery-powered models, remove batteries with the unit unplugged from the wall to avoid short-circuiting. Always use a non-conductive tool when probing terminals. After basic checks, reassemble the cover snugly and restore power to test basic function. If unsure at any step, seek professional help.
Common symptoms and what they mean
Common symptoms include a blank or dim display, readings that don't match room temperature, the HVAC cycling on and off rapidly, or the system not responding to commands. A blank screen often points to power or battery issues, while inaccurate readings can signal sensor drift or calibration problems. Short cycling can indicate wiring or control board faults, or poor placement. If the thermostat feels warm to touch, there may be a hidden short. Based on Thermostat Care Analysis, 2026, most problems are solvable with a systematic check of power, wiring, and software settings rather than a full system replacement. Start with the simplest explanations: confirm the thermostat is powered, switch modes, and observe whether the HVAC responds to temperature changes. If the issue persists, move to the diagnostic flow section.
Diagnostic flow: symptom → diagnosis → solution
Use this simple flow to avoid wandering in circles. 1) Note the symptom in clear terms (display status, response time, or unexpected temperatures). 2) Check the power supply, battery status, and circuit breakers. 3) Verify the 24V signal between thermostat and HVAC equipment and inspect for loose wiring. 4) Check sensor calibration and placement, ensuring the device is not in direct sunlight or near heat sources. 5) If you identify a fault you can fix, apply the appropriate solution. 6) If the problem remains unresolved after these steps, escalate to professional assistance. This method keeps you focused and reduces the risk of misdiagnosis.
Step-by-step fixes for the most common issue: power and wiring problems
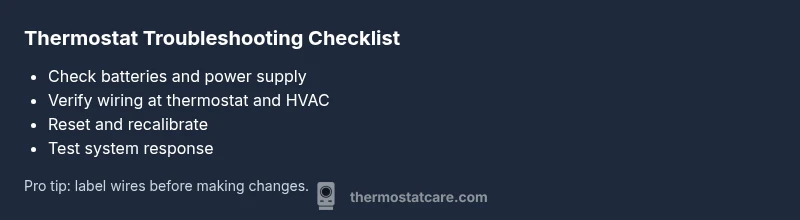
- Power off and safety check — shut off the thermostat and HVAC power at the breaker, then confirm with a voltage tester. 2) Check and secure 24V supply — locate the transformer and 24V wires, tighten terminal screws, and look for corrosion. 3) Battery replacement (if applicable) — install fresh batteries of the correct type and reinsert the cover. 4) Inspect thermostat wiring — unplug the unit, inspect for loose or frayed wires, and reseat all terminals. 5) Reset and recalibrate — perform a factory reset or reboot and reprogram schedules. 6) Test run — set a temperature and observe thermostat behavior and HVAC response. Tip: label wires before disconnecting and take photos for reference.
When to replace vs repair and how to choose a thermostat
If your unit is more than a decade old, shows repeating faults, or the display is dim and unresponsive despite fixes, replacement is often more cost-effective. Look for compatibility with your HVAC system, support for smart features, and energy-saving modes. When choosing a new thermostat, consider wire compatibility (C-wire), compatibility with your HVAC brand, and whether you need smart features like voice control or integration with a home assistant. Budget for installation if needed, as professional setup can add to upfront costs but reduces troubleshooting time later. Thermostat Care suggests prioritizing reliability and future-proofing over a quick, cheap upgrade. A well-chosen thermostat can improve comfort, energy efficiency, and home value over time.
Prevention and maintenance tips to avoid future thermostat problems
Create a simple seasonal checklist: replace batteries twice a year if your model uses them, clean the faceplate and air vents, and inspect wiring connections every six months. Keep the thermostat away from direct sun, heat vents, and drafts, and ensure it is mounted at a comfortable height for accurate readings. Schedule a professional inspection every year or two to verify sensors, wiring integrity, and compatibility with your HVAC system. Document changes to settings or schedules so you can revert easily if something goes wrong. Finally, store spare batteries, wire labels, and a basic tool kit in a dedicated drawer for quick access. These habits reduce downtime and extend the life of your thermostat.
Steps
Estimated time: 60-90 minutes
- 1
Power off and safety check
Shut off power to the thermostat and HVAC at the main breaker, then verify no voltage is present with a tester. This prevents shocks and shorts during inspection.
Tip: Always start with safety; mis-wired work can damage equipment. - 2
Verify 24V supply
Check the 24V signal between the thermostat and the furnace control board. Look for a stable voltage; any flicker or loss means a power issue or loose connection.
Tip: Note readings for comparison after fixes. - 3
Secure and inspect wiring
Open the thermostat base and inspect wire ends for fraying or corrosion. Re-seat all terminals firmly and re-close the cover.
Tip: Label wires or take photos before disconnecting. - 4
Test batteries (if applicable)
Replace old batteries with fresh, high-quality ones of the correct type. Reinsert and power the unit to test response.
Tip: Use the exact battery type recommended by the manufacturer. - 5
Reset and recalibrate
Perform a factory reset or reboot (follow the manual). Re-enter schedules and confirm temperature readings align with actual room temperature.
Tip: Keep a backup of settings if possible. - 6
Test run and observe
Set a target temperature and monitor whether the HVAC responds appropriately within a few minutes.
Tip: If misbehavior continues, document the symptoms for a pro.
Diagnosis: Thermostat display issues or non-response
Possible Causes
- highPower issue or dead battery
- highLoose or corroded wiring connections
- mediumFaulty sensor or calibration drift
- lowSoftware or calibration error
Fixes
- easyReplace batteries and test power at the thermostat
- easyTighten or re-seat thermostat and HVAC wiring terminals
- easyReset the thermostat to factory settings and recalibrate
- mediumTest the 24V control signal with a multimeter and correct any miswiring
- hardIf symptoms persist, replace the sensor or consult a pro
Questions & Answers
What are the most common thermostat problems?
The most common issues are power or battery failures, loose wiring, sensor drift, and incorrect settings. These typically show up as a blank display, inaccurate readings, or unresponsive HVAC calls.
Most thermostat problems are power or wiring issues, sensor drift, or wrong settings.
Can a faulty thermostat affect energy usage?
Yes. A miscalibrated or unresponsive thermostat can cause the system to run longer than needed, increasing energy use and costs.
Yes, a faulty thermostat can make your system work harder and use more energy.
Is it safe to open a thermostat to inspect wiring?
Only if you have power cut and understand basic electrical work. Otherwise, contact a professional to avoid shocks or damaging equipment.
Power off first; if unsure, hire a pro for safety.
When should I replace a thermostat instead of repairing it?
If the unit is old, faulty repeatedly, or the display is failing, replacement is usually more cost-effective and reliable.
If it keeps failing after fixes, replacement is often best.
Why is my thermostat not cooling or heating?
Check power, battery, mode settings, and breakers. Many times the issue is a simple mode selection or a loose connection.
First check power, mode, and connections before assuming a bigger issue.
What does a blinking thermostat mean?
A blinking display usually signals power or communication issues. Refer to the manual for codes and next steps.
Blinking often means power or communication error; consult the manual or a pro.
What to Remember
- Power and wiring come first in diagnosis.
- Batteries can power-off a thermostat; replace them.
- Follow a diagnostic flow to stay organized.
- Call a pro when in doubt to avoid safety risks.