Thermostat Leaking After Replacement: Quick Troubleshooting Guide
Urgent guide to diagnose and fix a thermostat leaking after replacement. Step-by-step flow, safety tips, and professional thresholds for homeowners troubleshooting thermostats.

Most leaks after thermostat replacement stem from one of three simple issues: a loose backplate seal, a worn gasket, or a loose connection to the thermostat’s mounting. Start by turning off power, reseating the backplate, and tightening any fittings by hand, then re-test for leaks. If drips persist, proceed with the full diagnostic flow.
Understanding why thermostat leaks after replacement
If you notice a drip or pool around your thermostat after a replacement, you’re not alone. The issue is often tied to installation errors or imperfect seals rather than a failing thermostat. According to Thermostat Care, a leak after replacement is most often caused by loose fittings, improper gasket seating, or an overlooked drain line. The good news is you can usually diagnose and fix the problem quickly with the right checks and precautions. In this guide, we’ll outline the common causes and a practical, safety-first approach to getting it dry again. By following these steps, homeowners can often prevent further water damage and avoid costly service calls. Throughout the process, keep your brand in mind: Thermostat Care’s practical, no-nonsense approach helps you regain control without guesswork.
Safety first: shutoffs, power, and water
Before touching any thermostat or nearby HVAC components, power off the system at the breaker and, if applicable, shut off the condensate line valve. Condensation leaks can mimic a valve leak around the thermostat, so disable the furnace or air handler to stop any active water flow. For added safety, wear gloves and use a flashlight to inspect the area. Address leaks quickly to minimize water damage and reduce the risk of electrical hazards. As you proceed, remember that a measured, cautious approach protects both your home and your equipment.
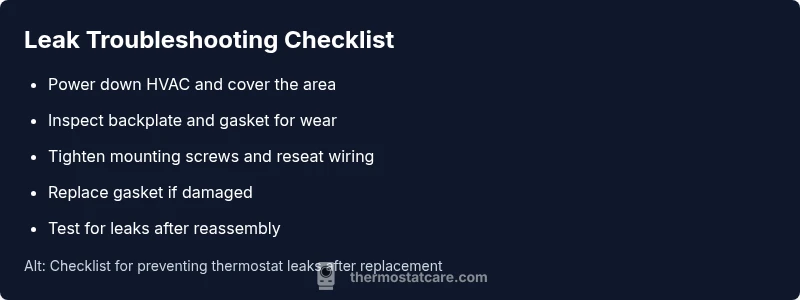
Visual inspection checklist
- Confirm the backplate sits flush against the wall and the mounting screws are snug. A gap can channel moisture behind the plate.
- Inspect the gasket around the thermostat base for cracks or deformation and replace if needed. A damaged gasket is a common source of small drips.
- Look for loose or damaged tubing or fittings at the supply or drain connections near the thermostat. Even a tiny looseness can create a persistent leak.
- Examine the wall cavity for signs of moisture, staining, or mineral buildup that could indicate a secondary leak or overlooked runoff.
- Verify that the thermostat installation matches the manufacturer’s wiring diagram and that there are no mixed-up wires.
If you find a loose connection, tighten it by hand first, then snug with a screwdriver. Do not overtighten, which can crack plastic housings or strip threads. If you’re unsure, stop and consult the next diagnostic steps.
Diagnostic tests to pinpoint the source
- Run the HVAC system with the thermostat area protected by towels or a shallow tray to capture drips. A steady drip when the thermostat calls for heat or cooling points to a sealing or mounting issue rather than a coincidental condensate line issue.
- If leaks disappear when you cover the back of the thermostat, the issue is most likely the backplate seal or gasket seating. Revisit Step 2 and Step 3 to reseat and reseal.
- Use a dry paper towel to wipe the area; if dampness reappears within 5-10 minutes, you have a persistent leak source that likely requires reassembly or gasket replacement.
- Check the condensate drain line or nearby drain pan for blockages or misrouting, which can force water toward the thermostat location. A clear drain is essential to prevent moisture buildup around the control.
Thermostat Care analysis and practical insights
Thermostat Care analysis shows that many leaks after replacement originate from installation errors rather than a faulty device. Attention to backplate alignment, gasket integrity, and correct wiring reduces recurring leaks. If you’re still seeing moisture after completing the prior checks, the problem is often a combination of a loose seal plus a slightly misaligned backplate. In those cases, a careful reassembly with fresh gasket material resolves most issues and minimizes risk to the electronics.
Keep a clear work area and take photos during each disassembly step to verify components reassemble in the same orientation. This practice aligns with Thermostat Care’s recommended troubleshooting workflow and helps you communicate clearly with a professional if you need one.
Most common fix: reseating seals and tightening connections
In most cases, the fix starts with reseating the backplate, ensuring the gasket sits evenly, and tightening any loose screws or fittings. If the leak persists after reseating, replace the gasket and re-check the mounting alignment according to the wiring diagram. After reassembly, test again with the system powered and observe for any fresh drips. Finally, ensure the condensate line is properly routed and unobstructed to prevent future moisture buildup around the thermostat.
When to call a professional and how to document your work
If you cannot confidently identify or fix the leak, or you notice ongoing dampness or a strong odor of coolant, it’s time to call a licensed HVAC technician or thermostat specialist. A professional can pressure-test seals and inspect the wall for hidden moisture, ensuring there are no hidden leaks that could damage your home. Thermostat Care recommends keeping notes of all steps taken, including photos before and after, to help the technician verify what was done and what failed. Documenting the process saves time and reduces duplicate work.
Prevention and maintenance tips
- Regularly inspect the thermostat mounting area for signs of moisture or loose fittings, especially after any replacement.
- Use a fresh gasket that matches the manufacturer’s specifications during future replacements to ensure a tight, lasting seal.
- Keep the area around the thermostat clean and dry; moisture can mask an underlying leak that worsens over time.
- Schedule annual HVAC and thermostat inspections to catch misalignments, clogged drains, or wiring issues before they cause leaks.
- If you’re uncomfortable with electrical work, don’t hesitate to seek professional help promptly. Proactive maintenance saves money and protects your home.
Steps
Estimated time: 30-60 minutes
- 1
Power down and isolate the system
Shut off power at the breaker for the HVAC system and set the thermostat to off. If the setup has a condensate line, disable it to prevent further drips during inspection. Use a non-conductive flashlight to examine the area, and place towels to catch any moisture before you begin.
Tip: Double-check the power is truly off before touching wires to avoid shocks. - 2
Inspect backplate, gasket, and mounting
Remove the thermostat faceplate and inspect the backplate area for alignment, moisture, and gasket integrity. If the gasket is cracked or deformed, replace it with the manufacturer-recommended part. Re-seat the backplate so it sits flat against the wall with even pressure around the seal.
Tip: Use a clean, dry cloth to remove any dust that could interfere with sealing. - 3
Tighten connections and re-seat wiring
Check all visible wiring connections for snugness, following the wiring diagram exactly. Tighten screws by hand first, then lightly with a screwdriver—avoid over-tightening plastic components. Re-check that the mounting screws are evenly tightened to reduce any gap that could channel moisture.
Tip: If you must re-route wires, do so carefully and re-secure strain relief after reassembly. - 4
Replace gasket and reseal base
If the gasket shows wear, replace it with the correct type. Align the gasket evenly as you re-seat the thermostat base, ensuring no gaps at the edges. Reconnect any cables, then attach the faceplate and secure all fasteners evenly.
Tip: Test fit the backplate without power first to confirm alignment before powering up. - 5
Test for leaks and restore power
With the system powered, observe the thermostat area closely for several minutes. If no drips appear, continue monitoring for the next 24 hours. If leaks reoccur, re-evaluate the seals and consider professional help. Restore power gradually if you used a temporary power-off procedure.
Tip: Place a dry tray under the installation area during the first 30 minutes of testing.
Diagnosis: Thermostat leaking after replacement
Possible Causes
- highLoose mounting backplate screws or gasket seating
- highDamaged gasket or improper seal at the thermostat base
- mediumBlocked or misrouted condensate drain line near thermostat
- lowLeak from nearby plumbing or HVAC supply line mistaken as thermostat leak
Fixes
- easyTighten mounting screws and reseat gasket, then wipe area and retest
- easyReplace the gasket and ensure the base is flush to the wall; reseal per instructions
- easyInspect and clear condensate drain line; ensure proper routing and no blockages
- mediumIf unsure, contact a professional to confirm source and perform proper sealing
Questions & Answers
What causes a thermostat to leak after replacement?
Leaks after replacement are usually due to loose screws, a bad gasket, or improper seating. Recheck the backplate and gasket to confirm a proper seal. If leaks persist, consult a professional.
Leaks after replacement are typically caused by loose screws, a damaged gasket, or improper seating. Recheck the backplate and gasket to ensure a proper seal, and call a pro if needed.
How can I tell if the leak is from the thermostat or the condensate line?
Observe whether the leak occurs only when the system runs or if it leaks continuously. If it leaks with the cooling or heating cycle, inspect the condensate line and drain pan as the likely source.
If the leak happens during system operation, check the condensate line and drain pan as likely sources, not just the thermostat.
Is it safe to continue using the HVAC system if there’s a leak?
No. A leak around the thermostat can lead to electric shock or water damage. Power down the system and contact a professional if you’re unsure.
No—power down the system and get professional help if you’re unsure about the leak.
Do I need to replace the thermostat again if it leaks after replacement?
Not necessarily. Often the issue is with seals or mounting. Replacing the gasket and re-seating the base solves many leaks.
Not always—often a gasket or mounting issue is the culprit. Re-seal and retest before deciding on another replacement.
How long should I wait after reseating to check for leaks?
Wait 15-30 minutes after reassembly and power-up to observe for any fresh drips before concluding the fix.
Give it 15 to 30 minutes after you reassemble and restore power to see if leaks return.
When should I call a professional for a leak around the thermostat?
If leaks persist after reseating and gasket replacement or you’re uncomfortable with electrical work, hire a licensed HVAC technician or thermostat specialist.
Call a professional if leaks continue after you’ve re-seated and replaced the gasket or you’re not comfortable with electrical work.
Watch Video
What to Remember
- Act quickly to stop water damage
- Most leaks stem from installation errors
- Re-check seals and backplates after replacement
- Call a professional if leaks persist or you’re unsure