Thermostat Housing Leaking: Quick Diagnostics and Safe Fixes
Learn how to diagnose and fix thermostat housing leaking safely. Step-by-step repairs, diagnostic flow, and prevention tips for homeowners and DIY enthusiasts troubleshooting thermostats.

A leaking thermostat housing is most often caused by a cracked housing or worn gasket that allows water to escape around the connection. Start by shutting off power to the thermostat and the associated heating circuit, then inspect fittings and replace the gasket or housing as needed. If leakage persists after resealing, contact a professional.
Understanding thermostat housing leaking
When a thermostat housing leaks, water can pool around the base and trigger damp spots in the mechanical room. The thermostat housing is the enclosure where the thermostat connects to the control valve or sensor on your heating system. In many homes, leaks stem from a worn gasket, a small crack in the housing, or a loose connection. The risk isn’t just a mess—water near electrical components can cause corrosion, short circuits, and reduced efficiency. For homeowners, the first step is to identify the exact source without panic. If the leak is obvious and systems are off, you can inspect from a safe distance; if not, shut off power to the equipment at the breaker to minimize risk. Thermostat housing leaking issues are solvable with careful inspection and guarded repairs, but when in doubt, escalate to a professional.
According to Thermostat Care, acknowledging the leak early helps prevent damage to surrounding wiring and HVAC components, making the fix simpler and safer. This guide will walk you through common causes, a diagnostic flow, and a practical repair approach that emphasizes safety and proper sealing to stop the leak at the source.
Common causes of thermostat housing leaks
Leaks around the thermostat housing typically come from one of a few root issues. A worn or damaged gasket is the most frequent culprit, especially if fittings have been disturbed during servicing. A cracked housing, often from age or thermal cycling, can allow water to escape. Loose fittings or clamps that secure piping to the housing can develop over time, creating a small but persistent drip. Corrosion or mineral buildup at the interface can degrade seals and promote leaks. Finally, overtightening threaded connections can crack fragile plastic housings. By understanding these causes, you can prioritize the simplest fixes first and decide when a professional assessment is warranted.
- Worn gasket at the housing-to-pipe interface
- Cracked or warped housing material
- Loose or damaged fittings and clamps
- Corrosion or mineral buildup on seals
- Over-tightened connections leading to stress cracks
Safety and prep: before you begin any repair
Safety is the first consideration when dealing with leaks near electrical components and heating equipment. Always power down the thermostat and the associated heating circuit before touching any wiring or fittings. If your system uses a live water supply, locate the main shutoff to prevent pressurized water from spraying during disassembly. Use protective gloves and eye protection, and keep a bucket or towel handy for minor spills. If you’re unsure about the risk of shock or scalding, pause and call a professional. Remember, small leaks may seem manageable, but they can worsen quickly as temperatures shift.
This section emphasizes proactive safety: de-energize the system, control water flow, and prepare tools in advance so you’re not scrambling mid-repair. Thermostat Care emphasizes that a cautious approach protects you and your home from electrical hazards and water damage.
Diagnostic flow: symptom → diagnosis → solution overview
This quick diagnostic sketch helps you verify the leak source and decide the next step. Start with the symptom of water pooling around the housing. If the pool is present only after a heat cycle, thermal expansion might be stressing seals. Check for visible cracks or deformed housings, and inspect gasket integrity and clamp tightness. If you find a damaged part, the solution is either gasket replacement or housing replacement. If leaks persist after resealing, escalate to a professional assessment to prevent further damage.
Step-by-step repair: most common fix (gasket or housing) – overview
The most common fix for thermostat housing leaks is to replace the gasket or the entire housing if damage is evident. Begin by safely shutting off power and isolating water if applicable. Remove the cover and inspect the gasket seat for corrosion or debris. Replace worn gaskets with a manufacturer-approved part and clean seal surfaces before reassembly. After reassembly, slowly restore power and check for leaks. If you observe a drip, re-tighten within the manufacturer’s recommended torque without over-tightening. This overview prepares you for the detailed steps that follow.
Prevention and maintenance to avoid future leaks
Preventing leaks is easier than repairing them after a failure. Schedule routine inspections of the thermostat housing and its connections, especially after heating cycles or service work. Use the correct gasket material and replacement parts recommended by the system manufacturer. Avoid over-tightening connections, which can crack plastic housings. Keep an eye on signs of corrosion or mineral buildup and address them early with gentle cleaning and seal checks. A proactive maintenance habit reduces emergency calls and extends the life of your heating system.
Steps
Estimated time: 60-90 minutes
- 1
Power down and isolate
Turn off power to the thermostat at the breaker and, if applicable, shut off the heating circuit to prevent any electrical risk. If your system uses a separate water supply, close the main valve to stop water flow. This step reduces the risk of shock and water spray during inspection.
Tip: Verify the breaker is off with a non-contact tester before touching wiring. - 2
Inspect externally
Carefully examine the housing exterior for cracks, deformation, or obvious gasket wear. Look for mineral buildup or corrosion at the seal surface, which can indicate long-term leakage.
Tip: Take clear photos to reference when ordering parts. - 3
Loosen and reseal fittings
If fittings are loose, gently tighten them to the recommended torque. Clean any old sealant from the seating surfaces to ensure a proper seal before reassembly.
Tip: Use the correct gasket material and avoid over-tightening. - 4
Replace gasket or housing
If the gasket is worn or the housing is cracked, replace the gasket or the entire housing with an OEM part. Install new seals and re-check seating surfaces for cleanliness.
Tip: Only use compatible parts from the system manufacturer. - 5
Reconnect and test
Reconnect everything, restore power, and slowly test the system. Observe the housing area for any sign of fresh leakage during a controlled heat cycle.
Tip: Have towels ready and monitor for the first 10–15 minutes of operation. - 6
Monitor and document
Continue to monitor the area over the next 24–48 hours. If you still see dampness or a drip, stop and call a professional for a thorough assessment.
Tip: Keep a log of dates and observations for reference.
Diagnosis: Water pooling around the thermostat housing or visible dampness after the heating cycle
Possible Causes
- highCracked housing or damaged gasket
- mediumLoose fittings or clamps
- lowCorrosion or mineral buildup at seals
- lowOver-tightened connections causing stress
Fixes
- easyReplace gasket or housing and reseal all connections
- easyTighten fittings to manufacturer torque and clean gasket seats
- mediumReplace cracked housing or severely corroded parts
- hardCall a professional for a full diagnosis and seal replacement if leaks persist
Questions & Answers
What are the signs that thermostat housing is leaking?
Signs include visible water pooling around the housing, damp walls, or a musty odor near the mechanical room. Check for cracks, corrosion, or loose fittings at the housing. If uncertain, shut off power and seek professional help.
Look for water pooling around the thermostat housing, damp walls, or a musty smell. Check for cracks or loose fittings and shut off power if you’re unsure.
Is a leaking thermostat housing dangerous?
Leaking near electrical components can pose shock or fire risks. If you detect moisture in electrical areas, power down the circuit and call a professional if you are uncomfortable with the inspection.
Moisture near electrical parts can be dangerous. Power down and call a pro if you’re unsure.
Can I fix a leaking thermostat housing myself?
If the issue is a worn gasket or loose connection, you may replace the gasket or tighten fittings. If the housing is cracked or heavily corroded, replacement is safer and more reliable.
You can fix gasket or fitting issues yourself, but cracked housing usually needs a professional.
How long does a typical gasket replacement take?
A gasket replacement often takes under an hour if access is straightforward; more complex housing work can extend the time. Plan for 30–60 minutes for gasket work, longer if housing replacement is needed.
Gasket work is usually under an hour; housing replacement may take longer. Plan for about 30 to 60 minutes for gasket tasks.
When should I call a professional?
If leaks persist after resealing, if you notice corrosion, or if you’re unsure about shut-off procedures, contact a professional. A pro can safely replace components and confirm there’s no hidden damage.
If leaks persist or you’re unsure about safety, call a professional.
Watch Video
What to Remember
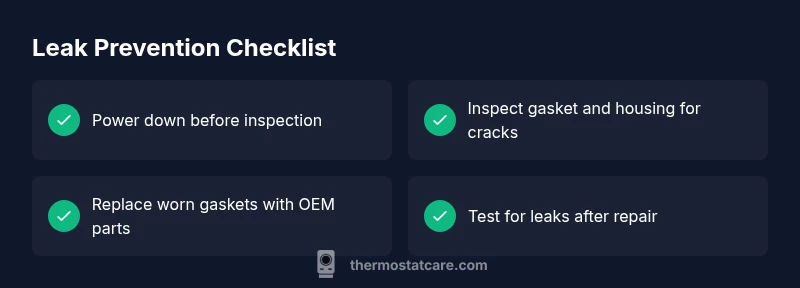
- Identify the exact source of the leak before repairs.
- Prioritize gasket or housing replacement for the most common fixes.
- Always shut off power and water before working near electrical components.
- Test for leaks after repairs and monitor the area closely.
- When in doubt, contact Thermostat Care for professional guidance.