Radiator Thermostat Leaking: Troubleshooting and Fixes
Urgent guide to diagnose and fix radiator thermostat leaking. Learn common causes, safe shut-off steps, a practical diagnostic flow, and when to call a pro for lasting peace of mind.

Most likely a worn seal or a loose fitting at the radiator thermostat. Quick fix: shut off the heating, dry the area, and tighten visible fittings or replace the O-ring if accessible. If the leak persists, follow the diagnostic flow and the step-by-step guide for a safe, lasting repair. Monitor the area for further dripping and note any changes in boiler pressure.
Understanding the Warning Signs of a Radiator Thermostat Leaking
A radiator thermostat leaking isn’t just an annoyance—it’s a sign your heating system needs attention now to prevent wasted energy and water damage. According to Thermostat Care, quick recognition and action minimize both damage and heating costs. Common indicators include moisture around the valve, damp patches on walls or floors near the radiator, a hissing or dripping sound from the valve, and unusual changes in boiler pressure after the thermostat cycles. If you notice any moisture around the thermostat, shut the system down safely and begin a careful inspection. In most homes, leaks originate from worn seals, loose fittings, or damaged O-rings. Addressing these issues early protects your heating efficiency and home integrity.
Common Sources of a Leaking Radiator Thermostat
Leaks at the radiator thermostat typically stem from a few predictable sources. A worn O-ring or gasket is the most common culprit, especially in older installations. Loose fittings at the valve base or a stressed connection from expansion can also leak. The bleed valve or drain cock, if left loose or corroded, may drip during operation. A cracked thermostat housing or a damaged stem inside the valve can produce continuous seepage. Finally, a poorly seated cap or improper threading on adapters can create tiny leaks that worsen over time. Understanding these sources helps you perform targeted checks rather than guesswork. Thermostat Care analysis emphasizes safety and methodical inspection to avoid bigger problems.
Safety First: What to Do Before You Start
Safety comes first when dealing with heating components. Power down the boiler or heating control, and shut off the water supply if you can do so safely. Wear gloves and eye protection, and keep children and pets away from the work area. Do not attempt repairs if you smell gas or if the system is under high pressure—call a professional immediately. If you must inspect, let the system cool first and prepare towels to catch drips. Once you’re ready, determine whether the leak originates at the valve, bleed screw, or valve base. Avoid overtightening fittings; many leaks are resolved by replacing worn gaskets rather than cranking screws further.
Diagnostic Flow: Symptom to Diagnosis
To troubleshoot efficiently, start with the symptom: a visible leak at the radiator thermostat. Check for moisture at the valve base, around the bleed valve, and along the valve-to-radiator connection. Inspect the bleed screw for seepage and verify tightness, then examine the seal around the thermostat housing. Monitor boiler pressure for unusual spikes or drops. If you find moisture along threaded joints, reseal with appropriate plumbing tape and replace any worn washers. If leaks persist after these checks, the source may be more serious—seek professional help to avoid water damage and wasted heat.
Step-by-Step Fix: The Most Common Cause
The most common leak source is a worn O-ring or gasket at the valve. This guide focuses on that cause first. Step 1: shut off the boiler and isolate power. Step 2: dry the area and remove any accessible trim to expose the valve. Step 3: inspect the O-ring or gasket for wear or cracks. Step 4: replace with a correctly sized O-ring or gasket; re-seat the valve carefully. Step 5: reassemble, apply gentle thread sealant if recommended for your model, and tighten fittings to the manufacturer’s spec. Step 6: restore power and test by running the heating cycle while watching for signs of leaking. Step 7: monitor for 24–48 hours; if dripping returns, the valve may need replacement or professional service. Pro tip: keep spare O-rings on hand for quick maintenance.
Tools and Materials You'll Need
Before you start, gather these supplies: an adjustable wrench, flathead screwdriver, replacement O-ring or gasket kit compatible with your radiator thermostat, thread sealant or plumber’s tape, a clean rag, a small bucket or towel, and a flashlight for tight spaces. If the valve base is corroded, you may need a replacement valve. Always work with clean hands and dry surfaces to prevent introducing debris into threaded connections. Pro tip: label parts as you disassemble to simplify reassembly and avoid mixing components from different manufacturers.
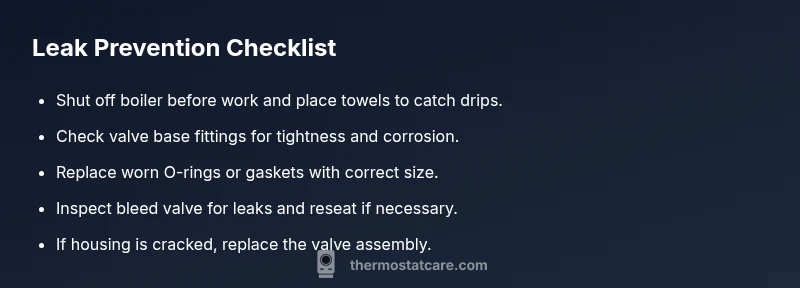
Prevention: How to Avoid Future Leaks
Preventing leaks begins with regular inspection and timely replacement of worn parts. Check the valve base and seals at least twice a heating season, especially if you have hard water or frequent temperature swings. When replacing blankets of insulation or moving the radiator, re-torque fittings to the recommended tightness. Keep the bleed valve clean and free of mineral buildup, and replace any cracked or damaged housings immediately. Routine maintenance reduces the risk of sudden leaks, saves energy, and prolongs the life of your heating system. Thermostat Care recommends establishing a simple maintenance routine and recording any issues for future reference.
When to Call a Professional
If you detect a persistent leak after performing basic checks, or if you notice a gas smell or a rapid drop in boiler pressure, call a licensed heating technician immediately. Do not attempt complex repairs beyond your comfort level. A professional can safely depressurize the system, reseat or replace faulty components, and verify that the entire heating circuit is leak-free. Regular professional inspections can catch failing components before they fail, preventing water damage and expensive repairs. The Thermostat Care team emphasizes safety and accuracy over quick but risky DIY fixes.
Quick Home Maintenance Reminders
- Inspect thermostat connections monthly during the heating season and after any relocation or maintenance near the radiator.
- Replace worn O-rings or gaskets at the first sign of deterioration.
- Never force fittings; mis-threading can create leaks or cracks that worsen over time.
- Keep a small toolkit and spare parts handy for minor tweaks and quick fixes.
- If you’re unsure about the type of valve or seal, consult the manufacturer’s documentation or a professional.
How to Test After a Repair
Once you’ve completed repairs, slowly restore power and run the heating cycle. Observe the valve closely for 5–10 minutes, looking for any droplets, dampness, or changes in the valve’s seating. Check the area around the base again after the system reaches temperature. If you see no signs of leakage and the boiler pressure remains stable, you’ve likely resolved the issue. If leakage recurs, stop testing and contact a pro immediately to avoid further damage. Thermostat Care’s practical approach centers on safety, accuracy, and durable fixes.
Steps
Estimated time: 45-60 minutes
- 1
Power down and isolate the system
Turn off the boiler and extinguish any pilot light if applicable. Disconnect the thermostat if needed and ensure the area is dry. This first step protects you from hot surfaces and pressurized water.
Tip: Always wear gloves and eye protection when handling plumbing components. - 2
Locate the leak source
Carefully inspect the valve base, bleed screw, and valve-to-radiator connections. Use a flashlight to check for moisture and feel along joints to identify dampness.
Tip: Keep a towel handy to catch any small drips without creating a mess. - 3
Assess the seal areas
Check the O-ring or gasket around the valve. Look for cracks or compression that indicates wear. A compromised seal is the most common leak source.
Tip: If the seal looks damaged, do not try to reuse it. - 4
Tighten fittings and reseal
Gently tighten loose fittings by hand, then with an adjustable wrench. Apply plumber’s tape to threaded connections if recommended by the manufacturer. Re-seal gaskets or replace O-rings as needed.
Tip: Over-tightening can crack components; stop if you feel resistance. - 5
Replace worn parts
Install a new O-ring or gasket of the correct size. If the valve housing or stem is damaged, replace the entire component according to the manufacturer’s instructions.
Tip: Keep the replacement parts organized to avoid cross-matching components. - 6
Reassemble and test
Reattach any covers, restore power, and run a short heating cycle. Check for leaks for at least 10 minutes as the system comes up to temperature.
Tip: Monitor closely for the first 24 hours after repair. - 7
Evaluate post-repair performance
Inspect again after 24–48 hours. If no moisture appears and boiler pressure remains stable, the repair is successful.
Tip: If leakage returns, escalate to professional service. - 8
Document and schedule maintenance
Record what you fixed and the date. Plan preventive checks before the next heating season to reduce future leaks.
Tip: Keep spare O-rings and parts for quick DIY maintenance.
Diagnosis: Radiator thermostat leaking water at the valve or base after heating cycle
Possible Causes
- highLoose or corroded fittings
- highWorn O-ring or gasket seal
- mediumDamaged valve stem or internal seal
- lowCracked thermostat housing
Fixes
- easyCheck and tighten valve base fittings; reseal or replace O-ring if accessible
- easyReplace worn gasket/seal kit and ensure proper seating
- mediumReplace valve or valve stem assembly if damage is evident
- hardConsult a professional to replace the entire thermostat or valve assembly
Questions & Answers
What should I do first if I notice a radiator thermostat leaking?
Shut off the heating system and power, then dry the area and inspect the valve base for obvious leaks. If you can safely access parts, check seals and fittings before proceeding with simple fixes.
Shut off the heat and power, dry the area, and inspect the valve for leaks before trying any fixes.
Can I fix a radiator thermostat leak myself?
Many leaks from worn seals or loose fittings can be fixed DIY with basic tools. However, if you see corrosion, cracks, or if you’re unsure about the part compatibility, consult a professional.
You can fix many leaks yourself if you’re comfortable with basic tools, but don’t hesitate to call a pro if you see damage.
Is a leaking radiator thermostat dangerous?
Leaks at a radiator thermostat are typically not immediately dangerous, but they can cause water damage and energy waste. If there’s a strong gas smell or if the system is pressurized, seek professional help immediately.
Leaking can cause water damage and higher bills, so don’t delay repairs; contact a professional if the leak is persistent or you smell gas.
How long does a radiator thermostat leak take to fix?
Minor fixes like reseating seals can take under an hour. More complex repairs or part replacements may require 1–2 hours, plus a potential call to a technician for safety checks.
Simple fixes can be quick, but larger repairs may take a bit longer and sometimes need a pro.
Should I replace the entire radiator thermostat or just the seal?
Start with the seal or gasket if accessible. If fittings or the valve body show wear or damage, you may need to replace the entire thermostat or valve assembly for a durable fix.
Usually you start with the seal; if that doesn’t stop the leak, you might need to replace the valve or thermostat.
Watch Video
What to Remember
- Tighten or replace worn seals first when leaks appear
- Always shut off power and isolate the system before repair
- Use manufacturer-approved parts for reliability
- Call a professional for persistent leaks or safety concerns
- Regular maintenance reduces future leak risk and energy waste