How to Fix a Thermostat That Is Stuck Open
Learn to diagnose and fix a thermostat that’s stuck open with a clear, step-by-step plan from Thermostat Care. Save energy, prevent damage, and restore comfort fast.

A thermostat that is stuck open is usually due to a faulty actuator or wiring fault keeping the control signal on. Start with quick checks: verify power, replace batteries if needed, and test in manual/hold mode. If the problem persists, follow the diagnostic flow below for safe, methodical repairs.
Understanding Why the Thermostat Is Stuck Open
When a thermostat is stuck open, the heating system may continue to run or fail to shut off when the setpoint is reached. This not only wastes energy but can shorten equipment life and raise utility bills. According to Thermostat Care, a stuck-open condition is most often caused by a failing actuator, sensor drift, or wiring faults that keep the control signal in an active state. If you notice persistent heating or cooling despite you setting a different target, you may be dealing with a thermostat that is stuck open. Begin with calm, safety-first steps: power down the thermostat to stop wasteful operation, then inspect for simple fixes you can do safely. This approach minimizes risk and buys time to decide whether a professional should be called.
Thermostats are designed to communicate precise commands to your HVAC system. When the device cannot accurately interpret room temperature or send a proper signal, the system can override your desired setting and stay engaged. Recognize early warning signs—unexpected energy usage, uneven heating, or the thermostat display behaving erratically. Addressing these signs quickly can prevent further wear and save you money in the long run.
When you’re facing a thermostat that is stuck open, you should act with purpose but stay within your comfort and safety zone. If you’re unsure at any point, pause and seek professional help. Remember that a dangerous condition can arise if you work near live electrical components or gas-powered equipment without proper precautions.
Steps
Estimated time: 20-45 minutes
- 1
Power Down and Safety Check
Turn off the thermostat at the unit, then switch off the dedicated HVAC circuit breaker. This minimizes shock risk and prevents further energy waste while you inspect wires and components.
Tip: Double-check the breaker label to ensure you’re cutting power to the right circuit. - 2
Remove Thermostat Faceplate
Gently remove the faceplate to access the terminals. Take a photo of the wiring before disconnecting anything so you can reassemble correctly.
Tip: Work on a clutter-free surface and keep screws organized. - 3
Inspect Wiring and Terminals
Look for loose, corroded, or damaged wires. Reseat any loose connections and tighten screws to a snug, not overtight, fit.
Tip: If a wire is damaged, do not strip more than necessary—plan for replacement. - 4
Check the Actuator/Damper
If your system uses a motorized damper, ensure it moves freely and isn’t stuck in the open position. A sticky actuator often causes a permanent open state.
Tip: Listen for the actuator motor when you change temperature settings. - 5
Test in Manual Mode
Set the thermostat to a known heat setting and test if it shuts off when the room reaches the setpoint. If not, the control signal is likely stuck.
Tip: If your thermostat has a ‘hold’ setting, disable hold to allow automatic cycling. - 6
Reassemble and Power Up
Reconnect the wall plate, restore power to the HVAC system, and observe the thermostat’s response across several cycles.
Tip: If the problem recurs, consider replacing the thermostat or calling a professional.
Diagnosis: House stays warmer or furnace runs continuously despite thermostat setpoint indicating off or lower heat.
Possible Causes
- highFaulty actuator or motor in the thermostat that cannot close the valve or open the damper
- highLoose, damaged, or shorted wiring between the thermostat and the HVAC控制 board
- mediumSensor drift or calibration error causing incorrect reading of room temperature
- lowHold mode or programming error causing constant heat demand
Fixes
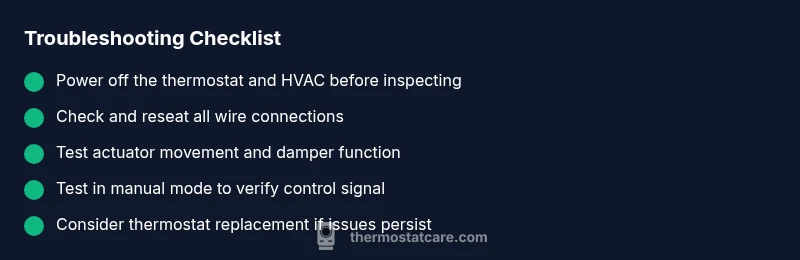
- easyTurn off power to the thermostat and HVAC equipment before inspecting wiring or opening the wall box to avoid electric shock.
- easyCheck the thermostat’s wiring connections at both the thermostat and the furnace/air handler; reseat and retighten any loose terminals.
- mediumTest the actuator by switching to manual heat and seeing if the system responds; if not, the actuator or damper may need replacement.
- easyReplace the thermostat if it’s older or malfunctioning beyond simple fixes.
Questions & Answers
What does it mean if my thermostat is stuck open?
A stuck-open thermostat continuously signals the HVAC system to heat or cool, even when the setpoint is not requiring operation. This can waste energy and may indicate a faulty actuator, wiring issue, or sensor drift.
A stuck-open thermostat keeps telling your system to run, which wastes energy and can wear things out. It’s usually caused by a faulty actuator, wiring problems, or sensor drift.
How can I tell if the actuator is at fault?
Observe whether the damper or valve moves when changing the thermostat setting. If you can’t hear or feel movement and the system stays on, the actuator may be the culprit.
Check for movement in the damper or valve when you change the setting; no movement often points to the actuator.
Can a stuck-open thermostat cause high energy bills?
Yes. When the system runs continuously, energy use rises, and wear increases. Resolving the issue quickly can prevent needless energy costs.
Absolutely. A stuck-open thermostat makes your HVAC run longer, boosting energy bills until it’s fixed.
Should I replace the thermostat?
If the thermostat is old, has a frequent error, or can’t be calibrated properly, replacement is often more cost-effective than repair.
If it’s an older unit or keeps acting up, replacement may be the better option.
Is professional help always necessary?
Not always. Many stuck-open issues can be resolved with basic safety checks and wiring reseats. However, a pro is advisable if you’re uncomfortable with electrical work or if the issue persists after basic fixes.
You can try basic fixes, but don’t hesitate to call a professional if it doesn’t improve.
What safety steps should I take first?
Always cut power at the breaker before touching the thermostat or HVAC wiring. Wear insulated gloves and use a non-contact voltage tester if available.
Power off at the breaker first, then check wiring and components safely.
Watch Video
What to Remember
- Identify the most common causes first: actuator or wiring faults.
- Follow a safe, methodical diagnostic flow before replacing components.
- Test in manual mode to verify control signals.
- Call a pro if you cannot safely diagnose or resolve the issue.