Should You Put Thermostat on Auto? A Practical Guide
Learn when Auto mode makes sense, how to configure it for comfort and energy savings, and avoid common pitfalls. Thermostat Care guides homeowners through a clear, step-by-step approach.

Putting your thermostat on Auto allows the system to switch between heating and cooling to maintain your target temperature automatically. It’s ideal for maintaining comfort while reducing energy waste, provided your system is well-maintained and your schedules align with real occupancy. This guide helps you choose when Auto works, and how to configure it effectively.
Why Auto matters for comfort and efficiency
If you’re asking should you put thermostat on auto, the short answer is that Auto mode is usually the best default for most homes. When your thermostat is in Auto, it uses your setpoint to decide whether to run heating or cooling, aiming to hold the temperature without you needing to intervene. This approach tends to smooth out temperature swings, reduce overheating or overcooling, and minimize unnecessary equipment cycling. According to Thermostat Care, Auto mode can improve comfort consistency while lowering energy waste—especially in climates with significant daily variation or during shoulder seasons when occupancy varies. The key to getting the most from Auto is pairing it with sensible setpoints and a predictable schedule, plus ensuring your home is reasonably well-sealed and insulated so the system isn’t fighting drafts or radiant heat gain. When these conditions are met, Auto becomes a reliable default that adapts to your routine, weather, and appliance performance, giving you comfortable rooms without constant manual tweaking.
How Auto interacts with heating and cooling modes
Auto mode treats the thermostat as a conductor, coordinating heating and cooling so the system acts only as needed. When the indoor temperature drifts from your target, Auto signals the furnace or air conditioner to start, and it signals the fan as required. This leads to smoother transitions and fewer short bursts of energy use. If you have a heat pump, Auto can optimize cycle length and compressor start times, especially during milder days when temperature swings are modest. For homes with traditional split systems, the function is similar, though you may notice longer pre-heating or pre-cooling periods if your insulation is weak. A common pitfall is leaving the fan on all day; most systems perform best with the fan set to Auto so the blower runs only during active heating or cooling, which reduces humidity fluctuations and energy waste. In general, Auto works best when the thermostat has an accurate sensor, the home is reasonably tight, and you use the mode consistently with your daily schedule.
Auto vs manual modes: when Auto is best
Auto is typically the best default for comfort and efficiency, but there are reasons to use manual modes in specific situations. If you want constant indoor air circulation, you may prefer the fan On setting, but this choice increases energy use and may dry out the air in dry climates. If you have humidity-sensitive spaces (basements, kitchens, or rooms with poor insulation), Auto combined with humidity management accessories often yields better comfort than manual adjustments. In rooms that are unusually sensitive to temperature, some users temporarily switch to manual to stabilize a single area while the rest of the house runs on Auto. The success of Auto also depends on proper sensor placement: a sensor placed near a sunlit window or a drafty doorway can give skewed readings and push the system to compensate more than necessary. In practice, most households achieve better results by leaving Auto on and tweaking only the setpoints and schedules rather than the mode itself.
Temperature setpoints and scheduling in Auto
Using Auto effectively means establishing reasonable setpoints and occupancy-based schedules. Rather than chasing the perfect temperature at every hour, focus on maintaining consistent comfort during your typical wake, work, and sleep periods. Outline a daytime setpoint that keeps the living areas comfortable when you’re home and awake, and a separate lower or higher setpoint for nighttime or when you’re away. Then translate those targets into a daily or weekly schedule within the thermostat app or on the device panel. The goal is to minimize large swings between day and night, which forces the system to perform more cycles. Don’t forget to consider the impact of sun exposure, appliances, and lighting on room temperatures; windows with strong afternoon sun can push a zone warmer, requiring a different setpoint or a temporary adjustment. Thermostat Care recommends testing a few degree differentials to find what balances comfort with energy savings in your climate.
Seasonal considerations: winter vs summer Auto behavior
Auto behavior varies with seasons, and understanding this can help you optimize comfort and energy use year-round. In winter, Auto tends to run the heating system longer to compensate for outdoor cold, so small daily adjustments to the daytime setpoint can significantly affect bills. In summer, Auto helps slow the load on cooling equipment by avoiding sudden temperature drops after hot afternoons. If you live in a climate with large diurnal swings, you may notice more pronounced cycling in transitional months; in those cases, refining the schedule or slightly adjusting setpoints during peak heat or cold can reduce energy use without sacrificing comfort. A well-sealed home and properly insulated ducts are critical to Auto performing well across seasons, since leaks and insulation gaps undermine the thermostat’s ability to hold temperature. Thermostat Care’s approach is to tailor Auto use to your climate, occupancy, and comfort preferences, not to enforce a one-size-fits-all rule.
Practical setup: configuring Auto on common systems
Getting Auto set up correctly starts with confirming your thermostat supports Auto mode and that the HVAC equipment is compatible. Begin by accessing the thermostat settings and selecting Auto as the running mode. If your system uses a heat pump, ensure the equipment profile is set to heat pump with auxiliary heat if needed. Create a simple, repeatable daily schedule that covers your core hours: mornings, evenings, and overnight. Keep setpoints consistent within each block to prevent needless cycling. If your thermostat supports adaptive scheduling or learning features, enable them after you’ve validated your basic schedule, but review recommendations periodically. Verify fan behavior—set it to Auto rather than On so the blower only runs when heating or cooling is active. For smart thermostats, connect to your Wi‑Fi network, enable remote access, and check that notifications about filter changes or maintenance reminders are active. As a final check, run the system through a full cycle to observe transitions and ensure no unusual delays or short-cycling occur. If you detect issues, revisit sensor placement and recalibrate if needed.
Common pitfalls and troubleshooting
Several common mistakes can undermine Auto performance. First, avoid frequent manual overrides; large, repeated changes disrupt Auto’s optimization and can increase energy use. Second, ensure the temperature sensor isn’t placed in a warm or cold spot (like near a window or a thermostat blowing across a vent). Third, keep the thermostat and its sensors clean and free of dust—calibration drift can cause inaccurate readings. Fourth, verify that the HVAC equipment is well maintained: dirty filters, dirty coils, or a failing blower motor can degrade performance and mask Auto’s benefits. Fifth, if you have a humidifier, dehumidifier, or ERV/HRV, check that Auto interacts appropriately with those devices; sometimes you’ll need to set separate schedules for humidity control. Finally, if your home has poor insulation or leaky ducts, Auto may work harder without delivering noticeable comfort gains. In such cases, address the building envelope and ductwork first, then fine-tune Auto settings.
Real-world scenarios and case studies
Consider a two-story home with different sun exposure: the upstairs bedrooms capture more sun in late afternoons, while the downstairs living area remains cooler. Auto helps balance these zones by adjusting cooling needs as occupancy shifts, but you may need to tweak downstairs setpoints for daytime comfort and allow the upstairs to drift a bit. In a family with irregular work hours, Auto combined with a flexible schedule reduces energy waste during long days away and ensures comfort when family members return. A smaller apartment with tight envelope benefits from Auto even more, because minor temperature differences can drive significant cycling if setpoints are aggressive. Thermostat Care’s experience suggests starting with modest setpoints and a predictable rhythm, then expand or compress those ranges as you learn how the home responds to Auto in real life.
Maintenance tips to keep Auto performing well
Regular maintenance helps Auto perform at its best. Start with a scheduled filter replacement and system check to ensure airflow remains unimpeded. Clean the thermostat’s sensing elements and check for firmware updates if you’re using a smart thermostat. Calibrate the indoor temperature sensor if readings seem inconsistent with the actual room temperature. Keep the thermostat clean and dry, avoiding heat sources or steam that could affect readings. If you use a remote sensor in a different room, verify it’s properly paired and reporting accurately. For multi-zone systems or heat pumps, ensure the zoning controller is functioning correctly and the auto-mode transitions are coordinated across zones. Finally, monitor your energy bills and comfort complaints; if you notice persistent discomfort or unusually high energy use, consider refining setpoint differentials or registering for a professional HVAC tune-up to support Auto behavior.
Thermostat Care's verdict: best practices and energy impact
Thermostat Care’s verdict is that Auto mode remains the most versatile and often the energy-efficient way to manage indoor climate for most homes. Use Auto as the default, but tailor setpoints, schedules, and humidity considerations to your climate and occupancy. The key is consistency: stable routines reduce cycling, and a well-sealed home enhances Auto’s effectiveness. If you’re unsure where to start, begin with a simple day/night schedule, test for one or two weeks, and adjust gradually. A modern thermostat with learning or adaptive features can accelerate optimization, but regular review ensures the system remains aligned with your comfort and energy goals. The Thermostat Care team recommends documenting your settings and periodically revisiting them as seasons change or if you add insulation, seal gaps, or change occupancy. With a thoughtful Auto strategy, you can enjoy steady comfort while minimizing energy use and equipment wear.
Tools & Materials
- Thermostat with Auto mode and scheduling(Ensure it supports Auto, scheduling, and wifi/app control if using a smart thermostat)
- Mobile device or computer(For app access and remote monitoring)
- HVAC system manual(To verify compatibility and wiring requirements)
- Internet connection(For smart thermostats and online scheduling)
- Spare batteries(If the thermostat uses batteries for power)
- Basic maintenance tools(Screwdriver and flashlight for sensor checks)
Steps
Estimated time: 15-25 minutes
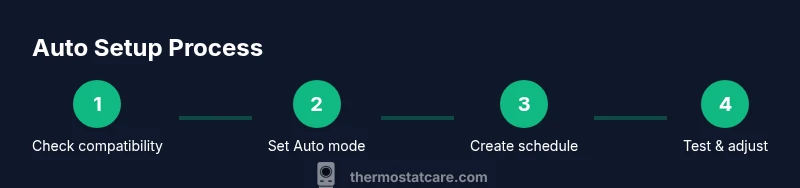
- 1
Check system compatibility
Review your HVAC’s compatibility with Auto mode in the thermostat manual. Confirm there are no conflicting modes or zones that would prevent Auto from coordinating heating and cooling.
Tip: If you’re unsure, contact a professional or reference the manufacturer’s support page. - 2
Switch the thermostat to Auto mode
Navigate to the thermostat Settings and select Auto as the active mode. If already in Auto, confirm that the schedule is active and not overridden by a temporary hold.
Tip: Make a quick test by adjusting the setpoint and watching how the system responds. - 3
Set baseline daytime and nighttime setpoints
Establish stable targets for when you’re home awake and when you’re asleep. Keep the changes modest to avoid large swings that create extra cycles.
Tip: Document your targets for future reference and seasonal adjustments. - 4
Create a simple daily schedule
Program consistent wake, work, and sleep blocks. Translate these into start/end times and corresponding setpoints.
Tip: Avoid last-minute last-minute changes; Auto works best with predictable patterns. - 5
Configure fan behavior and humidity controls
Set the fan to Auto (not On) and verify any humidity control devices align with Auto timing.
Tip: For smart setups, enable alerts for filter changes to maintain airflow. - 6
Test transitions and verify comfort
Run a full heating and cooling cycle to observe transitions. Check that rooms reach target temperatures without long delays.
Tip: If a zone lags, inspect insulation or ductwork first before chasing the thermostat. - 7
Save settings and monitor
Save your configuration and observe performance for one week. Note any discomfort or energy changes and adjust gradually.
Tip: Keep a quick log of changes to measure impact over time.
Questions & Answers
Should I always use Auto mode?
For most homes, Auto provides a balance of comfort and energy efficiency. There are times when manual control helps, such as when you need steady fan operation or specific humidity targets. If your home is well-sealed and your schedule is regular, Auto is usually the best default.
Auto is the best default for most homes, with manual control used only in special circumstances.
What if my thermostat doesn’t have Auto mode?
If Auto is unavailable, you can still optimize comfort with separate heating and cooling modes and a well-planned schedule. Update firmware or consider upgrading to a model that supports Auto for automatic optimization.
If you don’t have Auto, use scheduled heating and cooling with consistent setpoints.
Does Auto save energy?
Auto typically reduces energy use by minimizing unnecessary cycles and keeping the space within a tight comfort band. Savings depend on climate, insulation, and how well you set up schedules and setpoints.
Yes, Auto generally saves energy when paired with solid schedules and good insulation.
Will Auto affect humidity control?
Auto can influence humidity indirectly through cycling. In spaces with humidity control devices, ensure those devices are coordinated with Auto so dew point and moisture removal occur at appropriate times.
Auto may affect humidity; coordinate with any humidifiers or dehumidifiers.
How do I set a schedule in Auto?
Create a simple day/night schedule, align it with when you’re home, and adjust gradually based on comfort and energy use observations.
Start with a simple day/night plan and tweak over time.
Fan should be Auto or On with Auto?
Set the fan to Auto. Keeping it On wastes energy and can cause uneven humidity and comfort fluctuations.
Keep the fan on Auto for efficiency and comfort.
Watch Video
What to Remember
- Use Auto as the default setting for most homes.
- Pair Auto with sensible setpoints and a predictable schedule.
- Avoid frequent manual overrides to let Auto optimize.
- Regularly maintain HVAC components to support Auto.
- Test and adjust seasonally as conditions change.