Should Thermostat Fan Be On Auto or On? A Practical Guide
Learn when to set your thermostat fan to Auto or On, how each setting affects energy use and comfort, and a step-by-step guide to tune airflow in your home.

Auto is the default choice for most homes because it saves energy and maintains comfortable temperatures; On runs the fan continuously, improving air movement but using more energy. For specific rooms or faster cooling, switch to On temporarily. See our full guide for testing and tuning.
Understanding Auto vs On
When you set the thermostat fan to Auto, the fan runs only while the cooling or heating cycle is actively calling for heat or cool. The fan stops when the cycle ends, then remains off until the next demand. Selecting On forces the fan to run whenever the system is powered, providing continuous air movement even between cycles. This can improve perceived comfort in some rooms, but it uses more energy and can cause more wear on the fan motor over time. In practical terms, Auto prioritizes efficiency and thermostat control, while On prioritizes air circulation. The Thermostat Care team notes that most households benefit from Auto by default, adjusting to On only as needed for comfort or air quality.
When to Use Auto
Auto is usually the best default setting for most homes. It aligns with how modern HVAC systems are designed to dehumidify during cooling cycles, while the fan is off during idle periods to save energy. Use Auto if your focus is energy efficiency and steady temperatures. Auto also reduces noise at times when no cooling is required. However, if you have rooms that feel stuffy or have humidity issues when the system is off, Auto may not deliver the desired air movement. In these cases, you can still benefit from Auto most of the day and switch to On temporarily during peak heat hours or when hosting guests. Base your decision on actual comfort and energy bills rather than theory.
When to Use On
On can be advantageous in rooms with poor air distribution, in very hot climates where you want a faster response, or when you want the fan to run after cooling cycles to help all spaces feel evenly cooled. On may also help with air quality if you're using high-efficiency filters or have mold/ Allergy concerns, since continuous airflow can aid filtration. Keep in mind that On increases energy use and can expose the fan motor to more wear, so use it sparingly. For a typical home, On should be considered a temporary adjustment rather than a permanent setting.
How Fan Behavior Affects Comfort and Airflow
Even with the same setpoint, the fan setting changes how quickly air circulates. Auto turns the fan on during active cooling/heating, pushing conditioned air into living spaces, then off to save energy. On keeps a constant breeze that can reduce hot spots, especially in larger or multi-story homes. But constant airflow can create drafts and may feel too cool in some rooms. In addition, continuous airflow leads to slightly higher energy use and potential extra wear on the blower motor. The right balance often means Auto during the majority of the day, with On used in rooms that regularly feel stuffy or warm.
Energy Considerations: Auto vs On
From an energy perspective, Auto generally delivers better efficiency since the fan runs only when needed. On trades some efficiency for constant air movement, which can help with conditioning uniformity but at a price. The difference varies by climate, home size, insulation, and thermostat model. In energy-conscious households, pairing Auto with smart scheduling and zoning can maximize comfort while minimizing costs. The Thermostat Care analysis shows that understanding your home's airflow pattern and adjusting over time provides the best balance between comfort and energy use.
Scenarios by Home Type
Apartment or small home: Auto often suffices, since space heats and cools quickly. Larger homes or multi-story houses: On may help reduce temperature gradients between floors. If you have pets, allergies, or frequent guests, you may prefer On during peak activity periods for better air distribution. Always consider your insulation quality and window drafts, as these factors influence how quickly a space responds to changes in fan settings. Use Auto as the baseline, and experiment with On in targeted rooms to improve comfort without blowing up energy costs.
How to Verify Your Settings on Different Thermostats
Most modern thermostats label Auto and On clearly in the Fan or System menus. Start by selecting Auto, then monitor behavior over a day or two. If you notice stuffy rooms or uneven temperatures, try On for 24–48 hours in those zones and compare comfort levels. Remember that some older or cheaper models may use a slightly different naming convention or lack a dedicated On option. In such cases, use the thermostat’s 'Fan: On' function through the HVAC control or app to simulate continuous airflow. Always re-check after weather changes or seasonal shifts.
Authority Sources
Reliable guidance comes from established energy and HVAC resources. For further reading, consult Energy.gov’s thermostat guidance, the U.S. EIA for general energy context, and EPA’s indoor air quality recommendations. These sources help homeowners understand how fan settings interact with humidity, filtration, and overall system efficiency. Thermostat Care references these standards when recommending practical, home-tested steps for optimizing fan behavior.
Tools & Materials
- User manual for thermostat model(For exact menu names and steps)
- Thermostat or app access (phone/tablet)(Remote access can help; ensure you have login)
- Notebook or notes app(Record setting changes and experiences)
- Small flashlight(For older units with dim displays)
- Battery (if needed)(Replace thermostat batteries if it uses them)
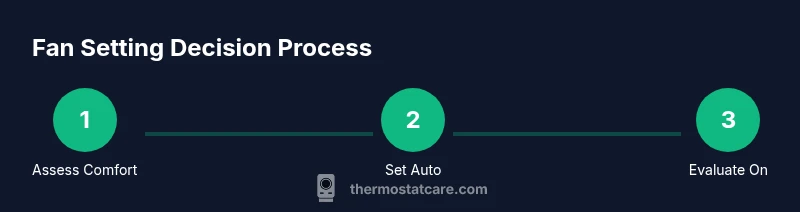
Steps
Estimated time: 15-60 minutes for setup; 24-48 hours for evaluation
- 1
Access thermostat settings
Open the thermostat interface or app, navigate to Fan settings under System or Equipment. If your model uses a physical dial, locate the Fan option on the interface. You’re aiming to set the Fan mode to Auto to begin testing.
Tip: If the screen is slow to respond, give it 10 seconds and press a hardware reset button if available. - 2
Set fan to Auto
Choose Auto and confirm the change. Auto ensures the fan runs only during active cooling or heating cycles, reducing unnecessary airflow when the space is comfortable.
Tip: Record the outdoor conditions and indoor setpoint so you can compare later. - 3
Run a test cycle
Trigger a cooling or heating cycle and observe whether the fan engages only during the cycle. Note any room temperature drift or drafts while the fan is idle between cycles.
Tip: Give the system at least 15 minutes to respond to the new setting. - 4
Temporarily switch to On
If you notice stuffy rooms or uneven cooling, switch the Fan setting to On for a 12–24 hour trial in the affected zones. This will push air continuously and help you judge comfort improvements.
Tip: Avoid leaving On all day in mild climates to prevent unnecessary energy use. - 5
Monitor and compare
Track comfort, perceived airflow, and energy use over 24–48 hours. Compare Auto vs On experiences in the same weather conditions to keep variables consistent.
Tip: Use a simple checklist to note which rooms felt better and when. - 6
Finalize your setting
Choose Auto as the baseline. If certain zones require On for comfort, set On there during those periods and revert when not needed. Ensure changes are saved in the app or thermostat.
Tip: Consider creating a simple schedule for On during peak heat and Auto otherwise. - 7
Re-evaluate with seasonal shifts
Climate, occupancy, and insulation change how fan settings behave. Re-run the Auto vs On test after major weather changes to maintain comfort and efficiency.
Tip: Set a reminder to re-check at the start of the heating or cooling seasons.
Questions & Answers
What is the difference between Auto and On on thermostat fan settings?
Auto runs the fan only during active cooling or heating cycles, while On keeps the fan running continuously when the system is powered. This affects comfort and energy use.
Auto runs with cooling or heating cycles; On runs the fan continuously for air movement. Energy use and comfort change accordingly.
Will using On increase my energy bill?
Yes. On generally uses more energy because the fan runs longer, though the exact impact depends on climate, home size, and usage patterns.
Yes, On typically uses more energy since the fan runs longer.
Should I use Auto in humid rooms?
Auto can help with dehumidification during cooling by reducing fan operation between cycles. If humidity remains high, On or an additional dehumidifier may help, along with better airflow.
Auto helps dehumidify during cooling, but persistent humidity may benefit from On or other dehumidification methods.
What if my thermostat doesn't offer an On option?
Some models only support Auto. If On isn’t available, check if your HVAC control allows an always-on fan via a separate setting or consider upgrading to a model that includes On.
If On isn’t available, look for an always-on fan option in another control or consider upgrading.
When should I test changing the fan setting?
Test changes during typical weather conditions and monitor comfort, costs, and air movement for 24–48 hours before finalizing.
Test for a day or two to see how it affects comfort and energy.
Watch Video
What to Remember
- Start with Auto for most homes.
- Use On selectively to improve comfort in problem rooms.
- Test changes for 24–48 hours before finalizing.
- Be mindful of wear and energy use on On.
- Leverage thermostat app or schedules to optimize airflow.