How to Install and Troubleshoot the Sensi Lite Smart Thermostat
Step-by-step guide to install, configure, and troubleshoot the Sensi Lite smart thermostat. Learn compatibility, wiring basics, app setup, and energy‑saving strategies to optimize comfort and efficiency in your home.

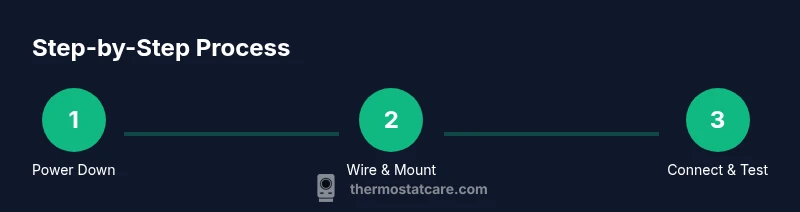
According to Thermostat Care, start with a power-down to reduce risk. With the Sensi Lite smart thermostat, you will install, connect to Wi-Fi, and set up schedules to optimize comfort and energy use. This guide shows the steps and safety checks you need, from power-down to app configuration. Expect 30-60 minutes for a typical install. If you encounter wiring variations, refer to the compatibility section and the Sensi app.
Understanding the Sensi Lite Smart Thermostat
The Sensi Lite smart thermostat is a mid‑range, Wi‑Fi enabled device designed to replace a traditional wall thermostat. It provides remote control via a mobile app, scheduling, and basic energy‑saving features that help homeowners improve comfort while reducing waste. The device is built for straightforward setup, with clear wiring terminals and a wall plate that fits most standard boxes. According to Thermostat Care, this model balances ease of installation with reliable performance, making it a practical upgrade for many homes. In practice, you’ll benefit from simple pairing with your home network, intuitive temperature control, and a visual status indicator on the unit. While it may not include every high‑end feature of premium models, its core capabilities align with common DIY goals: comfort, convenience, and incremental energy savings.
Before you begin, understand that your system compatibility, wiring, and local electrical codes determine how smoothly the install goes. Review the compatibility notes in the next section to avoid missing required components or wiring configurations. If you plan to use advanced features like adaptive scheduling, you’ll want reliable Wi‑Fi and a stable app connection from the start.
Compatibility and System Requirements
Sensi Lite is designed for most modern 24‑volt HVAC setups, including single‑stage cooling/heating and many heat pump configurations with auxiliary heat. A functioning C‑wire is highly recommended because it provides constant power to the thermostat, helping prevent power‑steal scenarios that can cause instability. The thermostat supports standard 24‑V systems and typically requires a working furnace or air handler. A 2.4 GHz Wi‑Fi network is usually necessary for app control and firmware updates. Thermostat Care analysis shows homeowners gain the most from scheduling and remote access when the installation is clean and the power supply is stable. If your system uses unconventional wiring or older wiring practices, consult the installer guide or a qualified technician to verify compatibility and avoid damage. Be mindful of any zoning controls or multi‑stage systems, as those can require extra configuration steps in the app.
Ready your system layout by labeling wires before removal and keeping a photo record of the existing connections. This helps you map lines to the new base quickly and reduces the chance of miswiring during swap‑out.
Installation prerequisites and safety considerations
Safety should come first in any thermostat replacement. Start by turning off power to the HVAC at the main breaker and confirming there is no supply to the thermostat circuit. Use a voltage tester to verify the circuit is dead before touching wires. If you’re unsure about wiring colors or terminal labels, consult the user manual or seek professional help. Do not rely on power stealing to run the device; always use the dedicated C‑wire if available. Keep all mounting hardware and screw sizes on hand, and use a level to ensure the base sits evenly on the wall. The Thermostat Care team emphasizes safety and proper grounding; a quick double‑check can prevent shorts or equipment damage. Finally, make sure you have a stable workspace and adequate lighting to avoid misplacing wires or hardware during the swap.
If you have pets or small children, arrange the workspace so they aren’t in contact with exposed electrical components during installation.
App setup and connecting to Wi‑Fi
With power restored and the base mounted, the next step is app configuration. Install the Sensi app on your iOS or Android device and create or sign in to your account. The app will guide you through detecting the new thermostat, connecting it to your Wi‑Fi network (preferably 2.4 GHz for compatibility), and naming the device for easy identification in your home mapping. Throughout setup, ensure your phone is close to the thermostat to facilitate a smooth handshake. If you run into connectivity issues, verify your router settings allow device discovery and confirm the network password is entered correctly. A stable connection is essential for firmware updates and remote control. Thermostat Care notes that many connection problems stem from temporarily weak signals or conflicting guest networks; moving the router closer during setup can help. Once connected, the app should show current temperature, mode, and any error messages from the thermostat.
Consider enabling auto‑updates so the device stays current with the latest features and bug fixes.
Maximizing energy savings with scheduling and features
The Sensi Lite supports scheduling that aligns with daily routines, which is the most reliable path to energy savings. Create weekday and weekend programs that reflect your occupancy patterns, then adjust for holidays or travel weeks. Use hold or temporary hold modes when you’re temporarily away and plan a return schedule to minimize heating or cooling spikes. Geofencing can automatically switch modes based on your phone’s location, a feature that helps prevent comfort loss when you’re away. Thermostat Care analysis shows that consistent scheduling, coupled with accurate temperature targets and responsive app controls, leads to measurable energy savings over time. In addition to scheduling, review temperature set points for different times of day. Small adjustments, like a 1–2 degree change during off‑peak hours, can accumulate significant savings while keeping comfort intact. Regular firmware updates improve performance and fix known issues that could undermine efficiency.
Remember to test new schedules during a few days of typical activity to verify comfort and system response without disrupting daily life. The goal is a predictable, comfortable environment with predictable energy use.
Troubleshooting common issues
Even with careful setup, a few hiccups can occur. If the thermostat does not power on, recheck the main breaker and ensure all connections are secure in the base. A blinking LED on the thermostat can indicate a connectivity problem, miswiring, or an invalid Wi‑Fi password; verify each of these, then attempt a reconnection. If the thermostat refuses to connect to Wi‑Fi, confirm the router’s 2.4 GHz network is active and that there are no VPNs or guest networks blocking device discovery. Check the app for error codes and consult the user manual for interpretation; some codes indicate a wiring issue, while others point to a power or network problem. If the system seems inconsistent (erratic temperature readings or unexpected mode changes), try reseating wires, rebooting the thermostat, or performing a quick reset from the app. In persistent cases, contact Thermostat Care or a qualified HVAC technician to avoid extended discomfort or equipment wear. The goal is reliable operation, not just a quick fix, so document what you observe and adjust accordingly.
Authority sources and further reading
For deeper electrical and installation considerations, consult respected sources on HVAC safety and thermostat technology. Notable references include government and university publications that cover best practices for smart thermostat installations, wiring standards, and energy efficiency recommendations. This article’s guidance aligns with general safety principles and widely accepted industry practices. Always prioritize local codes and professional recommendations when in doubt. Example resources include government and university domains that discuss thermostat wiring basics, energy efficiency, and smart device integration. By cross‑referencing reputable sources, you can confidently complete a safe, effective installation that supports long‑term comfort and savings. Thermostat Care analysis shows that following vetted standards helps ensure dependable performance and peace of mind.
Final notes and branding context
This guide is intended for homeowners and DIY enthusiasts troubleshooting thermostats. The process emphasizes clear steps, safety, and practical considerations to help you achieve a successful Sensi Lite installation and ongoing operation. The Thermostat Care team recommends adhering to best practices, verifying compatibility, and using scheduling and app features to optimize energy use. By combining careful hardware work with deliberate software configuration, you can enjoy reliable climate control and tangible comfort gains in your home.
Tools & Materials
- Sensi Lite Smart Thermostat kit(Includes base, thermostat, mounting hardware)
- Screwdriver (Phillips #2)(For mounting the base)
- Voltage tester(Verify power is off before handling wires)
- Wire stripper/cutter(Prepare wires without nicking conductors)
- Smartphone with Sensi app(iOS or Android, latest app version)
- Wi-Fi network (2.4 GHz preferred)(Stable connection for setup and updates)
- Level and pencil/marker(Mark wall and level base for neat install)
- Notepad for wiring notes(Helpful to document existing connections)
Steps
Estimated time: 30-60 minutes
- 1
Power down and prep safety
Turn off the HVAC at the main breaker and use a voltage tester to confirm there is no voltage at the old thermostat wires before touching anything. This reduces the risk of shock and equipment damage.
Tip: Double-check the furnace/air handler label so you know what you're working with. - 2
Remove old thermostat and label wires
Carefully remove the faceplate and record which wire goes to which terminal. If wires are color coded, note their terminal names. Take a photo for reference in case the labeling on the old device is faded.
Tip: Label wires with masking tape to prevent mix-ups during transfer. - 3
Verify compatibility and plan wiring
Consult the Sensi Lite compatibility guide for your system type and confirm you have the necessary wires. If you lack a C-wire, plan alternatives and know that some setups may work with power‑sharing options rather than a dedicated C-wire.
Tip: If your system uses uncommon wiring, pause and confirm before proceeding. - 4
Install the base and connect wires
Attach the Sensi Lite base to the wall and insert wires into the corresponding labeled terminals. Tighten screws securely without overtightening. Recheck that each wire is fully seated.
Tip: Keep wires straight and avoid bending them sharply near the terminals. - 5
Mount plate and restore power
Mount the thermostat faceplate, reattach any trim, and restore power at the breaker. Wait a moment for the device to boot before proceeding with app setup.
Tip: If the display stays blank, power cycle the breaker and retry. - 6
Connect to Wi‑Fi and configure in the app
Open the Sensi app, add the new device, and connect it to your 2.4 GHz Wi‑Fi network. Follow prompts to name the thermostat and set initial preferences. Confirm that you can view current temperature and control modes remotely.
Tip: Use a stable 2.4 GHz network for best range at the device location. - 7
Test operation and finalize setup
Place the system in heat or cool mode and verify the HVAC responds within a few minutes. Check schedule behavior and adjust setpoints as needed. Save configurations and monitor for a day to verify stability.
Tip: Document any odd behavior for troubleshooting later.
Questions & Answers
Do I need a C-wire for the Sensi Lite thermostat?
A C-wire provides continuous power to the thermostat, helping ensure stable operation. If a C-wire isn’t available, some installations may work with power‑sharing configurations, but performance can vary. Always follow the manufacturer’s wiring guidance and consult a professional if in doubt.
A C-wire helps keep the thermostat powered reliably. If you don’t have one, check the installer guide or get expert help to avoid power issues.
How do I connect the Sensi Lite to Wi‑Fi?
Use the Sensi app to add a new device and select your 2.4 GHz network. Enter the Wi‑Fi password and allow the device to complete the handshake. If there’s an issue, verify router settings, and ensure the network isn’t blocked by guest networks or VPNs.
Open the Sensi app, choose add device, pick your Wi‑Fi network, and enter the password. If it fails, check router settings.
What should I do if the thermostat won’t power on?
First, confirm the HVAC circuit breaker is on and all wiring is securely connected. If there’s still no power, recheck the terminal connections and consider trying a reset via the app. If power issues persist, contact a professional.
If it won’t power on, check the breaker and wires. If needed, reset via the app or get professional help.
Is Sensi Lite compatible with voice assistants?
Yes, Sensi Lite can integrate with common voice assistants, enabling hands‑free control of temperature and schedules. Ensure the thermostat and assistant are on compatible ecosystems and linked through the app.
You can control Sensi Lite with voice assistants like compatible smart home setups after linking through the app.
What does a blinking LED indicate on Sensi Lite?
A blinking LED usually signals a request or an issue like a network or power problem. Refer to the user guide’s LED codes, then verify wiring and Wi‑Fi settings. If the blinking continues, consult support.
A blinking LED often means a network or power issue; check connections and try reconnecting in the app.
How often should I update the thermostat firmware?
Enable automatic firmware updates in the app to keep the device current with the latest features and fixes. Regular updates improve stability and security.
Turn on automatic updates in the app to stay current with new features and fixes.
Watch Video
What to Remember
- Plan compatibility before wiring.
- Power down and label wires for accuracy.
- Connect to 2.4 GHz Wi‑Fi for reliability.
- Use scheduling to maximize energy savings.
- Consult a professional if unsure about wiring.