Install Sensi Smart Thermostat: A Complete How-To
Learn how to install the Sensi smart thermostat with a safe, DIY-friendly approach. This guide covers compatibility checks, wiring, Wi‑Fi setup, and initial configuration for reliable comfort and energy savings.

In this guide you will learn how to install a Sensi smart thermostat, including identifying wiring, verifying compatibility, and wiring the unit safely. Expect a step-by-step sequence with safety checks, required tools, and how to configure essential settings after install. This quick answer highlights the core actions and prerequisites, so you can quickly assess compatibility, power, and mounting considerations before you start.
Why installing a Sensi smart thermostat matters
According to Thermostat Care, installing a Sensi smart thermostat can simplify climate control, boost energy efficiency, and put comfort at your fingertips. The Thermostat Care team found that a properly installed device provides more accurate readings and responsive scheduling. If you’re a homeowner or DIY enthusiast, this guide will walk you through safe installation of the sensi smart thermostat, from compatibility checks to final configuration. You’ll learn what tools you need, what wires matter, and how to avoid common mistakes that can affect performance or warranty. By following proven steps and safety practices, you’ll reduce energy waste and improve overall comfort in your home.
Before you start: compatibility and planning
Not every HVAC setup is identical. The Sensi thermostat typically requires a standard 24-volt heat/cool system with a C-wire for power reliability, though many configurations can work with alternative power provisions. Before buying or mounting the device, verify your system type, confirm the presence of the C-wire, and gather the model numbers of your equipment. The Thermostat Care team recommends compiling photos of the existing wiring and labeling each wire, so you can map terminals accurately during installation.
Safety and prep considerations
Safety comes first when working with household wiring. Always turn off power at the HVAC and circuit-breaker panel before touching wires. Use a non-contact tester to confirm there is no live voltage. Keep the work area dry, unplug any nearby devices, and store old thermostat components safely until you’re ready to remove them. If you detect damaged wires or corrosion, pause and consider professional help to avoid equipment damage or personal injury.
Tools and materials you’ll need
Gather the essential tools before you begin so you can complete the install in one session. The list includes a Phillips head screwdriver (size #2), a small flat-head driver, a non-contact voltage tester, a wire stripper, electrician’s tape, a pen or tape for labeling, and a smartphone with the Sensi app installed for pairing. A step-stool or ladder and a level can help ensure a neat, secure mount. Optional items include a C-wire adapter if your system lacks a dedicated common wire.
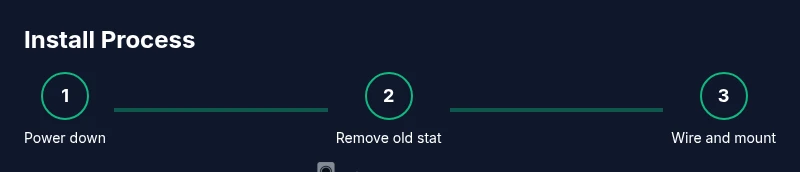
Step-by-step overview (high-level)
This section provides a high-level roadmap of the install process. You’ll remove the old thermostat, mount the new base, connect labeled wires to their matching terminals, and then power up to complete the app-driven setup. Post-install checks include confirming heating and cooling operate as expected, testing the fan, and confirming Wi‑Fi connectivity for remote access.
Understanding thermostat wiring and C-wire basics
Wiring terminology can be confusing at first. Most conventional HVAC systems use a thermostat wiring harness with terminals labeled R, C, W, Y, and G. The power-for-thermostat supply often comes from the C-wire (common) but some setups rely on a power-sharing method. If your current setup lacks a C-wire, you can explore adapters or alternative power options offered by manufacturers, but remember that not all options will be compatible with every system.
Installing the mounting plate and wiring the thermostat
Begin by removing the old stat and preparing the wall box. Attach the mounting plate level to the wall with screws, then thread wires through the plate openings. When wiring the new thermostat, connect each wire to the corresponding terminal according to the labeling on the control board or the app’s wiring diagram. Take a photo of the wiring in place before securing the thermostat to the wall, in case you need to revisit connections.
Connecting to Wi-Fi and configuring settings
With the faceplate installed, power on the device and follow the on-screen prompts to connect to your home Wi‑Fi network. Use a 2.4 GHz network when possible for broader compatibility, then sign in with or create a Sensi account. The app will guide you through selecting system type (heat, cool, or heat pump), preferred temperatures, and scheduling preferences. Verify the thermostat’s time zone and display language to ensure correct operation.
Testing the system and troubleshooting common issues
After wiring and app pairing, test each mode: heat, cool, and auto schedules. If the system doesn’t respond, double-check terminal mappings against the original wiring photos and look for loose connections. Common issues include a non-responsive display, Wi-Fi connection problems, or incorrect system type selected in the app. In many cases rechecking C-wire power or performing a reset resolves the problem.
Post-install tips and maintenance
Keep firmware up to date by applying updates in the app. Periodically review energy reports in the app to identify scheduling opportunities that save energy without sacrificing comfort. Clean the display and vent areas to prevent dust buildup, and test the system seasonally to catch issues early. If you move or remodel, update the thermostat wiring plan and re-mount as needed.
Authority sources and further reading
- https://www.energy.gov/eere/buildings/articles/thermostats-work-basics
- https://extension.psu.edu/how-to-use-a-thermostat
- https://www.energy.gov/eere/buildings/articles/thermostats-energy-savings
Note: Always consult manufacturer instructions for model-specific guidance.
Tools & Materials
- Sensi smart thermostat kit(Contains main thermostat unit and mounting hardware)
- Phillips head screwdriver (size #2)(For mounting and terminal screws)
- Flat-head screwdriver(For prying or terminal adjustment if needed)
- Non-contact voltage tester(Verify power is off before touching wires)
- Wire stripper(Prepare wires and trim ends cleanly)
- Electrical tape(Seal terminal connections and label wires)
- Level(Ensure mounting plate is level)
- Smartphone with Sensi app(Needed for pairing and configuration)
- Installation manual(Reference for compatibility and wiring)
- C-wire adapter (optional)(If no C-wire present, consider adapter)
Steps
Estimated time: 60-90 minutes
- 1
Power down and prep
Turn off power at the HVAC system and at the home’s circuit breaker. Remove the old thermostat and take a photo of the current wiring for reference. Clear the wall area and ensure you have steady access to the wiring and mounting location.
Tip: Verify power is off using a voltage tester before touching any wires. - 2
Verify compatibility
Check that your system is a standard 24V heat/cool configuration and determine if a C-wire is present. If there is no C-wire, plan for an adapter or a power-sharing option compatible with your model. Use the manufacturer’s compatibility list as a guide.
Tip: If in doubt, pause and consult a professional to avoid miswiring. - 3
Remove old thermostat and label wires
Carefully detach the old unit and label each wire with its terminal letter. Keeping consistent labels helps ensure accurate reattachment to the new thermostat.
Tip: Label wires with tape and a fine-tip pen for maximum clarity. - 4
Mount the base plate
Hold the mounting plate to the wall, mark screw holes, and secure with screws. Use a level to ensure the plate sits straight and aligns with the wall box.
Tip: Double-check the plate is level before tightening screws all the way. - 5
Attach wires to the new thermostat
Insert each labeled wire into the corresponding terminal on the new unit according to the wiring diagram. Ensure a snug, clean connection without crimping or bending wires excessively.
Tip: Take another photo of the connected wires for future reference. - 6
Activate power and start setup
Power the system back on and follow on-screen prompts on the thermostat or app to begin pairing. If prompted, select your system type and confirm the thermostat is detected.
Tip: Keep the app handy for quick follow-up steps and pairing codes. - 7
Connect to Wi-Fi and sign in
Join a 2.4 GHz Wi-Fi network and sign in to the Sensi app. The app will guide you through linking the device to your account and household.
Tip: Use a strong, stable network for reliable remote access. - 8
Configure system settings
In the app, set your system type (single-stage or multi-stage), define heat and cool preferences, and establish a basic schedule. Review time zone and display language.
Tip: If you have multiple zones or stages, document them for later tweaks. - 9
Test operation
Run a test cycle for heat, cool, and fan to confirm proper operation. Listen for unusual noises and verify temperature readings align with expectations.
Tip: Record any anomalies and revisit wiring or settings if needed. - 10
Finalize and maintain
Secure the faceplate, tidy wires, and ensure the unit sits flush. Review firmware updates in the app and schedule regular checks.
Tip: Keep a copy of wiring photos for future maintenance.
Questions & Answers
Is a Sensi thermostat compatible with my HVAC system?
Most standard 24V heating/cooling systems are compatible with Sensi, but check the official compatibility list for your exact model and wiring. If you have unusual equipment or multi-stage systems, verify requirements before purchasing.
Most standard 24V systems work, but check compatibility for your exact setup before buying.
Do I need a C-wire to install Sensi?
Many Sensi models require a C-wire for reliable power, but some installations can use alternatives or adapters. Always confirm your wiring and follow the manufacturer's guidance.
A C-wire is often needed, but there are adapter options if you lack one.
Can I install Sensi myself or should I hire a pro?
DIY installation is feasible for straightforward 24V systems with careful following of the wiring diagram. If you have limited experience or unusual wiring, consider professional help to avoid damage or warranty issues.
DIY is possible for simple setups; seek a pro for complex wiring.
What should I do if the thermostat shows an error code?
Refer to the user manual and the app’s troubleshooting section. Common codes point to wiring mismatches or power issues; recheck connections and ensure power is stable.
Check the manual for codes and recheck wiring if an error appears.
Will Sensi work with smart home assistants?
Yes, after setup in the Sensi app, you can link with supported voice assistants for voice control and routines.
Yes, you can connect Sensi to major smart assistants after setup.
What should I do after installation to ensure ongoing efficiency?
Review energy reports in the app, update firmware when available, and fine-tune your schedule to balance comfort and savings.
Check energy reports and keep firmware up to date.
Watch Video
What to Remember
- Verify compatibility before starting.
- Label and photograph existing connections.
- Follow safety steps to avoid electrical hazards.
- Test all functions after wiring and setup.