Replace thermostat on Whirlpool refrigerator: a practical guide
Learn how to replace the thermostat on Whirlpool refrigerators safely with a detailed, user-friendly guide. Includes compatibility checks, tools, wiring basics, testing, and cost considerations to help homeowners DIY with confidence.

This guide shows you how to replace thermostat on whirlpool refrigerator, covering safety checks, model compatibility, proper wiring, and testing after installation. You’ll learn the exact tools you need, how to prepare, and how to verify the fridge returns to the correct temperatures without risking damage or personal harm. Thermostat Care outlines a clear, safe workflow.
Why replacement might be necessary
According to Thermostat Care, erratic cooling, freezing in the fresh food compartment, or a fridge that won’t stay cold are common symptoms that point to thermostat issues. Before you blame the compressor or defrost system, consider the thermostat as a likely culprit. Replacing a faulty thermostat can restore stable temperatures and energy efficiency. This guide focuses on Whirlpool refrigerator models and emphasizes safety, model compatibility, and a methodical approach to avoid electrical hazards. Using the Thermostat Care framework helps homeowners troubleshoot with confidence and minimize unnecessary parts swaps.
Compatibility and choosing the right thermostat
Whirlpool refrigerators span many model lines, and thermostat designs vary between eras. The first step is to confirm the exact thermostat model or the compatible replacement by checking the model number plate inside the fridge (often on the ceiling of the fresh food section or behind the lower crisper drawer). If you cannot locate the number, use Whirlpool service documentation or Thermostat Care’s recommended cross-reference guides. Improper fit or wrong wattage can lead to thermal misreads, overheating, or actuator failure, so verify compatibility before purchasing a new unit. Consider whether you need a direct OEM replacement or a compatible aftermarket part that matches the electrical characteristics.
Tools, safety, and parts checklist
Safety is non-negotiable when working with electrical appliances. Ensure the fridge is unplugged from the wall and, if feasible, switch off the circuit breaker to eliminate any chance of shock. Gather the essential tools and replacement thermostat before you begin. A typical checklist includes a compatible thermostat, insulated gloves, a multimeter, nut drivers, small Phillips screwdriver, electrical tape, wire labels, and a flashlight for visibility. Optional but helpful items include a service manual, a camera to document wire positions, and a magnetic tray for screws. Thermostat Care advises keeping a clean, well-lit workspace and following the model-specific service instructions.
Common pitfalls and safe replacement approach
A common mistake is mixing up wires or failing to label connectors, which complicates reassembly. Another pitfall is using a thermostat with the wrong temperature range or sensor type, causing undercooling or overcooling. Always label each wire prior to disconnection and consult the wiring diagram for your Whirlpool model. If you’re unsure about any connection, pause and double-check the diagram or seek professional support. A cautious, step-by-step approach reduces the risk of damaging electrical components or voiding your warranty.
Wiring basics and how to wire a Whirlpool thermostat
Whirlpool thermostat wiring typically involves a limited number of conductors, plus ground and possibly a sensor lead. The key is to match the existing terminal arrangement on the new thermostat to the fridge’s wiring harness. Most replacements require secure, clean wire connections, no exposed copper, and proper insulation. When in doubt, refer to the wiring schematic that accompanies the thermostat or consult Thermostat Care’s guidance for model-specific color codes and terminal labels. A careful approach minimizes false readings and improves reliability.
Testing, calibration, and initial run
After reconnecting power, observe the fridge’s behavior for several hours to ensure the new thermostat reads temperatures accurately and responds to setpoint changes. Check both compartments, verify that fans engage appropriately, and confirm that proper defrost cycles are occurring if applicable. Use a thermometer to compare actual temperatures against the thermostat’s setpoints. If temperatures drift beyond acceptable ranges, recheck connections and consider recalibration. Document any discrepancies.
Cost considerations and sourcing parts
Prices for thermostats vary by model and supplier, so plan for a modest price range based on OEM versus aftermarket options. In some cases, you may encounter higher costs for unit-specific parts or expedited shipping. Factor in potential diagnostic fees if you hire professional assistance. Thermostat Care recommends comparing multiple sources, reading return policies, and validating warranty terms on the replacement part to avoid unexpected expenses.
Maintenance tips after replacement
After installation, perform a routine check over the next few weeks: monitor temperatures, listen for unusual compressor cycles, and inspect for frost buildup. Clean the interior coils and ensure proper airflow around the vents to support consistent cooling. Regular maintenance can help extend the life of the thermostat and overall fridge performance.
Step-by-step overview (planning and safety)
Before diving into the hands-on work, review the task plan, confirm model compatibility, and organize your workspace. Create a quick reference diagram of door shelves and wiring positions to guide your wiring tasks. Gather the replacement thermostat, tools, and labels, then power down and verify the circuit is isolated. This upfront planning keeps the process smooth and reduces the risk of mistakes.
Warranty, service options, and when to call a professional
If your Whirlpool refrigerator is under warranty, or if you’re uncomfortable with any electrical work, contact a certified technician. Some models require specialized tools or factory-approved procedures that are beyond typical DIY scope. Always check warranty implications before attempting replacement. Thermostat Care advises weighing safety against time, cost, and risk to determine whether to DIY or hire pro help.
Tools & Materials
- Compatible thermostat for Whirlpool refrigerator(Match model number or cross-reference per Whirlpool spec sheet and Thermostat Care guidance.)
- Multimeter(Set to a suitable voltage/ohms range to test sensor and circuit continuity.)
- Insulated gloves(Protect hands when handling live components or cold-spotted parts.)
- Screwdriver set (Phillips and flathead)(Remove access panels and terminals safely.)
- Nut drivers/wrench(Relaxed torque on securing nuts and fasteners.)
- Wire labels or masking tape(Label wires for accurate reassembly.)
- Electrical tape(Seal connections and insulate exposed conductors.)
- Camera or notepad(Document wire positions and terminal layout for reference.)
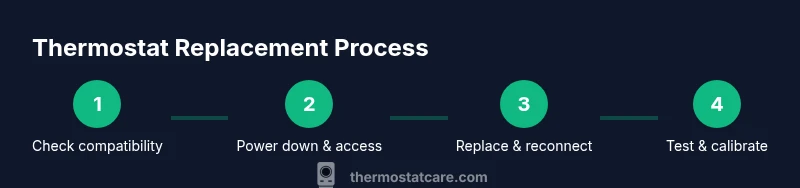
Steps
Estimated time: 30-60 minutes
- 1
Power down and access the thermostat
Unplug the fridge and, if possible, switch off the dedicated circuit at the breaker. Remove any interior panels necessary to reach the thermostat housing, keeping screws organized so you can reassemble later.
Tip: Take a quick photo of the installed wiring before disconnecting anything. - 2
Verify compatibility and locate wiring diagram
Cross-check the thermostat model with the replacement part and locate the fridge’s wiring diagram. Confirm terminal labels align and note any color-code conventions for your model.
Tip: If you’re unsure about the model code, pause and consult the Whirlpool manual or Thermostat Care resources before proceeding. - 3
Label wires and disconnect the old thermostat
Carefully label each wire with tape markers, then disconnect the thermostat wires from the terminals. Keep track of ground or sensor leads as required by your model.
Tip: Label in the order of terminal positions to ensure correct reattachment. - 4
Install the new thermostat and secure connections
Connect the new thermostat to the labeled wires according to the wiring diagram or thermostat instructions. Ensure all connections are tight, no frayed wires, and that insulation is intact.
Tip: Double-check that metallic surfaces aren’t touching any live terminals. - 5
Reassemble access panels and restore power
Place the thermostat housing back, reattach any panels, and restore power at the outlet or breaker. Ensure the area is dry and free of tools.
Tip: Take care not to pinch wires during panel reinstallation. - 6
Test and calibrate the thermostat
Set a target temperature and monitor the fridge’s performance for several hours. Verify correct readings with a thermometer and adjust calibration if necessary.
Tip: Allow the fridge to reach steady-state temperatures before judging performance.
Questions & Answers
Can I replace the thermostat on my Whirlpool refrigerator myself?
Yes, for many models, but it requires basic electrical safety and model compatibility checks. If you’re unsure or your unit is under warranty, consider professional service. Always unplug the appliance and follow the manufacturer’s instructions.
Yes, many Whirlpool models can be DIY if you follow safety steps and confirm compatibility.
How do I know if the thermostat is faulty?
Common signs include erratic temperatures, fridge that won’t cool, or ice forming in the fridge. If these occur after ruling out other components, the thermostat is a likely culprit. Use a multimeter to check sensor continuity per the service manual.
Look for erratic cooling and validate with a continuity test if you’re comfortable.
Are Whirlpool thermostat parts interchangeable with other brands?
Compatibility varies by model. Some third-party thermostats may fit, but incorrect specs can damage the control system. Always verify electrical ratings and use a compatible replacement.
Compatibility depends on model; verify specs before mixing parts.
What’s the typical cost to replace a Whirlpool fridge thermostat?
Costs vary by model and part type. Expect price ranges for OEM vs aftermarket options and factor in tools and potential labor if not doing it yourself.
Costs depend on model and part type; compare OEM and aftermarket options.
Do I need to recalibrate the thermostat after replacement?
Yes, after installation, calibrate to ensure accurate temperature readings. Allow the fridge to stabilize and use a thermometer to confirm setpoints align with actual temps.
Calibrate after install and verify with a thermometer.
What if the new thermostat doesn’t fix the issue?
Recheck wiring and model compatibility, test sensors, and assess other components like the compressor or defrost system. If problems persist, consult a pro.
Check wiring and other components if issues persist and consider professional help.
Watch Video
What to Remember
- Verify model compatibility before buying a replacement
- Label wires and follow diagrams exactly during replacement
- Test temperatures and calibrate after installation
- Keep safety first: unplug, dry workspace, and use proper tools
- Consider warranty and cost when deciding DIY vs professional help