Replacing Thermostat on Dryer: A DIY Guide
Learn how to safely replace the thermostat on your dryer, select the right part, and test for proper heat. This practical, expert guide from Thermostat Care covers compatibility, tools, step-by-step replacement, and post-install testing to prevent overheating and fires.

You will learn how to safely replace the thermostat on a dryer to restore temperature control and prevent overheating. Start by unplugging the appliance, confirming compatibility, and gathering the correct thermostat. This guide provides a step-by-step replacement, troubleshooting tips, and post-install checks. Thermostat Care notes that using the correct part and thorough testing reduces risk of fire or damage.
Why replacing thermostat on dryer matters
A dryer’s thermostat is a small but vital safety device. It regulates heat to keep the drum temperature within safe ranges, preventing scorching, damaged fabrics, and, most importantly, a potential fire risk. When a thermostat fails, the dryer can run too hot or too cool, leading to lint buildup and wasted energy. Replacing a faulty thermostat with a compatible unit is a common, effective DIY task that homeowners can perform with basic tools and careful safety steps. According to Thermostat Care, overheating is a leading cause of dryer fires, and addressing thermostat failures promptly can reduce that risk. This guide explains how to identify a faulty thermostat, choose a correct replacement, and complete the swap with proper testing.
First, understand the two common thermostat components in many dryers: the cycling thermostat, which opens and closes to maintain steady temperatures during operation, and the high-limit thermostat (often a thermal cut-off) that trips if the dryer overheats. Some models use a single device, while others employ both. Always consult your model’s manual or parts diagram to confirm which thermostat your unit uses and the exact part number. Using the wrong part is a frequent cause of post-install problems and may void warranties. Keep in mind that the thermostat is connected to the heating circuit; handling it safely minimizes the risk of shock or burns. With the right part and careful testing, replacing the thermostat can restore proper heating and improve cycle accuracy.
Identify the right replacement thermostat
Before purchasing, confirm the exact part you need. Most dryers use a cycling thermostat rated for a specific temperature range and a separate high-limit thermostat that opens at a higher threshold. You can find part numbers in the model’s parts list or on the old thermostat itself. When shopping, choose an authentic replacement from the manufacturer or a reputable aftermarket part with the same rating and connector configuration. Avoid generic parts with mismatched terminals or ratings, as they can derail safety and performance. If you are unsure, contact the manufacturer or a trusted repair retailer. Thermostat Care Analysis, 2026, emphasizes verifying model compatibility and resistance values (where listed) to ensure accurate operation. In some cases, a failed thermal fuse is mistaken for a thermostat failure; verify by performing a simple continuity check after isolating the circuit, but only if you are qualified to do so.
Note: If your dryer is under warranty, check whether the thermostat replacement affects coverage. After obtaining the correct thermostat, inspect the wiring harness for signs of wear, scorching, or loose connectors; replacing damaged wires at this stage saves time and reduces the risk of recurring problems.
Tools, parts, and safety prerequisites
Safety always comes first when replacing a dryer thermostat. Begin by unplugging the dryer from the wall outlet and, if your home uses a gas dryer, ensure the gas supply is safely turned off according to the manufacturer’s instructions. Gather the essential tools and the correct replacement thermostat. A clean, dry work area with good lighting helps you keep track of small screws and connectors. Use insulated tools to reduce the risk of short circuits, and wear heat-resistant gloves when handling warmed components after testing. Keep the old thermostat and wiring diagrams handy in case you need to compare connections. A multimeter is helpful to verify continuity and resistance values, but you should only perform electrical tests if you are confident in your skills. Thermostat replacement is a common DIY task, but never rush—precision matters for safe dryer operation.
Understanding thermostat types and where they sit
In most clothes dryers, you’ll encounter two primary thermostat types: the cycling thermostat and the high-limit thermostat. The cycling thermostat keeps the dryer’s heat in a narrow range by opening and closing the heating circuit as the drum temperature rises and falls. The high-limit thermostat (thermal cutoff) acts as a safety backup; if the dryer overheats, it permanently disconnects the heating element to prevent fire. Some models use a single device, others use both. Locating them requires removing access panels and referencing the model’s wiring diagram. When replacing, ensure you get parts with the same temperature rating and compatible terminals. If you’re unsure, consult the parts list or contact a professional. A correct replacement restores consistent heat and safe cycling, reducing the chance of lint combustion.
Locating the thermostat in your dryer
Thermostats are typically found near the blower housing, at the back or side of the drum, or on the heater housing. You may need to remove a rear panel, lower access panel, or the lint trap housing to reach the components. Before you touch anything, unplug the unit and discharge any residual voltage by waiting a few minutes after power removal. Take photos of the wiring before disconnecting any wires, and label each connector. This makes reassembly much easier and minimizes the risk of miswiring. Once you’ve located the thermostat, compare its appearance and connectors to the replacement part to confirm a match. If the parts look different, don’t force a fit—re-check the model number and order the correct unit.
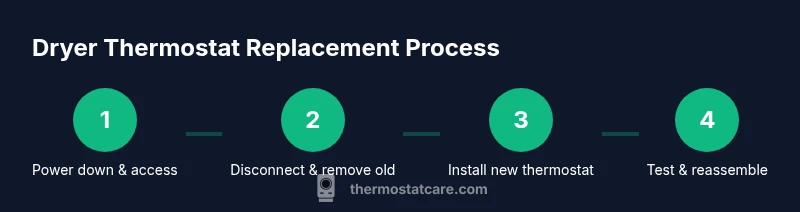
Step-by-step replacement process
A successful replacement follows a clear sequence that minimizes risk and ensures proper reassembly. Start by powering down and accessing the thermostat area. Then carefully disconnect the wires, remove the old thermostat, and mount the new unit in the same orientation. Reconnect the wires exactly as they were, secure the thermostat firmly, and reassemble the dryer panels. Finally, restore power and run a short test cycle to verify correct heat and cycling. Keep your notes and photos as a reference in case you need to troubleshoot later. The following steps are a concise, actionable workflow you can follow if you’re comfortable with basic household electrical work. If any step feels uncertain, stop and consult a professional.
- Step-by-step replacement is provided separately in the STEP-BY-STEP block below for precise actions and time estimates.
Step-by-step replacement process, continued
After installing the new thermostat, check all connections for secure contact and no exposed wires. Use a multimeter to verify continuity if applicable, and ensure there are no short circuits. Reassemble the dryer housing, plug in the unit, and select a short drying cycle to test heat output. If the dryer does not reach the expected temperature within spec, recheck the wiring and part orientation. Document any irregular readings and consult the replacement part’s documentation for alternative testing methods. Remember that safety is paramount; never bypass safety devices or disable lint filters for the sake of testing.
Post-install testing and troubleshooting after replacement
Testing is where most DIY replacements shine or fail. Start with a dry, empty cycle to verify that the dryer reaches the correct temperature and maintains it through the cycle. If you observe overheating, inspect the venting path for lint buildup or obstructions, which can mimic thermostat issues. If the dryer runs cool or never heats, recheck the thermostat wiring and verify that the cycling thermostat is closing at the intended temperature. If a fault persists, consult the model’s service manual or a professional technician. Thermostat replacement can dramatically improve safety and performance when done correctly.
Maintenance tips to extend thermostat life
Preventative care extends thermostat life and reduces the likelihood of future failures. Regularly inspect the lint screen and vent for obstructions, and clean the interior surfaces around the heater housing to prevent lint accumulation. Avoid over-tightening screws, which can crack plastic housings, and replace damaged wires immediately. Document thermostat part numbers and service dates to keep maintenance on track. A simple annual check that includes a quick visual inspection and a basic continuity test (if qualified) can catch problems before they become safety hazards.
By following these practices, you’ll improve the reliability and lifespan of your dryer's thermostat and overall heating system.
Safety reminders and warnings
Working with household appliances involves electrical and heating components. Always unplug the dryer before starting any work, and consider turning off circuit breakers if you’re uncomfortable handling live circuits. Wear protective gloves and eye protection, and keep a dry workspace free of water or damp surfaces. Be mindful of sharp edges, exposed wiring, and hot surfaces if the unit was recently in use. If you smell burning insulation, see smoke, or notice melted connectors, stop immediately and seek professional help. Finally, if your model requires disassembly beyond basic access, or if you’re replacing a dual-component thermostat system, professional service is recommended to avoid risk of property damage or injury.
Tools & Materials
- Replacement dryer thermostat (cycling or high-limit, matching model)(Ensure the temperature rating and terminals match the original part.)
- Screwdriver set (Philips and flat-head)(Keep screws organized; some models use Torx or hex fasteners.)
- Nut driver or pliers(Use insulated tools for added safety around heating components.)
- Wire strippers/crimpers(Optional if you need to repair damaged connectors.)
- Multimeter(Useful for checking continuity and resistance if you are confident in electrical testing.)
- Heat-resistant gloves(Protect hands when handling components that may be warm after testing.)
- Small labeled containers or magnetic tray(Helpful for keeping screws and small parts organized.)
Steps
Estimated time: 30-60 minutes
- 1
Power down and access thermostat
Unplug the dryer from the wall outlet. If available, switch off the circuit breaker to ensure there is no residual power. Remove the back or front panel to expose the heater housing and thermostat. Clear lint and debris to maintain visibility.
Tip: Take a photo of the wiring before disconnecting anything to simplify reassembly. - 2
Disconnect wires and remove old thermostat
Carefully note which wire goes to which terminal, then label or tag connectors. Gently disconnect the wires using pliers if needed, avoiding wire damage. Unscrew or unclip the thermostat from its mount and remove it from the housing.
Tip: If wires are brittle, replace any cracked insulation before reattaching. - 3
Install new thermostat and reconnect
Mount the new thermostat in the same orientation, align terminals, and reconnect the wires exactly as labeled. Ensure all connections are snug but not overtightened to avoid damaged terminals.
Tip: Double-check that you’re using the correct thermostat type for your model. - 4
Reassemble dryer and restore power
Replace any panels and screws removed earlier. Plug the dryer back in or restore power at the circuit breaker. Do not run a full cycle yet; start with a quick test to confirm heating.
Tip: Keep a fire extinguisher nearby during initial testing as a precaution. - 5
Test heat output and cycling
Run a short cycle with the door closed and monitor the temperature response. If possible, measure outlet vent temperature and compare to the thermostat’s rated range. If temperatures are off, recheck wiring and part orientation.
Tip: If the dryer still overheats, inspect venting for blockages and revisit the thermostat compatibility.
Questions & Answers
Do I need to unplug the dryer before starting the replacement?
Yes. Always unplug the dryer from the wall outlet and consider turning off the circuit breaker to ensure there is no power to the appliance during replacement.
Yes. Unplug the dryer and turn off the circuit breaker to ensure there’s no power while you work.
How do I know which thermostat to buy for my dryer model?
Check your model number in the owner’s manual or on the appliance label, then look up the exact thermostat type and temperature rating. Use OEM parts or trusted equivalents with the same terminals and rating.
Check the model number, then get the thermostat with the same rating and terminals from a reputable supplier.
Can I test the thermostat with a multimeter?
A multimeter can confirm continuity or resistance values for some thermostats. Only perform electrical tests if you’re confident in how to interpret the readings and safety implications.
A multimeter can help, but only if you know how to read the results safely.
What if the dryer still overheats after replacement?
Recheck the installation for correct part orientation and wiring, then inspect venting for blockages. If temperatures remain high, the issue may lie with another component or airflow path.
If overheating persists, recheck the wiring and venting paths and consider professional help.
Is replacing a dryer thermostat dangerous?
Any electrical work carries risk. Follow safety steps, unplug the unit, wear protective gear, and avoid working on live circuits. If unsure, hire a professional.
There are risks, but with careful safety steps it can be done. If unsure, call a pro.
How long do dryer thermostats typically last?
Thermostat lifespan varies by model and usage. Regular maintenance helps extend life, but if you notice frequent cycling or temperature instability, replacement is wise.
Lifespan varies; regular maintenance helps. Consider replacing if you see instability.
Watch Video
What to Remember
- Identify the correct thermostat type and rating before purchase.
- Safely disconnect power and document wiring for reassembly.
- Test heat output after replacement and inspect venting for blockages.
- Use proper safety gear to prevent shocks and burns.
- Thermostat replacement can improve dryer safety and performance when done correctly.