How to Test a Dryer Thermostat
Learn how to safely test a dryer's thermostat, diagnose overheating or non-heating issues, and decide if replacement is needed. A step-by-step, homeowner-friendly guide from Thermostat Care.

In this guide you will learn how to test a dryer's thermostat to confirm it activates correctly and prevents overheating. You will need a multimeter, a screwdriver, and basic safety gear. Follow these steps to verify continuity, measure resistance, and compare to the dryer spec. This process helps you decide if replacement is needed.
Understanding how a dryer's thermostat works
According to Thermostat Care, the thermostat in most electric clothes dryers acts as a temperature sensor and safety cutoff, opening the circuit when the drum temperature climbs too high. It helps protect the dryer from overheating and guides when the heating element should energize. Most dryers use a pair of thermostats: a cycling thermostat that regulates heat during normal operation and a high-limit thermostat that acts as a safety shutoff if temperatures spike. When these components fail, you may see symptoms like overheating, lack of heat, or abnormal cycling. By understanding the role of the thermostat, you can diagnose properly rather than guessing, which saves time and reduces the risk of further damage.
Common thermostat symptoms on a dryer
A failing thermostat can manifest in several ways. If your dryer runs without heat, you may suspect a thermostat that is stuck open or an open circuit. If the drum becomes overly hot or the load smells burnt, a thermostat might be failing to regulate temperature. Some models will trip the circuit breaker when a thermostat short or a stuck relay occurs. Conversely, a thermostat that never closes can prevent the heater from turning on, leaving you with no heat. Noting exact behavior helps you determine whether to test the thermostat directly or inspect related components like fuses, thermal cutoffs, or wiring connections. The Thermostat Care team has found that symptoms often overlap with thermostat wiring or control board issues, so a careful, staged diagnostic is best.
Safety considerations before testing
Testing a dryer thermostat involves working near live components and high heat. Always unplug the dryer and, if possible, switch off the corresponding circuit breaker before you start. If you must work with exposed wiring, wear safety glasses and insulated gloves. Use a non-contact voltage tester to confirm the power is off before touching any terminals. Keep children and pets away from the work area. When in doubt, consult a professional. The Thermostat Care guidance emphasizes that safety is the top priority and that taking time to prepare reduces the risk of shock or heat-related injuries.
Tools and preparations for testing
Before you begin, gather the essential tools: a digital multimeter with a continuity test, a screwdriver set (Phillips and flat-head), and insulated gloves. You’ll also want a set of labels or masking tape to mark wires so you can reassemble correctly. If you plan to replace the thermostat, have the replacement part on hand and confirm it matches your dryer's model. Keep a camera or notebook handy to document wire connections and torque specs. Note that some dryers require removing panels on the back, while others provide front access; verify your model’s service manual for the correct approach. The Thermostat Care approach recommends verifying all connectors are clean and free of corrosion before testing to avoid false readings.
Testing methods overview
There are several reliable ways to test a dryer thermostat. The most common method is a direct continuity test with a multimeter: disconnect the thermostat, set the meter to continuity, and check if the circuit closes when the thermostat should be closed. A second method is measuring resistance when the thermostat is cooled or warmed to see if it changes in a manner consistent with its specifications. Some technicians perform a controlled in-circuit test by heating the thermostat using the dryer’s normal cycle while monitoring voltage and current, but this requires careful attention to safety. The Thermostat Care guidance notes that testing should be performed with the appliance isolated from power and only after you have confirmed you can safely access the terminals.
Interpreting results and next steps
If continuity is present and resistance readings are within expected ranges when heated and cooled, the thermostat likely functions correctly. If there is no continuity or the readings stay constant despite temperature changes, replacement is warranted. In many cases, a faulty thermostat is accompanied by a blown thermal fuse or damaged wiring; in those cases, you should inspect and test those components as well. Always replace both the thermostat and any safety devices if you find one is faulty, to restore proper protection. The Thermostat Care team recommends documenting readings and confirming the model’s specification sheet to ensure you interpret results accurately.
Common mistakes and preventive care
People often assume a single failed thermostat is the sole cause of heating issues. In reality, wiring faults, a failing relay, or a clogged vent can mimic thermostat problems. Never bypass safety devices; this is dangerous and could cause a fire. Avoid touching live terminals, and never test with the heater energized. Label every wire and panel component before disassembly, and recheck that the ground connection is secure after reassembly. Regular maintenance, such as cleaning lint buildup and checking vent efficiency, reduces the likelihood of thermostat-related failures.
Tools & Materials
- Digital multimeter with continuity setting(Set to continuity or low-resistance range; probe distinct thermostat terminals)
- Screwdriver set(Phillips and flat-head; used to access thermostat housing)
- Insulated gloves(Protect hands when working near heated components)
- Non-contact voltage tester(Verify power is off before touching wiring)
- Labels or masking tape(Mark wires for correct reassembly)
- Replacement thermostat (model-specific)(Optional if you’re not sure whether to replace after testing)
- Shop rag or small brush(Clean connectors and remove lint around terminals)
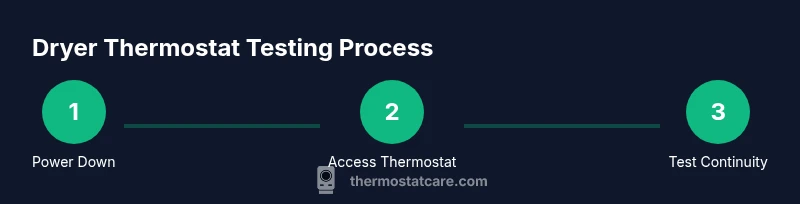
Steps
Estimated time: 45-75 minutes
- 1
Power down and unplug the dryer
Unplug the dryer from the wall outlet and switch off the circuit breaker if accessible. This ensures there is no chance of energizing components while you work. Confirm the outlet is dead with a non-contact tester before touching any wires.
Tip: Double-check the power source with the tester to avoid a shock. - 2
Access the thermostat assembly
Remove the access panel specified for your model to locate the thermostat housing. Keep track of all fasteners and note their original positions. If you’re unsure, consult the service manual or Thermostat Care resources for model-specific guidance.
Tip: Organize screws by location to simplify reassembly. - 3
Label and disconnect thermostat wires
Carefully label each wire with its terminal or connector. Detach the wires one at a time to avoid mixing up connections later. Avoid pulling on wires; grip terminals and use pliers if needed.
Tip: Take a photo before disconnecting for reference during reassembly. - 4
Test for continuity
With the thermostat removed, set your multimeter to continuity. Place probes on the thermostat terminals and observe the reading or audible beep. A healthy thermostat typically shows continuity in one state and may change as temperature changes if you have a testing setup that allows heating the sensor.
Tip: If there’s no continuity in any position, the thermostat is likely faulty. - 5
Test resistance and temperature response
If your model permits, use an ohm range to measure resistance across the thermostat while simulating temperature changes. Compare resistance behavior to your unit’s spec. This step helps you identify if the thermostat responds to temperature as designed.
Tip: Only perform resistance tests in a controlled manner to avoid damaging the meter or parts. - 6
Inspect related components
Check the thermal fuse, high-limit switch, and wiring for signs of damage or failure. A fault in these components can mimic thermostat failure. Clean connections and ensure no lint buildup is present around the housing.
Tip: Do not assume the thermostat is the sole culprit—verify related parts too. - 7
Reconnect and retest with power (safely)
Reconnect wires in their labeled positions. Restore power and run a short test cycle on the dryer to observe heat regulation without leaving it unattended. If the dryer overheats or fails to heat, power off immediately and recheck connections.
Tip: Monitor the first test cycle closely and be ready to power down if anything smells burnt. - 8
Decide on replacement
If continuity is inconsistent, readings don’t match spec, or the unit repeatedly overheats, plan for a thermostat replacement and inspect the safety fuse in the circuit. Keeping a spare thermostat on hand can reduce downtime for future repairs.
Tip: Document readings and model numbers to ensure you order the correct part.
Questions & Answers
What does a dryer thermostat do and why test it?
The dryer thermostat regulates heat to prevent overheating and protect the drum and lint trap. Testing helps confirm if it’s functioning properly or if it’s causing heat control issues.
The thermostat controls heat to prevent overheating. Testing shows whether it’s working as intended or if it needs replacement.
How can I tell if my dryer's thermostat is bad?
Signs include overheating, lack of heat, or erratic cycling. A continuity test with a multimeter that yields inconsistent results compared to spec also indicates a fault.
Look for overheating or no heat, and confirm with a multimeter test for continuity and proper resistance.
Is it safe to bypass the dryer thermostat to fix a heating problem?
No. Bypassing safety thermostats can cause fires or equipment damage. Always replace a faulty thermostat and test all safety devices.
Avoid bypassing safety parts; replace faulty components and test thoroughly.
What tools do I need to test a dryer thermostat?
A digital multimeter, insulated gloves, a screwdriver set, a non-contact voltage tester, and labels for wires are essential. A replacement thermostat is helpful if you confirm a fault.
You’ll need a multimeter, gloves, screwdrivers, a voltage tester, and labels for wiring.
What should I do after testing shows a faulty thermostat?
Order the correct replacement part, disconnect power, and install the new thermostat following the model’s service manual. Re-test after installation to ensure proper operation.
If the thermostat is faulty, replace it and retest the dryer afterward.
Can testing all safety components prevent future failures?
Yes. Inspecting and replacing worn safety components and cleaning vents reduces overheating risk and extends dryer life.
Regular checks of safety parts and vent cleaning can prevent future problems.
Watch Video
What to Remember
- Power off and unplug the dryer before any testing
- Use a multimeter to confirm thermostat continuity and resistance
- Inspect related safety components (fuse, high-limit switch) if readings are off
- Replace faulty thermostat and safety parts to restore proper operation