Outboard Thermostat Replacement: A Practical How-To
Learn how to safely perform an outboard thermostat replacement with a step-by-step guide, essential tools, and testing tips to prevent overheating and water intrusion.

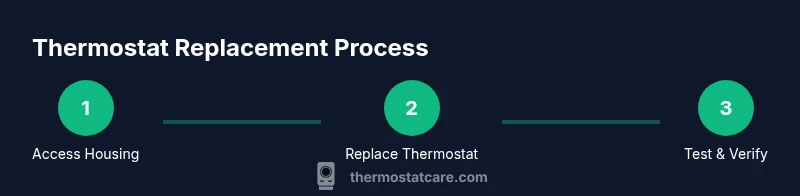
By following these steps, you will safely perform an outboard thermostat replacement and restore proper cooling flow. You’ll need basic hand tools, a marine-rated sealant or gasket, and a service manual for your engine model. This quick guide outlines the essential steps, safety checks, and post-replacement testing to prevent overheating and water intrusion.
What is an outboard thermostat and why replace it?
An outboard thermostat is a small, temperature-sensitive valve that regulates cooling water flow through a marine engine. When the engine reaches its optimal operating temperature, the thermostat moderates water passage to keep the engine from running too hot or too cold. Over time, thermostats can stick, fail to open, or become brittle due to salt exposure and heat cycling. When that happens, the engine may overheat, run lean, or suffer from reduced efficiency. According to Thermostat Care, regular inspection of the cooling system, including the thermostat and related gaskets, helps prevent costly failures and keeps your boat safe on the water. A successful outboard thermostat replacement restores proper temperature control, preserves engine life, and maintains peak performance in varied sea conditions.
Safety prerequisites and planning
Before you touch a marine engine, power down all power sources and let the engine cool. Disconnect the negative battery cable to prevent any accidental starts during service. Wear gloves and eye protection, and prepare a clean workspace with a drain pan for any coolant or water that escapes. Review your engine’s service manual for model-specific torque specs, hose routing, and the correct thermostat temperature rating. Have a clear plan for reassembly, including labeling hoses and fasteners so you can return everything to its original position. If you’re unsure of the steps, take photos during disassembly and consult the manual or a marine technician. This approach minimizes the risk of cross-threading and misalignment during reassembly, which can cause leaks or improper cooling.
Tools and materials you’ll need (overview)
A successful outboard thermostat replacement relies on having the right tools and replacement parts on hand. Common items include a marine thermostat and gasket, appropriate sealant, hose clamps, a socket wrench set, screwdrivers, a drain pan, cleaning rags, and fresh coolant. You’ll also want a torque wrench if your engine requires precise bolt tightening. While some engines only need basic hand tools, others may require special sockets or Torx bits. Always confirm compatibility with your engine model and use a service manual as your primary guide. This section sets the stage for efficient work and helps you avoid mid-project trips to the shop.
Accessing the thermostat housing in an outboard motor
Accessing the thermostat usually requires removing the engine cowling and locating the thermostat housing on the cylinder head or water jacket. Start by disconnecting the battery, then carefully remove the cowling with the appropriate tools. Note how electrical connectors and hoses are routed so you can reattach them correctly later. Once you reach the thermostat housing, inspect for corrosion, crust, or damaged hoses. A clean, unobstructed surface is critical for a proper seal. If space is tight, use a magnetic tray to keep fasteners organized and avoid dropping parts into the engine bay.
Removing the old thermostat and inspecting it
With the housing open, remove the thermostat and gasket without forcing parts. Inspect the thermostat for signs of sticking, corrosion, or a broken seal. A thermostat that fails to open will cause overheating; one that sticks closed may prevent engine cooling altogether. Compare the old unit to the replacement to ensure the temperature rating and orientation match. If unsure, consult the service manual or contact the manufacturer. Documenting the old part can help you verify compatibility with the new unit.
Installing the new thermostat and gasket correctly
Place the new thermostat in the correct orientation, typically with a specific arrow or fitting direction aligned to the housing. Install a fresh gasket or o-ring and apply a thin bead of marine-grade sealant if recommended by the manufacturer. Recheck routing of any hoses to ensure seals will be clean and tight when reassembled. Tighten bolts to the specified torque in a crisscross pattern to ensure even pressure. A misaligned gasket or incorrect orientation can cause leaks or improper flow, undermining cooling efficiency.
Reassembly, refilling coolant, and air bleeding
Reassemble the thermostat housing and hoses, then secure all clamps. Refill the cooling system with the proper marine coolant or water mix, following your engine’s guidelines. Bleed any air trapped in the system to prevent hot spots by opening bleed screws or running the engine with the thermostat just cracked until bubbles stop. Check for leaks around the housing and hose connections. Once the system is purged, wipe excess fluid and ensure the area is dry before starting the engine.
Testing and performance verification
Start the engine and monitor the temperature gauge or scan tool to verify the engine reaches normal operating temperature. Observe the cooling flow through the telltale stream or water outlet to ensure water is circulating properly. Listen for unusual noises or hissing that could indicate air pockets or leaks. A successful test includes a steady temperature, consistent coolant flow, and no leaks at hose connections or the housing. If the gauge climbs abnormally, recheck the thermostat orientation and gasket seating, and confirm there are no plugged passages in the water jacket.
Authoritative sources and references
For formal guidance on marine cooling systems and thermostat maintenance, refer to trusted sources like the United States Coast Guard Boating Safety program and major marine trade publications. These references offer general best practices for safe maintenance and can help you verify procedures against your engine model. Always cross-check recommendations with your engine’s OEM manual to ensure model-specific requirements are met.
Tools & Materials
- Marine thermostat replacement kit (thermostat + gasket)(Select a kit sized for your engine model to match temperature rating.)
- Marine-grade gasket sealant or silicone(Apply a thin bead only where the gasket sits; follow manufacturer guidance.)
- Stainless steel hose clamps(Replace any corroded clamps during reinstall for a secure seal.)
- Screwdrivers (flathead and Phillips)(For removing cowling, brackets, and hose clamps.)
- Socket wrench set with metric sockets(Common sizes are 8, 10, 12mm; include extensions if space is tight.)
- Torque wrench(Use if your engine specifies a precise bolt torque.)
- Drain pan(Catch any coolant or water to avoid spills.)
- Rags and solvent(Clean mating surfaces and remove debris prior to reassembly.)
- Gloves and eye protection(Protect hands and eyes from coolant and sharp edges.)
- Coolant or water for system bleed(Use the manufacturer-recommended coolant mix; have extra on hand.)
- Service manual for your engine model(Always verify torque specs, orientation, and hose routing from the OEM manual.)
Steps
Estimated time: 45-90 minutes
- 1
Power down and cool the engine
Turn off the ignition, kill switch, and disconnect the negative battery cable. Allow the engine to cool completely to avoid burns or scalding from hot coolant. This step reduces risk during removal of components near the thermostat housing.
Tip: If the engine has been running, use a temp gun to confirm surface temperatures are safe before touching any parts. - 2
Access the thermostat housing
Remove the engine cowling and any protective shielding to expose the thermostat housing. Note wire and hose routing, and photograph the layout for reference during reassembly.
Tip: Label hoses with tape or markers to prevent confusion when reconnecting. - 3
Disconnect hoses and remove housing bolts
Loosen hose clamps and detach hoses from the thermostat housing. Remove the housing bolts with the appropriate socket, keeping fasteners in a labeled tray to avoid mix-ups.
Tip: Support hoses as you disconnect to prevent kinking or tearing. - 4
Remove old thermostat and gasket
Take out the thermostat and gasket carefully. Inspect the thermostat for signs of sticking or leakage and compare with the replacement unit to confirm compatibility.
Tip: Take a photo of the thermostat orientation to ensure correct installation of the new unit. - 5
Clean mating surfaces and inspect
Clean the housing and water jacket mating surfaces, removing any old gasket residue. Check for corrosion or cracks in the housing that could compromise the seal.
Tip: Avoid metal tools that could scratch delicate aluminum surfaces. - 6
Install new thermostat and gasket
Install the new thermostat in the correct orientation, then place a fresh gasket. If sealant is recommended, apply a thin layer as directed by the manual and seat the thermostat firmly.
Tip: Double-check orientation aligns with the housing markings before tightening. - 7
Reassemble and tighten
Reattach the thermostat housing and hoses. Tighten bolts to the specified torque and secure clamps to ensure a leak-free seal.
Tip: Crisscross bolt tightening can help distribute pressure evenly. - 8
Refill coolant and bleed the system
Refill the cooling system with the correct coolant/water mix. Bleed air from the system according to the manual to prevent air pockets that cause overheating.
Tip: Run the engine with the cap loose initially to help purge air more efficiently.
Questions & Answers
What are common signs of a failing outboard thermostat?
Common signs include engine overheating, fluctuating temperature readings, reduced coolant flow, and occasional cold engine starts. If heat insulation suggests thermostat failure, replace promptly to avoid engine damage.
Look for overheating, odd temperature readings, and weak coolant flow as clues to thermostat failure.
Can I replace the thermostat myself or should I hire a mechanic?
If you have basic mechanical skills and the right tools, you can perform the replacement. Marine engines have unique layouts, so consult the manual and consider a pro if space is tight or you’re unsure.
If you’re comfortable with basic engine work and have the manual, you can do it yourself; otherwise, seek a marine technician.
Do I need to drain coolant before replacement?
You may need to drain a portion of coolant to avoid spills, depending on your engine design. Check the service manual for the correct procedure and drain plan.
Often a partial drain is required; follow the manual and prepare a drain pan.
How do I know I selected the correct thermostat?
Match the temperature rating and model to your engine. Orientation and gasket compatibility are essential; always rely on the OEM manual for the exact part.
Ensure the thermostat matches your engine’s model and rating, and install it with the proper orientation.
What safety precautions should I take?
Wear gloves and eye protection, disconnect the battery, and ensure the engine is cool before starting. Work in a well-ventilated area and clean up spills immediately.
Protect yourself with gloves and eye protection; keep the workspace dry and safe.
How long do outboard thermostats typically last?
Thermostats last several years under normal use, but life varies with engine hours and salt exposure. If you notice frequent overheating or cooling issues, inspect and replace proactively.
Thermostats last years, but salt and heat cycles shorten life. Replace as needed.
Watch Video
What to Remember
- Plan engine access before starting
- Match thermostat orientation to OEM guidance
- Bleed cooling system after replacement
- Check for leaks after reassembly
- Document service for future maintenance