How to test fridge thermostat: A practical DIY guide
Learn how to test a fridge thermostat, verify temperature accuracy, interpret readings, and decide when to recalibrate or replace components. A clear, step-by-step approach for homeowners and DIY enthusiasts.

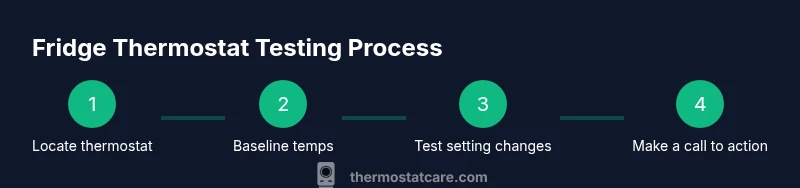
To test a fridge thermostat, locate the thermostat and its sensor, verify the internal temperature with a reliable thermometer, and observe how the unit responds to setting changes. This quick test helps identify calibration or sensor issues before calling a repair service or replacing parts. Include listening for compressor cycling, feel the airflow, and check for frost build-up.
What a fridge thermostat does and why testing matters
A fridge thermostat is the control brain that tells the compressor when to run based on the temperature inside the refrigerator. Good testing habits help you confirm that the thermostat is reading correctly, cycling on and off reliably, and not letting temperatures drift into unsafe ranges. According to Thermostat Care, a properly calibrated thermostat keeps foods fresh and reduces energy waste by avoiding unnecessary compressor run time. In practice, a small miscalibration or a sticky sensor can cause door shelves to feel warm at the back or the top shelves to stay cold for too long. By testing, you can distinguish between a simple adjustment and a faulty component that needs replacement. This guidance provides a practical approach you can apply with common household tools, without specialized equipment. You'll learn how to interpret thermometer readings, how to observe the unit's response to setting changes, and how to decide when a professional check is warranted.
Safety first: before you test
Testing a fridge thermostat involves working near electrical components and a running appliance. Always unplug the unit before removing any covers or sensors unless the manufacturer explicitly requires live testing. Keep hands dry, wear safety glasses if you use tools, and avoid forcing components. If you must unplug or move items, do so carefully and let the compressor rest for at least 15 minutes before re-powering. If your fridge is actively cooling food and you can't wait, skip the power-down step and perform only non-invasive checks such as visual inspection of door seals and wires.
Understanding common thermostat types in refrigerators
Fridge thermostats come in several common configurations: mechanical bimetal or capillary-style sensors, electronic/digital sensors, and hybrid units. Mechanical thermostats react to temperature changes with a bimetal strip that bends to turn the compressor on or off. Capillary tubes sense temperature through a liquid-filled sensor housing. Digital sensors provide calibrated readings and may offer more precise control via an external display. Recognizing your model’s type helps tailor your testing approach and determines whether calibration or sensor replacement is feasible without professional equipment.
Step 1: locate the thermostat and sensor
Begin by identifying where the thermostat control sits on your model. In top-freezer and side-by-side models, the control is often behind a kick panel at the base or inside the fresh-food compartment behind the thermostat housing. In newer models, the control pad may be on the door itself. For older units, the sensor can be tucked behind an interior wall or near the back wall of the fridge compartment. When you locate the assembly, take note of any exposed wiring, plastic covers, or frost buildup that could affect readings.
Step 2: baseline temperature readings and ambient checks
Before adjusting anything, establish a baseline. Place a reliable thermometer in the middle of the fridge and another in the freezer, away from the crisper drawers or vents. Record the temperatures at 15-minute intervals for an hour to understand natural fluctuations. Compare these readings to the thermostat setting by noting where the dial points. If the internal temps drift significantly from the expected range, you may have a calibration or sensor issue. Also check door seals for drafts, as poor sealing can cause misleading temperature readings.
Step 3: test response to setting changes
With the unit still powered, adjust the thermostat to a colder and a warmer setting. Then observe how quickly (and whether) the compressor cycles on and off in response to each change. A responsive system should show a clear, repeatable shift in temperatures within the next 30–60 minutes. If there is little to no change, the sensor or control circuitry may be faulty. Listen for unusual noises and check for frost buildup, which can indicate sensor or coil problems.
Step 4: calibration checks and sensor health
If readings appear off but the unit responds to setting changes, consider calibration. Some digital thermostats allow explicit calibration offsets; mechanical ones may drift and require replacement. Inspect the sensor housing for dirt, corrosion, or moisture intrusion, which can affect precision. If the sensor appears damaged or corroded, replacement is often the most reliable fix. For non-detachably sealed sensors, professional service may be necessary to avoid damaging refrigerant seals or safety features.
Step 5: decide next steps: calibration, sensor replacement, or professional help
When testing reveals persistent drift or non-responsiveness, you have three paths. First, attempt a manufacturer-recommended calibration if available. Second, replace a failing sensor or the thermostat module if you’re comfortable with part swaps and your unit type allows it. Third, if you encounter refrigerant odors, unfamiliar wires, or you’re unsure about electrical safety, contact a qualified technician. Timely intervention minimizes food waste and longer-term energy costs.
Maintenance to prevent future thermostat issues
Regularly inspect door seals, clean vents, and remove dust from the back of the refrigerator to reduce system strain. Keep the interior organized so air can circulate freely. If your model supports it, enable energy-saving modes or scheduled cooldowns to reduce compressor cycling. Record-keeping helps you notice trends over time, making it easier to identify when a test indicates a genuine problem rather than a temporary fluctuation.
Common mistakes to avoid
Don’t test with hot food or when the door has just been opened for a long period, as this skews readings. Avoid using non-calibrated or poorly rated thermometers; use one with a proven calibration. Never yank components or force wiring; mishandling can create safety hazards or worsen performance issues. Finally, avoid assuming a soft temperature drift means failure—some models exhibit minor, normal fluctuations during defrost cycles or door openings.
Tools & Materials
- Digital thermometer with fridge probe(Place in central shelf area away from vents; calibrate if possible)
- Notepad and pen(Record times, settings, and temperature readings)
- Small flashlight(Illuminate interior panels when checking hidden areas)
- Multimeter (optional)(Only if you’re comfortable diagnosing wiring or control circuits)
Steps
Estimated time: 30-60 minutes
- 1
Locate thermostat and sensor
Identify where the thermostat control is located based on your model. Look for a control panel on the door, behind a kick panel, or inside the fresh-food compartment. Locate the sensor housing and note any frost or moisture to assess potential reading interference.
Tip: Take photos of wiring before touching anything so you can revert if needed. - 2
Set up measurement environment
Remove food from nearby shelves if needed, and ensure the fridge is closed. Place the thermometer probe in the center of the main compartment and a second probe in the warmest zone (usually near the door). Wait 10–15 minutes for stable readings.
Tip: Avoid vents or near the back wall where cold air gathers; place probes mid-chamber for representative readings. - 3
Record baseline temperatures
Power the unit and record the current temperatures at 5-minute intervals for 30 minutes. Note the thermostat setting and the corresponding temperatures in both compartments. Compare with the manufacturer’s target range if available.
Tip: Consistency matters more than a single data point—watch for stable averages. - 4
Test response to setting changes
Increase the setting to a colder value and then decrease it to a warmer value. Observe whether the compressor starts within 15–30 minutes and if the temperatures move accordingly. If the unit does not respond, suspect sensor or control issues.
Tip: Only perform setting changes within safe, manufacturer-recommended ranges. - 5
Check sensor health and wiring
Inspect the sensor housing for corrosion, moisture, or dirt. If you see damaged wiring or a loose connector, address it only if you’re comfortable; otherwise call a professional. Use a multimeter only if you have training.
Tip: Moisture around sensors is a common cause of false readings; dry and reseal if possible. - 6
Decide on next steps
If readings remain inconsistent after calibration, consider sensor replacement or professional service. Document the results and timelines so you can discuss the issue clearly with a technician.
Tip: Keep the model number and any error codes ready for service calls.
Questions & Answers
What is considered a normal fridge temperature range?
A typical fridge operates at a few degrees Celsius to keep foods safe, with the freezer usually around -18°C. Use a dedicated thermometer to verify both compartments regularly.
Most fridges should stay a few degrees Celsius, with the freezer near minus eighteen. Use a dedicated thermometer to check both areas.
How often should I test my fridge thermostat?
Test when you notice temperature drift, after moving or repairing the unit, or during seasonal maintenance. Annually checks can catch gradual calibration changes.
Test if you notice drift or after moves; consider an annual check for gradual changes.
Can a failing fridge thermostat cause spoiled food?
Yes. If the thermostat misreads temperatures, it can let food warm up enough to spoil or freeze foods unintentionally.
A faulty thermostat can lead to unsafe temperatures and potential spoilage.
Is calibration possible for all thermostats?
Calibration depends on the model. Some digital or hybrid units offer adjustable offsets, while others require sensor replacement or professional service.
Not all models allow user calibration; check your manual or consult a technician.
Should I use a digital thermometer for testing?
A digital thermometer with a probe is recommended for accurate readings inside the fridge and freezer.
Yes, a probe thermometer provides accurate inside readings.
Watch Video
What to Remember
- Test temps across zones to spot drift
- Document baseline readings for comparison
- Calibrate or replace sensor when indicated
- Seek professional help for persistent discrepancies