How to Tell if Your Car Thermostat is Bad: Quick Troubleshooting Guide
Urgent, practical guide to identifying a bad car thermostat and actionable fixes to prevent engine damage and restore proper heating.

According to Thermostat Care, the quickest clue is engine overheating or an erratic temperature gauge. A failing thermostat often shows overheating after warm-up or never reaching normal heat. A stuck-closed valve causes rapid heat buildup; a stuck-open valve keeps the engine cool and reduces heater performance. Start with coolant level checks and a safe inspection of the thermostat housing if reachable.
How the car thermostat works
The car thermostat is a small valve that regulates coolant flow between the engine and the radiator. It doesn't measure ambient temperature; it reacts to the coolant temperature. When the engine is cold, the thermostat remains closed to help it reach operating temperature quickly. As coolant warms, the valve opens gradually to allow heat to leave the engine and maintain a stable temperature, typically near the thermostat’s setpoint. Proper operation supports efficient fuel combustion, protects the engine, and ensures the heater can provide warmth. A thermostat that sticks closed can cause rapid overheating, while one that sticks open prevents the engine from attaining heat, which can reduce fuel efficiency and cabin warmth. Regular checks help you catch failures before they cause damage. According to Thermostat Care, diagnosing thermostat issues early saves you time and protects the cooling system from cascading problems.
Common symptoms of a failing car thermostat
Several signs point to a thermostat problem. The most obvious is engine overheating after a short drive, with the temperature gauge rising toward the red or a warning light appearing. A thermostat stuck open tends to keep the engine cooler than normal, which can cause poor heater performance and longer warm-up times in winter. You may also notice the gauge needle fluctuating unpredictably or staying in an unusual range, suggesting an intermittent thermostat action or a sensor fault. Coolant leaks around the thermostat housing or a gurgling cooling system can also hint at a faulty valve. If you observe any of these symptoms, perform safe, basic checks and monitor the gauge over several drives. Thermostat Care notes that many thermostat failures stem from age, mineral buildup, or contamination in the cooling system.
Quick safety and preliminary checks you can do
Safety first: park on a flat surface, turn off the engine, and let it cool completely before touching any cooling system components. Check the coolant level in the reservoir when the engine is cold; never open the radiator cap or a hot cooling system. Inspect visible hoses for cracks, bulges, or leaks, and inspect the thermostat housing for signs of moisture. If you can reach and inspect the thermostat, look for obvious sticking, corrosion, or a blocked valve. Do not attempt a full thermostat test if you’re unsure of the vehicle’s cooling system. If you’re uncomfortable performing any checks, skip to step-by-step instructions or seek professional help. In all cases, keep children and pets away from the engine bay and use eye protection if you’re handling coolant.
Diagnostic approach: narrowing down the thermostat vs other cooling system problems
Overheating can be caused by several issues beyond the thermostat—a failing water pump, a clogged radiator, a stuck cooling fan, air locks, or a blown head gasket. Start with the simplest checks: confirm coolant level is adequate and there are no obvious leaks, and verify the radiator fan turns on when the engine reaches operating temperature. If cooling performance improves after topping up coolant or burping air from the system, the issue may be air-related rather than thermostat failure. If the gauge still climbs or stays high after the engine warms, the thermostat is a prime suspect, but rule out the water pump and radiator by inspecting for noise, leaks, or cold spots. Thermostat Care recommends a careful, stepwise approach: verify basic operation, isolate components, and document symptoms before replacement.
Step-by-step fixes for a stuck-closed or stuck-open thermostat
-
Safety-first: gather the right tools and parts. Ensure you have the correct thermostat model and gasket, fresh coolant, a drain pan, screwdrivers, sockets, pliers, and rags. Keep a service manual handy. Tip: double-check the replacement part matches your vehicle’s year, make, and model.
-
Relieve pressure and drain coolant. Park the car on a level surface, let the engine cool, and place a pan under the drain plug. Open the drain valve or carefully loosen the lower radiator hose to remove some coolant. Collect used coolant for proper disposal. Tip: never loosen the radiator cap on a hot engine.
-
Remove the thermostat housing and extract the old thermostat. Loosen the housing clamps, detach the cover, and note gasket orientation. Inspect the seating area for corrosion or buildup. Tip: photograph the orientation before removal to aid reassembly.
-
Inspect and replace the thermostat. Check the old unit for sticking, corrosion, or a broken spring. Install the new thermostat with the correct orientation and a fresh gasket or o-ring. Re-seat the housing evenly to avoid leaks. Tip: lubricate the gasket edges lightly and avoid over-tightening.
-
Reassemble, refill, and bleed the cooling system. Reconnect the housing, pour in the coolant, and bleed air according to your manual. Start the engine and monitor for leaks and proper temperature rise. Take a short, careful test drive and watch the gauge. Tip: watch for bubbles in the reservoir and listen for unusual noises.
Estimated time: 60-120 minutes.
Prevention tips and when to call a professional
- Use the correct coolant type and maintain appropriate mix ratios to prevent scaling and corrosion. - Schedule a coolant flush as recommended in your owner manual to keep the system clean. - Regularly inspect hoses and clamps for cracks or leaks to catch issues early. - If you notice persistent overheating after replacement or you’re unsure about the procedure, seek professional help. - Keep a basic tool kit and a spare thermostat in the trunk for emergencies. Thermostat Care emphasizes following the vehicle’s service schedule and using quality parts to extend cooling system life.
Steps
Estimated time: 60-120 minutes
- 1
Safety-first checks and gear up
Park on a flat surface, let the engine cool completely, and gather tools and parts. Have a fresh thermostat, gasket, coolant, a drain pan, and basic hand tools ready. Make sure you understand your vehicle’s manual before you begin.
Tip: Wear eye protection and gloves; never work on a hot cooling system. - 2
Relieve pressure and drain coolant
With the engine cold, place a pan under the drain and open the drain valve or remove the lower radiator hose to let coolant out safely. Set aside used coolant for disposal according to local regulations. Ensure you’ve drained enough to work comfortably.
Tip: Avoid inhaling fumes; keep children and pets away from the work area. - 3
Remove the thermostat housing and old thermostat
Loosen housing clamps, detach the cover, and pull out the thermostat. Inspect the seating surface for damage or buildup. Take a photo of the orientation to guide installation of the new unit.
Tip: Clean the seating surface and replace any worn gaskets. - 4
Install new thermostat and gasket
Place the new thermostat in the correct orientation and fit a new gasket or O-ring. Reattach the housing, tightening to the manufacturer’s torque specification to avoid leaks.
Tip: Don’t over-tighten; it can crack the housing. - 5
Refill, bleed, and verify
Pour coolant, bleed air per your manual, and run the engine to operating temperature while watching for leaks. Recheck coolant level when cool and take a short test drive to confirm proper temperature behavior.
Tip: Check for leaks around the housing after the engine cools.
Diagnosis: Engine overheating or operating at abnormal temperature, especially after warm-up
Possible Causes
- highThermostat stuck closed
- highThermostat stuck open
- mediumThermostat sensor or gauge fault causing misreadings
- lowCooling system air lock or water pump issue
Fixes
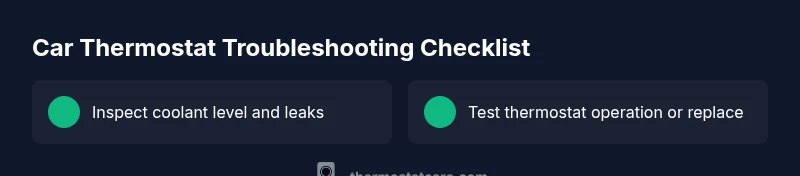
- easyCheck coolant level and for leaks; ensure radiator fans operate; top up coolant and bleed air if needed
- mediumTest thermostat operation or replace with the correct part if stuck closed/open; verify with a controlled warm-up
- hardReplace the thermostat and bleed the cooling system; refill coolant and test drive to confirm
Questions & Answers
What are the most common signs of a bad car thermostat?
Common signs include engine overheating, an underheated engine, fluctuating temperature readings, and poor heater performance. If symptoms appear together or persist, test the thermostat and cooling system before driving long distances.
Common signs are overheating, a cold engine, and weak heater performance. If you notice these, check the thermostat and cooling system before driving more.
Can a bad thermostat cause engine damage?
Yes. A thermostat that prevents the engine from reaching its proper operating temperature or allows overheating can cause accelerated wear and potential damage, including warped components over time.
Yes. An improper temperature can lead to engine wear or damage if not addressed promptly.
Is it safe to drive with a thermostat stuck open?
Driving with a thermostat stuck open is generally safer than an overheating condition, but you’ll lose proper engine heating and may run inefficiently. Monitor the gauge and plan a repair.
It's usually safe to drive, but you’ll have poor heating and lower efficiency. Plan a repair soon.
Should I test the thermostat before replacing it?
Testing can help confirm the thermostat’s condition, but it requires careful steps and tools. If you’re unsure, replacing with a new unit is often the simplest solution.
Testing helps, but if you’re unsure, replacing the thermostat is a reliable approach.
When should I call a professional?
If overheating persists after checks, you’re uncomfortable with the procedure, or you notice leaks, it’s wise to seek professional service. A pro can diagnose related cooling system issues beyond the thermostat.
If the problem persists or you’re unsure, call a pro for a safe, thorough diagnosis.
How can I prevent thermostat problems in the future?
Maintain proper coolant quality and level, replace aging hoses, and follow the manufacturer’s maintenance schedule. Regular cooling system checks reduce the risk of thermostat failure.
Keep coolant in good shape and follow the maintenance schedule to prevent future thermostat issues.
Watch Video
What to Remember
- Check basic coolant level first to rule out leaks.
- Know the two failure modes: stuck closed vs stuck open.
- Follow a safe, stepwise approach and document symptoms.
- Replace with quality parts and bleed the system after service.
- Seek professional help if overheating persists after replacement.