How to Set Thermostat for Air Conditioning
Learn how to set your thermostat for air conditioning to improve comfort and cut energy use. This practical, homeowner-friendly guide covers modes, schedules, and testing—avoiding common mistakes.

To set your AC thermostat, switch to cool mode, set a comfortable target, enable any eco or schedule features, and test by running the system briefly. This quick approach reduces waste and improves comfort.
Why Proper AC Thermostat Settings Matter
Your home's cooling comfort and energy bills hinge on how you set the thermostat for air conditioning. The thermostat is the control center for your AC, and small changes in target temperature, mode, and scheduling can make a noticeable difference in how often the system runs and how evenly rooms stay cool. The Thermostat Care team found that thoughtful configuration helps prevent overcooling in some rooms while undercooling others, reduces unnecessary compressor cycles, and extends the life of your equipment. In practice, this means choosing cooling mode, avoiding extreme temperature settings, and using schedules that match your daily routines. With a clear plan, you can enjoy comfortable indoor temperatures without wasting energy or money. This section lays out the concepts homeowners should grasp before making adjustments, so you can approach the setup with confidence and avoid common misconfigurations.
Choosing the Right Thermostat for Your Air Conditioner
Not all thermostats are created equal, especially when you consider different AC systems. A programmable or smart thermostat is a good fit for most central air setups, because it can control cooling cycles, monitor readings, and run schedules automatically. If your home uses a ductless mini-split or a heat pump, verify that the thermostat supports cooling mode and any auxiliary heating options you rely on. The key is compatibility: the thermostat should connect to the HVAC equipment reliably, display accurate temperatures, and offer intuitive controls. When selecting, look for features such as accurate sensors, user-friendly interfaces, and the ability to set multiple sensors in larger homes. A well-matched thermostat reduces the guesswork of cooling and helps ensure a consistent, comfortable environment across rooms.
Modes, Features, and Scheduling that Matter
Modern thermostats present a suite of modes and features designed to tailor cooling to your schedule. The Cooling mode maintains a constant target, while Auto lets the system decide when to run the compressor and fan based on actual temperature readings. The Fan option determines whether the blower runs continuously or only with cooling cycles. Scheduling lets you predefine different temperatures for weekdays and weekends, aligning cooling with occupancy patterns. Eco or energy saver modes adjust performance to lower energy use without sacrificing comfort. Some thermostats offer adaptive recovery, which starts cooling a little early to reach the target at the programmed time, reducing temperature swings. Narrow down the options you actually use, and disable features that complicate operation. Always confirm that changes take effect within minutes of saving settings to avoid waiting in the wrong conditions.
Seasonal Optimization: Adapting to Heat and Humidity
Seasonal shifts require thoughtful adjustments to keep comfort steady and energy use reasonable. Start with a baseline that reflects your typical daily routine, then adjust as weather and daylight hours change. When you’re away, use scheduling to raise the temperature slightly so cooling isn’t wasted on empty rooms. If humidity is a factor in your climate, coordinate thermostat settings with dehumidification strategies—some systems include humidity controls or work best with a dedicated dehumidifier. The objective is to avoid constant, aggressive cooling while still maintaining a pleasant indoor environment. By reviewing your schedules every few weeks, you can keep the system aligned with seasonal needs without overworking the compressor or wasting energy.
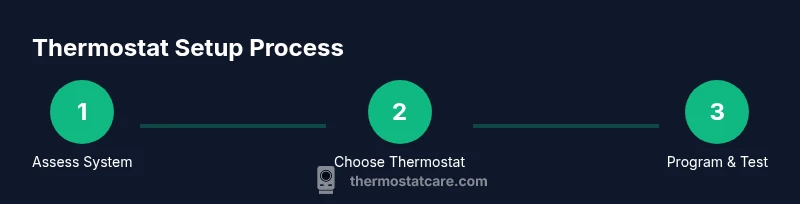
Practical Programming Steps to Set Your Thermostat for Efficient AC
Begin by power-cycling the thermostat to ensure you start from a clean slate. Then switch the system into Cooling mode and verify the outdoor unit responds when you adjust the setpoint. Next, set a realistic temperature target and create a basic weekday/weekend schedule that matches your routine. Activate energy-saving features such as adaptive recovery or eco mode if they’re available, and ensure the thermostat’s sensors are placed away from heat sources like lamps or electronics. Finally, run a quick in-room test by observing several rooms and comparing readings with a wall thermometer or a smart sensor. If readings differ significantly, check sensor placement or recalibrate according to the manufacturer’s guidance. This approach gives you a solid, repeatable baseline for comfortable cooling.
Troubleshooting and Verification after Setup
After applying your settings, monitor the system for several days to confirm it performs as intended. If some rooms stay warmer than others, add or relocate sensors, adjust fan settings, or extend the schedule for those zones. If the unit runs constantly, recheck target temperatures and ensure there are no leaks in the ductwork or poorly insulated spaces. For smart thermostats, confirm you have a stable Wi-Fi connection and that the mobile app is syncing correctly. If you still notice inefficiencies, consider a quick professional check for wiring integrity or sensor accuracy. Keeping notes about what you changed and the resulting comfort levels helps you fine-tune over time.
Tools & Materials
- Programmable or smart thermostat compatible with your AC(Ensure cooling mode is supported)
- Owner’s manual or wiring diagram(Keep for reference to wiring and mode options)
- Screwdriver set (Phillips #2)(For any panel screws)
- Non-contact voltage tester(Optional safety check if wiring access is needed)
- Pen and notepad(Record desired temperatures and schedules)
- Room thermometer or sensor(To verify readings across rooms)
Steps
Estimated time: 20-30 minutes
- 1
Power down and prep
Power off the thermostat and, if needed, the circuit breaker feeding the AC. Remove the thermostat cover to access the wiring only if you are confident and have consulted the manual. This ensures safety and prevents short circuits while you configure settings.
Tip: If you must touch wiring, use a non-contact tester first and disconnect power at the breaker for safety. - 2
Switch to cooling mode and verify
Set the system to Cooling mode and verify that the outdoor unit engages when you adjust the setpoint. Listen for the compressor and check that the indoor fan starts as expected. Confirm the display shows cooling activity within a few minutes of changes.
Tip: If the compressor doesn’t respond, recheck wiring or consult the manual before proceeding. - 3
Set target temperature and range
Choose a practical cooling target based on comfort and climate. Establish a basic range for weekdays and weekends if your thermostat supports scheduling. Save the changes and wait a few minutes to let the system respond.
Tip: Avoid extreme setpoints; gradual adjustments make the system smoother and more efficient. - 4
Enable scheduling and energy-saving features
Turn on scheduling and enable eco or energy saver modes if available. Create simple daily or weekly profiles that reflect occupancy. Ensure adaptive recovery is enabled if your model supports it.
Tip: Test the schedule by simulating a typical day to confirm transitions occur smoothly. - 5
Test and calibrate
Do a quick room-by-room check with a wall thermometer or sensor. Compare readings with the thermostat and adjust sensor placement if you notice large disparities. Calibrate or recalibrate according to the manufacturer’s guidance.
Tip: Place sensors away from heat sources and direct air drafts to maximize accuracy. - 6
Save and document
Save all changes and document the baseline target temperatures, schedules, and features enabled. This makes future tweaks easier and helps you benchmark comfort versus energy use.
Tip: Keep a simple note with the model, firmware version, and date of changes.
Questions & Answers
How do I know if my thermostat supports air conditioning?
Check the thermostat’s specifications for cooling modes and compatibility with your AC type. If in doubt, consult the manual or contact the manufacturer’s support. Compatibility is essential for reliable cooling control.
Check the thermostat’s cooling modes in the manual or online specs to confirm compatibility with your AC.
Should I use cool or auto mode for best efficiency?
Auto mode often provides the most balanced efficiency by letting the system manage compressor cycles. Cool mode keeps a fixed target, which can work well with a well-planned schedule but may exceed comfort during temperature swings.
Auto mode usually yields better efficiency; use cool if you prefer strict control and have a solid schedule.
Can I use a smart thermostat with central AC?
Yes. A smart thermostat can optimize schedules, monitor readings, and control multiple zones in a central AC system. Ensure compatibility with your furnace or indoor air handler and verify the wiring and sensor setup.
Yes, most smart thermostats work with central AC and can help you save energy with schedules.
How often should I recalibrate the thermostat?
Recalibration is usually needed if you notice persistent temperature discrepancies between the thermostat and actual room readings. Do a check after major changes or seasonal shifts and recalibrate as needed.
Check readings after changes or seasonal shifts and recalibrate if there’s a mismatch.
What common mistakes waste energy when cooling?
Common issues include large, unnecessary temperature gaps, melted or misaligned sensor placement, and failing to use schedules. Regular maintenance and aware scheduling help avoid waste.
Big temperature gaps, mislocated sensors, and not using schedules waste energy.
How do I reset my thermostat to default settings?
Use the reset option in the thermostat menu or consult the manual for model-specific instructions. Resetting can help fix persistent misconfigurations but will erase custom schedules.
Use the reset option in the menu or the manual; it restores default settings but clears schedules.
Watch Video
What to Remember
- Verify compatibility before installing.
- Set sensible schedules to match occupancy.
- Test readings against a room thermometer.
- Enable energy-saving modes where available.
- Document changes for future adjustments.