How to Replace an AC Thermostat
A practical, DIY-friendly guide to replacing your air conditioner thermostat safely. Learn compatibility checks, required tools, a detailed step-by-step process, testing, and troubleshooting for reliable cooling.

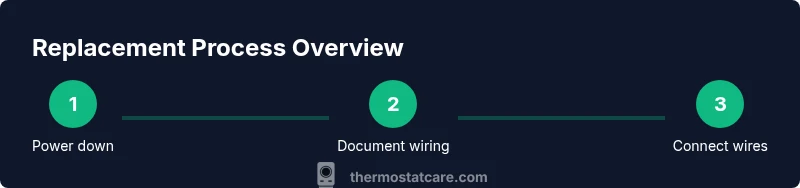
Replacing an AC thermostat involves confirming compatibility, safely powering down the system, removing the old unit, wiring the new thermostat according to the installer’s diagram, and testing the HVAC system to ensure correct operation. This guide provides a safe, step-by-step method, required tools, common pitfalls, and troubleshooting tips. Most installs take about 30-60 minutes depending on wiring complexity.
Understanding when to replace vs repair
If your thermostat is failing to read temperatures accurately, constantly losing power, or displaying error codes, you may be facing a thermostat replacement rather than a simple repair. Replacements are often necessary when the current unit is discontinued, lacks compatible wiring for modern features, or no longer powers the HVAC system reliably. According to Thermostat Care, replacing an AC thermostat should be considered when a unit is physically damaged, has outdated wiring that cannot support smart features, or is not communicating with the HVAC system as intended. This section helps homeowners distinguish between repairable issues and a replacement path, so you don’t waste time chasing a fix that won’t last. Remember that a replacement offers long-term benefits like improved control, energy insights, and better reliability in extreme weather.
First, verify your system compatibility by confirming that the new thermostat supports your HVAC type (conventional, heat pump, multi-stage, or Y/2H calls). If you’re unsure, consult the wiring diagram for your current unit and compare terminal labels. When you bypass compatibility, you risk improper operation or safety concerns. If you’re selecting a modern smart thermostat, ensure your indoor wiring includes a C-wire for continuous power. Thermostat Care analysis shows that compatibility and wiring adequacy are the two most critical factors influencing the success of a replacement.
In addition to compatibility, think about installation complexity. A straightforward 1- or 2-stage cooling system is typically easier to replace than a multistage or heat-pump configuration. If you’re replacing a simple, battery-powered dial thermostat with a modern digital model, you may find the transition smoother and less prone to diagnostic codes. This section grounds your decision-making in practical checks rather than assumptions, setting you up for a smooth install.
Compatibility and selecting a replacement thermostat
Choosing the right replacement thermostat is about more than just color and display size. You need to ensure electrical compatibility, feature needs, and mounting options align with your HVAC system. Start by identifying your HVAC type: conventional split, heat pump, or packaged unit. Then, confirm the thermostat’s compatible wiring configuration matches your existing wiring: common wire (C), power (R), fan (G), heat (W), cooling (Y), and any auxiliary terminals. If your system uses a C-wire, that helps provide reliable power to smarter thermostats; if not, you may need a power extender kit or a non-powered model.
Consider feature goals: basic programmable models save energy, while Wi-Fi-enabled or smart thermostats offer remote control, energy reports, and voice assistant compatibility. Even so, these features require robust Wi-Fi coverage and compatible HVAC control boards. Some smart thermostats support integrated sensors and zoning features, which can improve comfort in larger homes but may demand more complex wiring.
Look for compatibility notes from the manufacturer and from independent sources to verify performance with your equipment. Thermostat Care emphasizes verifying that the thermostat’s mounting plate matches your wall cutout and that the wiring terminals align with your existing wiring. If you have a heat pump, confirm the specific reversing valve (O/B) and other heat-pump-specific terminals, as miswiring can prevent cooling or heating from functioning correctly. Finally, plan for installation ease: a model with a simple setup routine and a clearly labeled terminal layout helps reduce mistakes. As you compare models, document your existing wiring with photos so you can map wires to the new thermostat confidently.
Selecting a thermostat that is easy to install and offers future-proof updates is worth the initial effort. For many homeowners, a well-chosen thermostat will deliver consistent comfort, faster diagnostics, and potential energy savings over time.
Safety prerequisites and power-down procedure
Before you touch any wires or electrical components, commit to a safety-first mindset. Turning off the right power sources is crucial to prevent shocks or damage to your HVAC control board. Start by switching off the circuit breaker that powers the furnace or air handler, not just the thermostat’s wall switch if present. This ensures there is no line voltage reaching the thermostat or associated wiring. Next, verify the absence of voltage with a non-contact voltage tester at the thermostat location and near the furnace control panel if accessible. If you detect any electricity, wait and re-check before proceeding.
With power confirmed off, remove the thermostat cover and inspect the wiring. Take close-up photos from multiple angles and note terminal labels. This documentation will serve as a guide when reconnecting wires to the new unit. Do not rely on memory for multi-wire connections, especially if your system includes multiple stages or a heat pump. If you’re unsure about any step, pause and consult the installation manual for the replacement thermostat or seek professional assistance. Thermostat Care notes that safety and proper wiring are non-negotiable for a reliable replacement. After you’ve confirmed safety and documented the wiring, you’re ready to move to the actual wiring and mounting phase.
If your system has a 24V transformer leak- or fault-detection feature, avoid triggering it during replacement. Some models require a short power-down period after reconnecting, so plan for a brief waiting window before final testing. These precautions reduce the risk of damaging your HVAC control board and help prevent short circuits during the swap.
Preparing the installation site and taking references
The installation site should be clean, well-lit, and easily accessible. Clear the wall area of obstructions, dust, and any old mounting debris. You’ll need a stable surface to work and a clear path to the furnace or air handler if wiring runs behind a wall. Before removing the old thermostat, check the wall box dimensions to ensure the new thermostat’s base plate will fit. If the new unit comes with a larger mounting plate, you may need to patch the wall or use an adapter plate.
Prepare your wiring by labeling each conductor as you disconnect it from the old thermostat. Color-coded wire labels or masking tape with terminal labels help prevent miswiring. If the original wiring lacks a C-wire, consider whether a C-wire adapter or power extender kit is appropriate for the new thermostat. Having a few basic tools at hand—screwdrivers, a small level, a pencil, and a ruler—will speed up mounting accuracy and alignment. A tidy, neat installation not only looks better but reduces the chance of loose connections and future maintenance issues. Thermostat Care recommends spending extra attention on clean wiring runs, avoiding sharp bends, and ensuring wires are fully seated in the terminal clamps.
Finally, verify that the new thermostat model’s mounting holes align with the existing wall box. If not, you’ll need to adjust the box or choose a mounting solution that fits your wall. A precise fit reduces the risk of instability or cover wiggle and helps keep the device secure for the long term. With the preparation complete, you’re ready to proceed to the wiring and mounting stage with confidence.
Wiring and mounting the new thermostat
Wiring the new thermostat correctly is the core of a successful replacement. Begin by inserting the new base plate over the wall box and securing it with the provided screws. Then, reconnect the wires according to the terminal labels on the new thermostat. A common configuration includes R (power), C (common), G (fan), Y (cooling), and W (heat); heat pump setups may include O/B and AUX/E terminals. Ensure each wire is fully inserted and tightened in the terminal clamp. If you encounter loose or frayed conductors, trim and re-strip the wire ends to ensure solid connection. If you’re replacing a battery-powered model with a wired smart thermostat, identify and preserve any battery compartment requirements that might affect compatibility.
Once all wires are attached, secure the thermostat body, reattach the faceplate, and restore power at the breaker. If the thermostat powers on, you should see a startup screen or prompt. Some models require you to complete an initial setup wizard or connect to Wi-Fi. Follow the manufacturer’s on-screen instructions for configuration options, including date/time, language, and system type. Thermostat Care emphasizes double-checking that wires correspond to the correct terminals and that no bare copper is exposed. A careful, methodical approach reduces the chance of miswiring and helps avoid nuisance diagnostic codes.
Pro tip: take another photo of the wiring once everything is connected for future reference. This is especially helpful if you ever need to service the thermostat again or replace it with a different model later on. Level the faceplate visually to ensure a clean, professional finish and avoid a crooked appearance that can obstruct the display or touchscreen.
If you’re dealing with a heat pump, make sure the reversing valve (O/B) is set to the correct position, as misconfiguration can impact heating performance. When in doubt, consult the thermostat’s installation guide and verify the wiring compatibility with your HVAC system. The goal is a secure, accurate connection that delivers reliable operation without nuisance codes.
At this stage, you’ve set up the physical connection. The next steps focus on configuring settings, testing operation, and validating comfort and energy performance. Take your time; a well-executed wiring process ensures long-term reliability and accurate readings.
Configuration, testing, and everyday use
With the wiring in place, you’ll configure the thermostat for your system type and comfort preferences. If you’re using a basic programmable model, set your cooling and heating setpoints and program the schedule that matches your daily routine. For smart thermostats, go through the app-based setup: connect to Wi-Fi, create an account, and expose the thermostat to the home network. Thoroughly review the system activity and error messages in the device UI to verify that the HVAC responds correctly to changes in setpoints and that fan control behaves as expected. If the thermostat supports learning or adaptive scheduling, decide whether to enable these features and monitor how quickly it adjusts to your routine.
Next, perform a test run. Set the thermostat to heat and then to cool, observing the HVAC response at both the air handler and outdoor unit if accessible. Listen for unusual noises and ensure the air flows through the vents. Check that the display remains readable in different lighting conditions and that touch inputs register consistently. Document any discrepancies or unexpected readings. If readings appear off, re-check the wire connections and terminal assignments against the new unit’s wiring diagram. Thermostat Care highlights that meticulous testing after installation helps confirm that replacements function correctly and that energy-saving features are genuinely effective.
With a successful test, you’re ready to finalize the installation. If your climate involves dehumidification or zoning, verify those features operate smoothly and respond to schedule changes. For Wi-Fi models, confirm cloud connectivity and remote control behavior. On a practical note, keep the quick-start guide, wiring diagram, and a photo log handy in case you need to troubleshoot later. A well-configured thermostat will deliver comfort, energy savings, and reliable performance throughout the year.
Finally, consider enabling any available diagnostic tools on the thermostat. Many models offer energy usage data, fault codes, and system status indicators that can help you identify future maintenance needs early. Regular checks of the thermostat’s performance, battery (where applicable), and firmware updates keep the system current and reliable.
Thermostat Care notes that a well-executed replacement with careful configuration yields long-term benefits and peace of mind for homeowners.
Troubleshooting after installation and long-term tips
Even with careful installation, you may encounter occasional issues after replacing an AC thermostat. If the display is blank or unresponsive, verify that power is present at both the thermostat and the furnace control board. A wired model may need a reset or reconfiguration if the display fails to boot. If you notice the HVAC system not responding to temperature changes, recheck the wiring connections and ensure the R and C wires are properly connected. A common snag is a loose connection at the control board, which can cause intermittent operation. If the thermostat reports incorrect readings, check for a loose or corroded wire, verify the thermostat's internal sensors are not blocked by dust, and confirm that the model supports the required sensor configurations for your home.
For Wi‑Fi thermostats, ensure a stable network connection and confirm the app is properly linked to the device. A delay in communication can manifest as lag in updates or failure to reflect setpoint changes on the screen. If you still experience issues, revert to a basic manual mode (if supported) to confirm the HVAC system itself is functioning correctly. Should you encounter unusual wiring while troubleshooting or if you have a multi-zone system with a complicated wiring diagram, seek professional support rather than attempting risky repairs.
From a maintenance perspective, set a reminder to update firmware if your thermostat supports it and schedule periodic checks of the wiring connections and mounting stability. Keeping the installation clean, dry, and free from dust helps prevent contact resistance and ensures long-term reliability. The Thermostat Care team recommends documenting any changes you make—wires moved, settings adjusted, or components replaced—for future reference and faster troubleshooting should issues arise later.
Thermostat Care verdict: practical guidance and next steps
The Thermostat Care team recommends a careful, methodical approach to replacing an AC thermostat. Start with compatibility checks and safety, then proceed through a structured wiring and mounting process, followed by thorough testing and careful configuration. If you’re not confident with electrical wiring or if your system has unusual or complex wiring, don’t hesitate to contact a licensed HVAC technician. A professional can verify compatibility, protect system warranties, and ensure optimal performance. With the right preparation and attention to detail, a thermostat replacement can deliver improved comfort, energy savings, and reliable operation for years to come. Thermostat Care’s verdict is clear: plan, verify compatibility, document wiring, and test thoroughly for the best results.
Tools & Materials
- Screwdriver set (Phillips andflat-head)(Phillips #2 and flat-head #1-2, depending on screws)
- Non-contact voltage tester(Verify no live voltage before touching wires)
- Wire stripper/crimper(If you need to adjust wire ends)
- Nut driver or small socket set(For mounting plate screws)
- Replacement thermostat (compatible with your HVAC)(Check brand compatibility and wiring terminal layout)
- Digital thermostat wiring diagram or manual(Keep on hand)
- Electrical tape and wire nuts(For safe wire connections)
- Smartphone with thermostat app (optional)(For Wi‑Fi setup and remote control)
Steps
Estimated time: 45-90 minutes
- 1
Power down and verify no voltage
Switch off the breaker that powers the furnace or air handler. Use a non-contact tester to confirm no voltage at the thermostat wires. This protects you from electric shock and prevents damage to the control board.
Tip: Double-check in the furnace area if you have a shared circuit with other devices. - 2
Remove old thermostat and photograph wiring
Carefully remove the thermostat faceplate and base. Take clear photos of each wire connected to its terminal and note the terminal labels. This gives you a reliable reference for wiring the new unit.
Tip: Label wires with tape if terminal labels are unclear. - 3
Disconnect wires and remove mounting plate
Unscrew the mounting plate and detach the wires from the old unit. Place wires to the side, preserving their order. If you’re installing a new plate with a different pattern, you'll need to adapt the mounting location accordingly.
Tip: Keep screws organized to avoid misplacement. - 4
Mount the new base plate
Install the new base plate on the wall, ensuring it’s level. Secure it with screws and connect the wires to the matching terminals according to the new thermostat’s diagram.
Tip: Avoid bending wires sharply; keep runs neat. - 5
Connect wires to the new thermostat
Attach each wire to its corresponding terminal (R, C, G, Y, W, etc.). Tighten screws firmly, but don’t overtighten and damage conductors.
Tip: If a C-wire is missing, consider a power extender kit or a model that doesn’t require it. - 6
Attach the faceplate and restore power
Snap on the faceplate, return power at the breaker, and confirm the thermostat powers on. If your unit requires setup, follow the on-screen prompts.
Tip: Have the installation manual handy for any model-specific steps. - 7
Configure settings and test operation
Configure system type (gas/oil/electric, heat pump, etc.), set schedules, and run a test cycle (cool then heat). Confirm the HVAC responds correctly to setpoint changes.
Tip: Document the final settings for future reference. - 8
Optional Wi‑Fi setup and calibration
If using a smart thermostat, connect to your home Wi‑Fi, install the app, and sync the device. Calibrate sensors and confirm energy reporting features.
Tip: Use a strong Wi‑Fi signal to prevent disconnects.
Questions & Answers
Do I need a professional to replace my AC thermostat?
Not always. If you’re comfortable with basic wiring and safety steps, you can replace a thermostat. For heat pumps, multi-stage systems, or unfamiliar wiring, professional help is safer and may protect your warranty.
You can do it yourself if you’re comfortable with wiring, but seek professional help for complex setups.
What symptoms indicate a thermostat replacement is needed?
Frequent outages, inaccurate readings, blank or non-responsive displays, and inconsistent system behavior are signs a replacement may be necessary.
Look for a blank screen or bad readings as red flags.
Can I reuse my existing wiring with a new thermostat?
You can often reuse wiring if the terminals align and you have a C-wire for power. If not, a C-wire adapter or different model may be required.
Check compatibility and wiring layout before buying.
Will replacing the thermostat affect my HVAC warranty?
Replacing a thermostat generally does not void the HVAC warranty, but improper installation or non-certified parts could affect coverage. Always follow the manufacturer’s guidelines.
Review warranty terms and confirm proper installation.
What tools are essential for this task?
A screwdriver set, non-contact voltage tester, wire strippers, and a replacement thermostat are essential. Keep a wiring diagram handy.
Have the right tools and diagram ready before starting.
Should I choose a Wi-Fi thermostat or a basic model?
Wi‑Fi models offer remote access and energy insights but require a stable network and compatible HVAC. A basic model works well if you only need reliable temperature control.
Wi‑Fi is optional—choose based on your needs and setup.
Watch Video
What to Remember
- Verify compatibility before purchasing.
- Power down and document wiring before removal.
- Match wires to the correct terminals on the new unit.
- Test thoroughly after installation.
- If in doubt, consult Thermostat Care for guidance.