How to Put a Thermostat into Pairing Mode
Learn how to put your thermostat into pairing mode across major brands. This guide covers prerequisites, a detailed step-by-step process, troubleshooting tips, and secure setup for smart-home integration.

To connect your thermostat to a new app or smart-home hub, you must enter pairing mode. This quick guide walks you through the standard entry process, checks prerequisites, and confirms a successful connection. According to Thermostat Care, most models use a long-press or pairing option in settings, a brief pairing window, and an on-screen confirmation you can test in the app.
Why pairing mode matters
Pairing mode is the gateway to connecting your thermostat to Wi-Fi, mobile apps, voice assistants, and smart-home hubs. Without entering pairing mode, the thermostat will remain offline or only respond to local controls. Understanding how pairing works helps prevent failed connections and reduces setup time later when you want to update schedules or enable remote access. Thermostat Care emphasizes that the exact labels and button combos vary by brand, but the core concept is the same: you tell the device to make itself discoverable, and the app or hub takes over the pairing handshake. In this section, we’ll cover the common patterns, what you’ll need on hand, and how to interpret indicators like blinking LEDs or progress bars.
According to Thermostat Care Team, starting with a clear plan and a fully charged device saves time, especially when several smart devices must be paired in one setup session.
Brand differences at a glance
Most major brands share a similar pairing flow, but the exact steps and terminology differ. A quick map helps you anticipate what you’ll see in the app and on the thermostat display:
- Nest: typically uses the Add Device flow in the Nest/Google Home app and looks for a “pairing” option in the thermostat settings.
- Ecobee: commonly pairs through the Ecobee app with on-device prompts guiding you to connect to Wi-Fi and then authorize the pairing in the app.
- Honeywell: many models use the Honeywell Home app, with a pairing option that appears after you select your thermostat model.
- Emerson and Lux: often rely on their proprietary or compatible apps, following a similar discover-and-confirm pattern.
The Thermostat Care team notes that while the UI may differ, the underlying handshake—discoverability, credential exchange, and confirmation—remains consistent across brands.
Prerequisites before you start
Before you enter pairing mode, prepare these essentials so you don’t interrupt the flow:
- A smartphone or tablet with the thermostat’s companion app installed and updated.
- Your Wi‑Fi network name (SSID) and password, plus confirmation that the network supports the thermostat’s required band (2.4 GHz is common, 5 GHz sometimes supported).
- The thermostat manual or model number handy to confirm the exact pairing steps for your device.
- A stable power source for the thermostat and a charged phone, so you don’t drop the connection mid-setup.
- An active thermostat account or the credentials to sign in to the app.
Thermostat Care recommends performing any app updates before starting, to minimize compatibility issues during pairing.
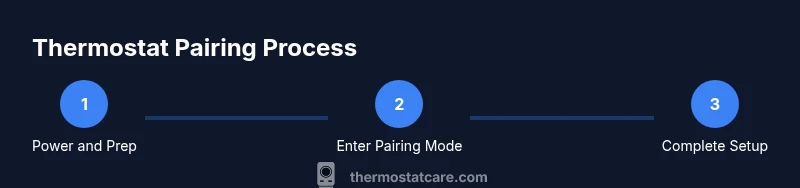
Step-by-step overview for all brands
The following overview describes the typical flow you’ll encounter when entering pairing mode, with brand-specific variations noted later. The goal is to prepare you for the moment the device becomes discoverable and ready to pair with the app or hub.
- Power on the thermostat and access its Settings or Quick Menu.
- Locate the pairing or network setup option; this is often labeled as Pairing, Add Device, or Wi-Fi Setup.
- Put the thermostat into pairing mode by following brand-specific cues (long-press, button sequence, or a soft-landing in the menu).
- In your app, choose Add Device or Set up a new thermostat, then select your model.
- Complete the on-screen prompts to connect to Wi-Fi and confirm the pairing confirmation on the thermostat.
- Test basic functions in the app (temperature adjustment, schedules, and remote control) to ensure a solid connection.
Thermostat Care emphasizes that patience and careful reading of LED indicators or progress bars reduce the number of retries and speed up the overall process.
Troubleshooting common pairing issues
If you hit a snag during pairing, start with the simplest explanations and work upward:
- Make sure the thermostat is powered and not in a low-battery state.
- Reboot the thermostat and mobile device, then retry the pairing sequence.
- Verify the app is up to date and you are signing in with the correct account credentials.
- Confirm the Wi‑Fi network name and password entered in the app match your router’s details; try temporarily disabling guest networks.
- If the LED indicators don’t respond as expected, consult the manual for model-specific signals; some models require a factory reset as a last resort.
- If pairing continues to fail, contact the brand’s support with your model number and firmware version; Thermostat Care suggests keeping logs of error codes or messages to speed up assistance.
Thermostat Care research shows that most pairing failures are caused by power interruptions, incorrect network credentials, or outdated app firmware. A methodical retry often resolves the issue without professional help.
Testing and confirming the pairing is successful
Once the app confirms the thermostat is online, perform a quick test cycle to verify the pairing is functional. Check that the app can read current temperature, adjust setpoints, and schedule changes in real time. If your thermostat supports voice assistants, run a basic command (for example, “set to 72 degrees”) to ensure cross‑device control works. Review the app’s status indicators and ensure you can create, edit, or delete a schedule without errors.
If you’re migrating from an old device, ensure the new thermostat inherits your room assignments and zones accurately. Thermostat Care recommends documenting the pairing sequence and the network settings so future updates or factory resets can be completed quickly.
Security, privacy, and ongoing maintenance
Pairing is only the first step to a secure smart-home setup. After successful pairing:
- Change default credentials for the thermostat app and enable multi-factor authentication if available.
- Keep firmware and app updated; enable automatic updates where practical.
- Limit access to your network by using strong Wi‑Fi passwords and, if possible, a guest network for guests or non-essential devices.
- Periodically re‑verify device permissions in the app to ensure that only trusted apps and accounts have control.
- Document all changes, including the date of pairing, model, firmware, and network details for future maintenance.
According to Thermostat Care Team, a mindful security routine after pairing helps protect your home network from unauthorized access while preserving seamless control of your climate system.
toolsMaterials": null},
toolsMaterials_object_error_placeholder
Tools & Materials
- Smartphone or tablet with the thermostat’s companion app(Needed to run the pairing process and control the thermostat.)
- Wi-Fi network name and password(Ensure network is stable and compatible (2.4 GHz commonly supported).)
- Thermostat manual or model number(Helpful for brand-specific pairing steps.)
- Stable power supply for thermostat(Plug in or ensure battery level is adequate.)
- Account credentials for the app(You will sign in to your thermostat account.)
- Optional: extra device for troubleshooting(A tablet or spare phone can help isolate issues.)
Steps
Estimated time: 15-25 minutes
- 1
Power on thermostat and access settings
Make sure the device has power and reach its Settings or Quick Menu. This first step prepares the thermostat for discovery by the app and avoids interruptions during the pairing handshake.
Tip: If your model uses a physical button, locate the Menu or Settings button before powering up. - 2
Enter pairing mode on the thermostat
Follow brand-specific cues to enable discovery (e.g., long-press a button or select Pairing option in Settings). You should see LED indicators or a visible pairing prompt on the screen.
Tip: Don’t release the button until the LED starts blinking or a pairing message appears. - 3
Prepare the companion app
Open the thermostat app on your phone, ensure it’s updated, and login to your account. Have the “Add Device” option ready to start the pairing flow.
Tip: If you’re new to the app, complete any initial onboarding steps before attempting pairing. - 4
Initiate pairing in the app
Choose Add Device or Set Up New Thermostat, then select your model from the list. The app will search for the thermostat’s pairing signal.
Tip: Stay within a few meters of the thermostat to ensure a strong Bluetooth/Wi‑Fi discovery signal. - 5
Confirm pairing on both devices
When the app shows a successful connection, confirm on the thermostat if prompted. The device should appear as online in the app.
Tip: If you’re asked for a network password, re-check for accuracy and avoid copy-paste errors. - 6
Test and finalize the setup
Adjust the temperature, schedule a test, and verify remote control works. Confirm you can monitor status from within the app and with any connected voice assistants.
Tip: Document the pairing time and any network settings for future reference.
Questions & Answers
What does pairing mode do on a thermostat?
Pairing mode makes the thermostat discoverable by the app or hub, enabling the initial exchange of network credentials and device identity. Without it, the device cannot be added to your network or controlled remotely.
Pairing mode makes the thermostat discoverable for setup by your app, so you can connect and control it remotely.
Do all thermostats use pairing mode?
Most modern smart thermostats have some form of pairing mode, but the exact method varies by brand and model. Always consult the manual for brand-specific steps.
Most smart thermostats use pairing mode, but the steps vary by brand.
How long does pairing typically take?
Pairing usually takes 5–15 minutes, depending on your network, app, and device firmware. If you encounter delays, review power and network settings.
Typically five to fifteen minutes.
What should I do if pairing fails?
Check power, restart devices, verify Wi‑Fi credentials, and update apps. If problems persist, contact brand support with model and firmware details.
First check power and Wi‑Fi, then retry. If it still fails, contact support.
Is internet required for initial pairing?
Most models require internet for activation and cloud verification; some can pair offline, but final setup usually needs internet access.
Usually you need internet for activation.
Can I pair multiple devices to one thermostat?
Yes, you can typically pair multiple devices (phone, tablet, smart speaker) but management of authorized devices is brand-dependent.
Yes, you can pair multiple devices; check the app for managing authorized devices.
Watch Video
What to Remember
- Pairing mode makes the thermostat discoverable by apps and hubs
- Follow brand-specific prompts to enter pairing mode
- Verify the connection in the app and test basic functions
- Secure your network and account after pairing
- Keep firmware and apps updated for ongoing reliability