How to Open a Honeywell Thermostat: A Homeowner's Guide
Learn how to safely open a Honeywell thermostat to access wiring and settings. This educational guide covers safety precautions, tools, model variations, and best practices for homeowners troubleshooting thermostats.

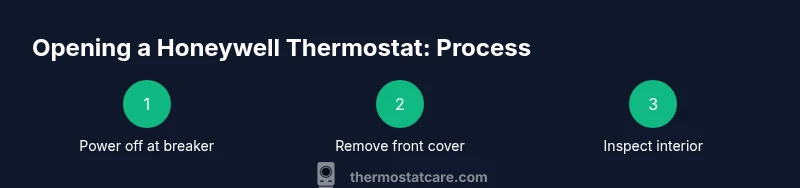
To open a Honeywell thermostat, power off at the circuit breaker, then remove the front cover by unscrewing the screws or releasing the clips, and carefully lift to access the interior. This is a safety-first procedure for homeowners; always verify model-specific steps in your manual. The goal is to access terminals or batteries without damaging the unit.
Why opening a Honeywell thermostat may be necessary
If you’re troubleshooting poor heating or cooling performance, you may need to access the wiring or battery compartment inside the thermostat. For many models, opening the cover lets you inspect for loose wires, corrosion, or a dead battery that could cause intermittent operation. The question often comes down to how to open the honeywell thermostat correctly to avoid damage. According to Thermostat Care, carefully inspecting the interior while powered down reduces the risk of shorts and improves diagnostic accuracy. In this section we’ll examine typical reasons to access the internals and how to approach the task with care.
Identifying your Honeywell model and cover design
Honeywell produces a range of thermostat designs, and the removal method can vary by model. Some newer units hide screws behind the thermostat label, while others use simple clips. Before you pry or unscrew, locate your model number on the back or inside the cover. This helps you consult the correct procedure and avoid forcing parts. The Thermostat Care team found that following model-specific guidelines is the surest path to a safe opening.
Safety prerequisites and protective steps
Power should be off at the circuit breaker before touching any thermostat components. Many Honeywell thermostats operate on low-voltage circuitry, which can be damaged by static discharge or accidental shorts. Use dry hands, keep the area clear of metal objects, and avoid touching exposed terminals. If you have any doubt about covering the interior with a non-conductive shield during maintenance, skip that step and proceed with standard precautions.
Tools and setup before you start
Collect a small set of tools so you aren’t scrambling mid-process. A Phillips and a flat-head screwdriver are usually sufficient for most models; a flashlight helps you see inside the low-light interior. Keep a copy of your model’s manual handy and plan for a few extra minutes if you need to replace batteries or reseat a loose wire. Having the right tools on hand reduces the risk of slips that could damage terminal blocks.
What you might see inside and what to do next
In many Honeywell units, you’ll find a screw-on front plate or a clip-on cover. Inside, look for battery compartments, terminal screws, or a circuit board. If you identify loose wires, gently push them back into their terminals and secure with the appropriate screws. If you encounter a stubborn clip, avoid prying with metal tools; instead, use a plastic pry tool to minimize the risk of cracking the plastic housing.
Tools & Materials
- Flat-head screwdriver(For prying off covers or loosening retention clips)
- Phillips-head screwdriver(For removing front-plate screws)
- Non-conductive gloves(Optional grip and protection)
- Flashlight(Extra light for low-visibility interiors)
- Replacement batteries(If model uses batteries, have the correct type on hand)
- Owner's manual(Keep model-specific instructions handy)
Steps
Estimated time: 15-25 minutes
- 1
Power off at the circuit breaker
Locate the HVAC circuit breaker or the dedicated thermostat circuit and switch it to off. Confirm power is off using a non-contact voltage tester if available. This step prevents shocks and protects the circuit from accidental shorts.
Tip: Always verify no power is present before touching internal components. - 2
Remove the thermostat cover
Use the appropriate screwdriver to remove screws or gently release any clips holding the cover. If there are plastic tabs, apply steady pressure to avoid cracking. Lift the cover slowly to reveal the interior.
Tip: If you’re unsure where screws are, check the model’s diagram in the manual. - 3
Inspect the interior for obvious issues
Look for loose wires, detached terminal screws, or corroded contacts. Do not force wires back into terminals; reseat them firmly but gently. Check the battery compartment if your model uses batteries.
Tip: Take a photo before you touch anything to document the original wiring arrangement. - 4
Secure any loose connections
Tighten any loose terminal screws with the correct screwdriver size. If a wire is damaged, note its label and consult the wiring diagram before replacing. Do not over-tighten screws, which can damage terminals.
Tip: Always power down first; re-check power after reassembly. - 5
Test a safe reassembly
Position the front plate back and lightly press to confirm it sits flush. Reinsert screws and ensure the cover is snug. Restore power at the breaker and observe the thermostat for normal operation.
Tip: If the display flickers, re-check wiring and battery installation. - 6
Power on and verify function
Turn the circuit breaker back on and test basic functions: display lights, temperature setpoints, and schedule if applicable. If issues persist, consult the manual or call a pro for wiring concerns.
Tip: Document any changes you made for future reference.
Questions & Answers
Do I need to turn off power to the HVAC system or just the thermostat when opening the cover?
Always power off at the circuit breaker before opening the thermostat. This reduces the risk of electric shock and protects the HVAC controls from damage, even if your model operates on low voltage.
Yes. Turn off the circuit breaker before opening the thermostat to stay safe and protect the system.
Will opening the thermostat void the warranty?
Opening the unit can affect warranty terms depending on the manufacturer. Check your model’s warranty documentation and contact the manufacturer if you’re unsure before proceeding.
It depends on the warranty; read the terms or contact support if you’re unsure.
What if the cover won’t come off or is stuck?
If the cover is stubborn, avoid forcing it. Use the correct screwdriver or a plastic pry tool and consult the manual. Forcing can crack the housing.
Don’t force it; use the right tool and consult the manual.
Is it safe to open a smart thermostat?
Yes, but exercise caution. Smart thermostats have sealed electronics and tighter assemblies. If you’re unsure about accessing internal components, consider professional help.
It's usually safe if you proceed carefully; otherwise, get a pro.
What should I do if I smell burning or see smoke?
If you detect burning or smoke, power off at the breaker immediately and contact a licensed electrician or your installer. Do not operate the unit further until inspected.
Power off immediately and call a pro if you smell burning.
Watch Video
What to Remember
- Power down before touching thermostat components.
- Model-specific removal methods prevent damage.
- Inspect for loose wiring and replace batteries if needed.
- Reassemble carefully and test all functions after powering up.