How to Make Nest Thermostat Hold Temperature Consistently
A comprehensive, step-by-step guide to getting your Nest thermostat to hold a chosen temperature reliably—including app vs. device controls, common pitfalls, and best practices from Thermostat Care.

To hold a temperature on a Nest thermostat, set the desired temperature and activate Hold in the thermostat UI or the Nest app. Choose the hold duration (until you manually release it or a new schedule kicks in) and confirm the thermostat will stop adjusting automatically. On newer Nest models, you can tap and hold the current temperature or use Hold in Settings. According to Thermostat Care, this keeps a steady comfort level while you’re away.
What holding a temperature really means on a Nest thermostat
A hold prevents the thermostat from following your normal schedule and learning pattern for a set period or until you tell it otherwise. It’s a useful feature when you want a constant temperature while you’re away, during a cold snap, or when you know your routine will be disrupted. Thermostat Care highlights that a hold can help you maintain comfort without chasing small daily tweaks, but it should be used thoughtfully to avoid energy waste. This section explains how the hold feature differs from your regular schedule and eco mode, and why understanding these nuances matters for reliable comfort.
Hold behavior and Nest learning features: what to expect
Nest thermostats are designed to learn your routines and adapt heating and cooling accordingly. When you enable a hold, the thermostat temporarily bypasses those learned adjustments. Depending on your model, a hold can apply indefinitely (until you release it) or for a set duration. If you return to the regular schedule, Nest will resume its learned behavior after the hold ends. For best results, use holds strategically—during vacations, guests’ visits, or when you’re changing your routine for several days—and monitor how it interacts with Eco mode and motion-based adjustments. Thermostat Care recommends pairing holds with a short-term adjustment to calibration if you notice drift.
How to enable hold on the thermostat itself (UI methods)
On most Nest thermostats, you can initiate a hold directly from the device. Wake the display, rotate the ring to set a target temperature, and select Hold. Depending on your firmware, you’ll see options like 'Hold until I change' or a time-based hold (e.g., 2 hours). The steps are quick, usually under a minute, but you’ll want to confirm the hold is active by looking for the Hold indicator on the screen. If you don’t see it, repeat the steps and ensure you’ve successfully confirmed the hold before leaving.
How to enable hold via the Nest app
If you prefer app control, open the Nest app and select your thermostat. Set the temperature you want and choose Hold from the quick actions. Pick the hold type: 'Until I change' or a specific duration if your app version supports it. The app is convenient when you can’t reach the thermostat in person, and it also provides a quick way to review your current hold status and remaining time. Thermostat Care notes that app-based holds are often more visible and easier to manage when you’re away.
Verifying the hold works and adjusting as needed
After enabling hold, allow a few minutes for the thermostat to stabilize at the new target. Check that the display confirms Hold is active and that the temperature remains steady over time. If you notice drift, recheck the target temperature and hold duration, and consider a quick calibration check of the temperature sensors. Consistency may require closing windows, ensuring proper HVAC operation, and removing drafts near the thermostat location. Consistency is easier when you understand how the hold interacts with your home’s HVAC cycles.
Common mistakes and how to avoid them
Some users enable a hold and forget to release it, causing energy usage to run higher than expected. Others rely solely on Eco mode while using holds, which can create conflicting signals if the system re-engages in a condition you didn’t anticipate. Ensure you know how long the hold lasts if you’re away, and always double-check that the thermostat is actually in Hold mode rather than simply displaying the new temperature. If you notice frequent overrides, revisit your schedule and consider an extended hold for longer disruptions.
Real-world scenarios where a hold is especially useful
Holds shine when you’re on vacation, hosting guests, or changing your routine for a few days. They’re also helpful during renovation work when doors are frequently opened, causing temperature fluctuations. A temporary hold helps you avoid uncomfortable swings and reduces the likelihood of HVAC cycling out of sync with your needs. Thermostat Care’s guidance emphasizes using holds as a tool for temporary stability rather than a replacement for long-term scheduling.
Safety and best practices for reliable holds
Always ensure your thermostat is mounted properly and away from heat sources, direct sunlight, or drafts that could skew readings. Regularly check for firmware updates, which can improve hold reliability and overall performance. Keep the Nest app connected and use a stable Wi-Fi network to prevent delays in hold activation or release. For households with sensitive environments (nurseries, medical needs, etc.), consider setting a consistent hold alongside a conservative schedule to minimize energy waste while preserving comfort.
Tools & Materials
- Nest thermostat (model supports Hold)(Ensure you can access Hold from the device or app)
- Smartphone or tablet with Nest app(Sign in to your Google account for remote holds)
- Stable Wi-Fi connection(Necessary for app-based holds and updates)
- Optional: small screwdriver for mounting checks(Only if you suspect sensor placement or mounting issues)
- Notepad or digital note app(To log hold times and any adjustments)
Steps
Estimated time: 15-25 minutes
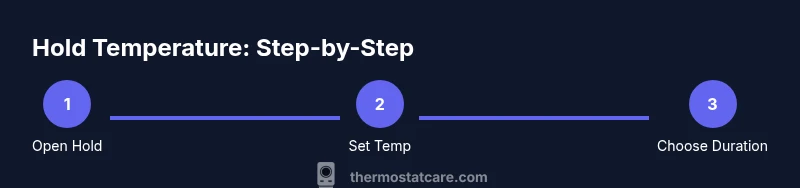
- 1
Open Hold menu on the thermostat
Wake the thermostat display and press the ring to access controls. Rotate to highlight Hold and select it. Confirm that the Hold option is active by checking for the Hold indicator on the screen.
Tip: If Hold isn’t visible, ensure your firmware is up to date and you’re using a supported model. - 2
Set the target temperature
With Hold selected, adjust the temperature to your preferred setting. Use the dial to fine-tune and ensure it matches your comfort needs before confirming.
Tip: Small changes can improve comfort without drastically increasing energy use; aim for 1-degree adjustments where possible. - 3
Choose the hold duration
Select how long you want the hold to last. Options vary by model; you may see 'Until I change' or a set time. Pick the option that best matches your schedule.
Tip: If your model doesn’t show a duration, use 'Until I change' for flexibility. - 4
Confirm and exit
Confirm the hold activation and return to the main screen. The Hold icon should be visible, indicating the thermostat will maintain the temperature as set.
Tip: If the icon doesn’t appear, re-enter Hold to double-check your selection. - 5
Test hold stability
Wait 5–10 minutes and observe the temperature on the display. Ensure it remains constant despite minor room fluctuations.
Tip: If you see drift, check nearby drafts, adjust the sensor location, or recalibrate if your model supports it. - 6
Optional app hold setup
Open the Nest app and repeat the hold process remotely. Confirm the app shows the same target temperature and Hold status.
Tip: App holds are handy when you’re away; ensure push notifications are enabled for hold updates. - 7
Return to normal schedule
When you’re ready to resume automatic scheduling, disable Hold in the thermostat or app. The system will begin following your established schedule again.
Tip: If you plan to return to Hold later, note the end time or conditions to avoid repeated reconfiguration.
Questions & Answers
What does 'hold' mean on Nest thermostat?
Hold stops the thermostat from following your regular schedule and learning patterns for a set period or until you release it. It creates a steady temperature regardless of daily changes.
Hold temporarily stops the schedule, keeping a steady temperature until you release it or set a new one.
How long does a hold last on Nest?
The duration can be 'Until I change' or a specific time if your model supports it. If you choose 'Until I change', the hold remains active until you manually revert it.
Hold can last until you change it, or for a set time if your model offers that option.
Can I use Hold with Auto-Schedule or Eco mode?
Yes, you can use Hold alongside Eco mode, but be aware that Eco can override or conflict with long holds during energy-saving periods. Plan holds around your preferred energy balance.
Hold can work with Eco mode, but check for conflicts that might cause unexpected changes.
Why isn’t the hold stick when I power cycle the thermostat?
A power cycle can reset temporary settings. Re-activate Hold after reboot and verify the indicator is showing Hold. If this becomes frequent, check for firmware updates.
Power cycles can reset holds; re-enable Hold and confirm it’s active.
Is hold different on Nest App vs. on the device?
The hold functions are designed to mirror each other, but timing and UI may vary slightly between the app and the device. Always verify the active Hold status in both places if you’re managing from multiple devices.
Holds on the app and device should be the same, but double-check both sides.
Watch Video
What to Remember
- Hold lets you lock in a temperature temporarily.
- Use Hold on the thermostat or in the Nest app for flexibility.
- Check for interaction with Eco mode and learning features.
- Verify Hold status after changes and power interruptions.
- Return to your normal schedule when the disruption ends.