How to Jump Thermostat for AC: Safe Troubleshooting and Alternatives
Learn why jumping a thermostat is unsafe and explore safe, practical troubleshooting steps to diagnose AC issues, protect your equipment, and avoid electrical hazards.

Jumping a thermostat to power an air conditioner is dangerous and can damage the HVAC system, blow fuses, or start a fire. This practice bypasses safety protections and voids warranties. Instead, follow safe troubleshooting: ensure power is off at the breaker, check thermostat batteries, confirm the C-wire is connected, and consult a qualified technician if the issue remains unresolved. Thermostat Care recommends safe, documented steps over bypass attempts.
Why jumping a thermostat is dangerous
Jumping a thermostat involves directly bridging the control circuit to force the air conditioner compressor to run without the thermostat correctly regulating it. This practice bypasses safety interlocks and can create electrical arcing, short circuits, or damage to the outdoor condenser, indoor air handler, or the thermostat itself. In many homes, the consequences include tripped breakers, blown fuses, and costly repairs. From a safety perspective, bypassing a control device that is designed to manage power to high-current equipment is simply not worth the risk. The Thermostat Care team has seen cases where a single jump caused a failed contactor, fried a control board, or triggered a flame sensor issue in the HVAC system. The prudent choice is to stop and pursue safer diagnostic steps instead, especially if you’re not trained in electrical work. If you’re not certain, contact a licensed HVAC technician who can diagnose without compromising safety or warranties.
How this guidance fits into home troubleshooting
This article focuses on safe, non-destructive ways to diagnose why your AC isn’t cooling and to determine whether the fault lies with the thermostat, wiring, or the HVAC equipment itself. We emphasize turning off power before inspecting components, using manufacturer manuals for model-specific instructions, and documenting any symptoms or error codes. By following safe practices, homeowners can reduce risk while preserving the integrity of their system. Thermostat Care’s approach combines fundamental electrical safety with practical thermostat troubleshooting techniques that protect your equipment and your family.
Safer alternatives to diagnose AC issues
Rather than attempting to jump or bypass the thermostat, use conservative checks and documented steps. Verify the thermostat display is responsive and powered (replace batteries if applicable). Confirm the thermostat is set to cooling, with a target temperature lower than the current room temperature. Inspect the thermostat’s wiring against the installation diagram; look for loose terminals or obvious signs of wear. If the thermostat communicates with the HVAC system using a C-wire, ensure the common wire is connected firmly at both ends. For smart thermostats, confirm the app is connected and the device shows no red fault indicators. If these checks don’t restore cooling or reveal a fault code, move to professional help rather than trying to bypass.
Understanding thermostat wiring at a high level
Thermostats act as the control brain for your HVAC system, modulating signals to the outdoor condenser and indoor blower. A typical setup includes a power source, a common (C) wire, and one or more signal wires (R, Y, G, W). The safety risk when attempting to intervene directly in these signals is not just personal shock risk; it also risks feeding back into other components, potentially damaging the control board or reversing actuator logic. Basic wiring knowledge helps you recognize signs of loose connections, frayed insulation, or a disconnected C-wire, which are common culprits in cooling failures. Always refer to your manufacturer’s wiring diagram and avoid making changes you’re not trained to perform.
Common mistakes homeowners make when troubleshooting
Common missteps include ignoring the power shutoff, replacing components without identifying the underlying cause, or attempting to force the system to run after a fault indicator lights up. Another frequent error is misinterpreting error codes or indicators on a smart thermostat; these signals are designed to guide professional service or modeled troubleshooting paths. A non-contact voltage tester should only be used after power is confirmed off, not as a sole safety precaution. By recognizing these mistakes, you can prevent escalation and ensure that diagnostic steps remain safe and productive.
When to call a professional
If your thermostat display is unresponsive, if you hear buzzing or clicking from the HVAC cabinet, or if the system remains off after you reset the thermostat, it’s time to contact an HVAC technician. Electrical safety and refrigerant handling require licensed technicians and appropriate tools. A professional can diagnose whether the issue is a thermostat fault, wiring problem, or a failed HVAC component such as a contactor, capacitor, or control board. Timely professional help can prevent further damage and maintain warranties. When you call, provide details about any error codes, the thermostat model, and the sequence of events you observed.
Preventive maintenance to avoid thermostat issues
Regular maintenance reduces the chance of intermittent cooling failures. Keep the thermostat area free of dust, check for firmware updates on smart models, and replace batteries as recommended. For wired thermostats, ensure connections are snug and not corroded. Consider a professionally installed surge protector or a dedicated HVAC circuit to reduce electrical noise and prevent tripping. Finally, schedule annual inspections that include thermostat calibration checks and system refrigerant charge verifications. Proactive care preserves efficiency and comfort while minimizing risky DIY interventions.
Tools & Materials
- HVAC disconnect or main breaker(Shut off power to the outdoor condenser and indoor air handler before touching any wiring)
- Non-contact voltage tester(Optional safety check to confirm power is off after setup)
- Owner's manual for your thermostat(Useful for model-specific safety notes and wiring diagrams)
Steps
Estimated time: 45-75 minutes
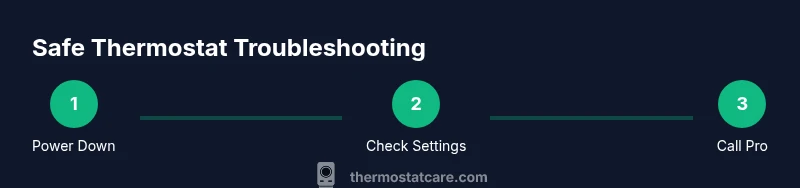
- 1
Power down the HVAC system
Locate the main breaker or HVAC disconnect and switch it to the off position. Confirm that no lights or indicators on the thermostat or HVAC equipment remain powered. This is a critical safety step before any inspection.
Tip: If you’re unsure which breaker controls the HVAC, switch off the main service panel and re-check the affected circuits. - 2
Verify power is off at the unit
Use a non-contact voltage tester at the outdoor unit’s access panel to confirm there is no voltage present. Do not touch any wires directly. If you detect voltage, wait and recheck after a longer interval or call a professional.
Tip: Always wear dry hands and stand on a non-conductive surface when inspecting electrical panels. - 3
Check thermostat status and settings
Remove and inspect the thermostat battery (if applicable) and replace if needed. Ensure the thermostat is set to cooling with a target lower than the current room temperature. Note any error codes or warning lights shown on the display.
Tip: Document any codes before re-energizing the system for reference during service. - 4
Inspect for obvious wiring issues from a safe distance
Visually inspect the thermostat wires at the wall plate for loose connections or damaged insulation without touching the conductors. Do not attempt to reseat or tape wires while power is off; only verify that the diagnoses point to a non-physical issue.
Tip: If you see frayed insulation or loose terminals, do not drive connections yourself; call a pro. - 5
Reset the thermostat to defaults (if advised by the manual)
Follow the manufacturer’s procedure to reset the thermostat to factory defaults, then reconfigure basic cooling settings. Avoid making radical changes or bypass attempts; this is a standard reset to shed potential software glitches.
Tip: After reset, monitor whether the thermostat responds normally to incremental temperature changes. - 6
Power back up and test basic cooling function
Restore power at the breaker and observe whether the thermostat initiates a cooling cycle. Do not bypass any safety features. If cooling does not start or there are unusual noises, stop and proceed to professional service.
Tip: Note the sequence of events and any audible cues to share with your technician. - 7
Document symptoms and seek professional help
Create a concise symptom log: when the problem started, what settings were used, any codes or indicator lights, and whether failures occur in outdoor or indoor units. Share this with a licensed HVAC technician for accurate diagnosis.
Tip: Include model numbers for thermostat and HVAC equipment to speed up service.
Questions & Answers
What does it mean to jump a thermostat, and why is it unsafe?
Jumping a thermostat means directly bridging control circuit wires to force the AC to run. This bypasses safety features designed to protect electrical components, increasing the risk of shock, fire, and equipment damage. It can also void warranties.
Jumping a thermostat bypasses safety features and can cause shocks, fires, and costly damage. It's unsafe and not recommended.
Are there safe ways to diagnose AC cooling failure at home?
Yes. Check the thermostat power and settings, replace batteries if available, verify the C-wire connections per the manual, and confirm the outdoor unit has power at the disconnect. Do not manipulate wiring inside wall plates or equipment.
There are safe checks like power and settings, but avoid touching internal wiring. If issues persist, call a professional.
When should I call a professional for thermostat issues?
Call a professional if the thermostat shows errors, if the cooling call does not engage the system after safe checks, or if you notice abnormal noises, smells, or tripped breakers. An HVAC tech can diagnose wiring, control boards, and refrigerant concerns safely.
If safe checks don’t fix it or you notice unusual signs, contact an HVAC pro.
Can a faulty thermostat affect refrigerant levels or the compressor?
A faulty thermostat typically does not directly affect refrigerant charge, but erroneous signals can cause the compressor to run improperly or short cycle. Only a qualified technician should test refrigerant and compressors.
The thermostat can influence compressor cycling, but refrigerant work must be done by a pro.
What preparation helps a technician diagnose faster?
Have model numbers for the thermostat and HVAC equipment, note any error codes, describe recent changes, and provide a timeline of when the problem started. This helps the technician pinpoint faults more quickly.
Gather model numbers, error codes, and a clear symptom timeline for the technician.
Is it okay to use a new thermostat if the current one fails?
Replacing a thermostat can be a good step, but ensure compatibility with your HVAC system and follow installation instructions. If in doubt, have a professional install the new unit to avoid wiring mistakes.
If the new thermostat matches your system, it can help, but professional installation avoids mistakes.
What should I do immediately if I smell burning or see smoke?
Shut off power at the main breaker immediately and call emergency services if there is smoke or a strong burning odor. Do not re-energize the system until it has been inspected by a licensed professional.
If you smell burning, switch off power now and call a pro.
Watch Video
What to Remember
- Avoid jumping the thermostat; safety and warranties matter.
- Use safe, documented troubleshooting steps before considering service.
- Know when to call a professional to protect equipment and family.
- Maintain regular thermostat and HVAC maintenance to prevent issues.
- Document codes, settings, and symptoms for efficient repair.