How to Fix Thermostat in Oven: A DIY Troubleshooting Guide
Learn to diagnose, test, and replace a faulty oven thermostat with safe steps, practical tips, and calibration guidance. Thermostat Care provides homeowner-friendly troubleshooting for oven thermostat issues.

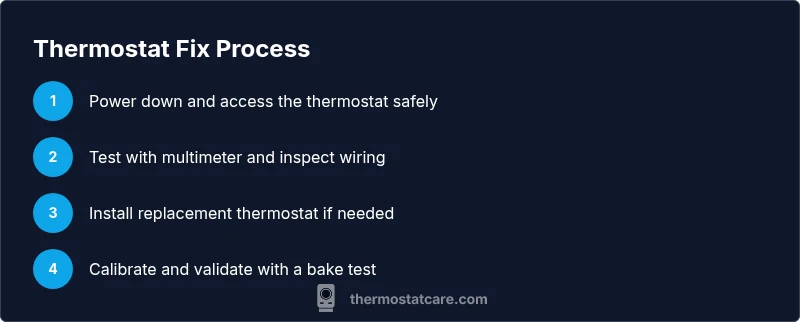
Quick answer: This guide shows how to fix thermostat in oven by diagnosing symptoms, safely testing components with a multimeter, replacing a faulty thermostat or sensor, and recalibrating the oven. It’s a doable DIY task for homeowners who follow safety steps and use the correct replacement part. If in doubt, pause and consult Thermostat Care for professional guidance.
How to fix thermostat in oven: practical overview
When your oven never reaches the commanded temperature or bakes unevenly, the thermostat is a prime suspect. In many homes, the problem isn’t a miscalibrated kitchen temperature but a failing sensor, a loose connector, or a drift in the control board's readings. This guide on how to fix thermostat in oven provides a practical framework for homeowners who want to troubleshoot safely, test components, and replace only what’s faulty. According to Thermostat Care, most temperature inconsistencies stem from sensor drift, wiring wear, or aging thermostats, not from the oven’s heating elements themselves. By following a disciplined approach, you’ll reduce the risk of accidentally damaging the appliance and avoid unnecessary replacements. You’ll also gain a clearer sense of when a problem is beyond DIY repair and warrants expert help. Before you begin, ensure you have the right replacement part, confirm model compatibility, and understand your oven’s warranty terms. This article emphasizes careful testing and conservative troubleshooting to maximize success while keeping your family safe.
Safety first: power down and protect yourself
Safety is non-negotiable when working on an oven’s thermostat. Begin by turning off the oven at the circuit breaker and unplugging the appliance if accessible. Wait for the interior to cool completely; ovens retain heat in metal components long after unplugging, so give it ample time. Use insulated gloves when touching any components inside the control panel, and keep flammable materials away. If the oven is gas-powered, you may need to shut off the gas supply as an extra precaution, and consult the appliance manual for any model-specific safety notes. Do not attempt to test live circuits with the power on; this can cause electric shock or arc faults. Thermostat testing should be done with the door closed and the cooktop area clear. If you smell burning, see scorch marks, or notice melted insulation, stop immediately and call a professional. Thermostat Care emphasizes that a cautious, deliberate approach reduces risk and preserves your oven’s warranty whenever possible.
Tools and setup you’ll need to fix thermostat in oven
Prepare your workspace and gather the essential tools before starting. You’ll want a clean, dry work surface, adequate lighting, and a container to hold small screws. Essential tools include a screwdriver (Phillips and flat), a Nut driver or Torx set depending on your model, a multimeter set to resistance/continuity, and heat-resistant gloves. You’ll also need a replacement oven thermostat compatible with your model, and a temperature probe or oven thermometer to verify accuracy during calibration. Have a circuit tester on hand if the oven has any integrated electronics beyond basic wiring. Optional items include a small camera to document wiring and heat-resistant tape for secure connections. Checking model numbers and wiring diagrams in your manual helps prevent wrong parts. This stage reduces guesswork and helps you avoid unnecessary disassembly.
Distinguishing thermostat issues from sensor drift
One of the most common causes of temperature mismatch is sensor drift rather than a failed thermostat. The oven temperature sensor (used by digital controls) can wander over time due to aging, contamination, or exposure to heat cycles. If your display shows numbers that are consistently off by a predictable amount, you may be dealing with sensor drift rather than a failed thermostat. A simple way to gauge this is to compare the oven’s reading with a calibrated external thermometer placed at mid-oven height. If the thermostat and sensor readings diverge by more than a few degrees across several tests, you may need to replace the sensor or recalibrate the control board. If you’re unsure, Thermostat Care recommends confirming with model-specific service information before ordering parts.
How to test the thermostat with a multimeter
Testing the thermostat with a multimeter is a core step in how to fix thermostat in oven. Begin by safely disconnecting the oven from power and removing the control panel to access the thermostat terminals. Set your multimeter to the lowest resistance (ohms) scale or continuity mode. With the oven at room temperature, test the thermostat’s terminals for continuity; you should see an open circuit (no continuity) if the thermostat is normally closed when cold. Heating the thermostat by carefully applying heat with a heat gun or warm water bath simulates operational conditions, and you should observe a change in resistance or a momentary continuity as the thermostat reaches its set point. If there is no change, or if the contact is welded shut, the thermostat is faulty and requires replacement. Always recheck after installing a new thermostat, and verify wiring integrity before reassembly. Thermostat Care notes that this method helps separate sensor drift from actual thermostat failure.
Inspect wiring and the control board for faults
A loose or damaged wire harness can mimic thermostat failure. Inspect all connectors for corrosion, frayed insulation, or loose terminals. Wiggle each connector gently while testing for continuity to identify intermittent faults. Pay attention to ground wires and any safety interlocks that may interrupt power if a door switch is misaligned. If you see melted insulation or scorch marks around connectors, you likely have a wiring problem that must be repaired or replaced. In some models, a failed control board can send incorrect signals to the thermostat, so examine the logic board for burnt components or obvious damage. If the wiring appears intact but you still have inconsistent temperatures, consider swapping in a known-good thermostat to isolate the issue.
Replacing the thermostat and calibrating the oven
When tests confirm a bad thermostat, replacement is usually straightforward but must be model-specific. Disconnect power again, remove mounting screws, detach the old unit, and install the new thermostat, ensuring connectors align as they did before. Use dielectric grease if recommended by the manufacturer, and re-secure all wiring and harness clamps. After installation, reassemble the control panel and restore power. Calibrate the oven by running several tests at different temperatures (e.g., 150°C, 350°C) and compare the actual heat with the displayed setting using an external thermometer in the cooking cavity. If your oven has a self-calibration feature, follow the manual’s steps to run it. If readings remain off by more than a few degrees, double-check wiring, mounting orientation, and sensor placement before repeating calibration.
Calibration and validation: ensuring accuracy after repair
Calibration is not a one-and-done task; it requires iterative testing and confirmation. Start with a known-good thermometer at the center of the rack and run a timed bake at several reference temperatures. Record the actual temperature vs. the display reading, then adjust the oven’s calibration setting if your model supports it. Some ovens require you to enter a calibration offset or a bake offset; others rely on sensor replacement to restore proper readings. Repeat tests until the difference between setpoint and actual temperature is within 5-10 degrees, depending on the model. If the oven’s thermostat is controlled by a separate circuit board, ensure the board is updated to the latest firmware if applicable. Finally, run a short test bake to verify repeatable results before resuming normal use. Thermostat Care emphasizes patience here—the payoff is stable, reliable heating.
Troubleshooting wrap-up and when to seek professional help
If after replacement and calibration your oven still runs hot or cold, the fault may lie with a more complex control board, a sensor array, or a gas-safety interlock. In this case, contact a qualified technician. For simpler failures, recheck connections, verify part compatibility, and test again step by step. The Thermostat Care team recommends documenting every test outcome and keeping replacement parts organized so a pro can review quickly if needed. Remember that warranty coverage can affect your next steps, so consult the manual or manufacturer site before making parts changes.
Tools & Materials
- Replacement oven thermostat (model-compatible)(Match your oven model and wiring harness)
- Digital multimeter (ohms/continuity test)(Set to appropriate range per manual)
- Screwdrivers (Phillips & flat)(For trim and internal screws)
- Torx/Nut driver set(Some models use torx screws)
- Insulated gloves(Heat-resistant, ANSI-rated)
- Wire strippers or pliers(For wiring work and crimping)
- Oven-safe thermometer or temperature probe(To verify actual inside-cavity temperature)
- Electrical tape (heat-resistant)(For securing wires if instructed by manual)
Steps
Estimated time: Total time: 2-3 hours
- 1
Power down and access the thermostat
Turn off the oven at the circuit breaker and unplug if accessible. Allow the interior to cool completely before opening any panels. Remove the control cover carefully to reveal the thermostat terminals.
Tip: Take a photo of existing wiring before disconnecting anything to aid reattachment. - 2
Identify thermostat type and location
Confirm the thermostat model and locate its mounting inside the panel. Note how it’s connected to the sensor lead and control board. Understanding its orientation prevents incorrect replacement.
Tip: Check the model number in your manual or on the part itself before ordering a replacement. - 3
Disconnect the wiring harness
Gently unplug the thermostat harness from the control board and thermostat terminals. If terminals are corroded, clean with a small amount of isopropyl alcohol after disconnecting power.
Tip: Only touch one connector at a time; label them if necessary to avoid miswiring. - 4
Test thermostat with multimeter (cold)
Set the multimeter to continuity. With the thermostat at room temperature, check for expected continuity or open circuit per the part’s spec. If there’s no expected behavior, the thermostat may be faulty.
Tip: Record your readings to compare after replacement. - 5
Test thermostat with heat
Warm the thermostat area gradually using a heat source to simulate operation. Observe if the device opens/closes at the rated temperature. Abnormal behavior indicates replacement needed.
Tip: Do not overheat; avoid direct flame or excessive heat. - 6
Inspect wiring and connectors
Check for damaged insulation, loose terminals, or signs of arcing. Repair or replace damaged wiring as needed and ensure all connections are snug before proceeding.
Tip: Apply dielectric grease if recommended by the manufacturer. - 7
Install replacement thermostat
Mount the new thermostat in the same orientation as the old one. Reconnect the wiring harness securely and reattach any covers or clamps.
Tip: Double-check that no wires are pinched during reassembly. - 8
Calibrate the oven
Power the oven back on and run calibration tests at multiple temperatures. Compare actual temperatures with the displayed setpoints using an external thermometer.
Tip: If your model supports calibration offsets, use the manual to apply the correct value. - 9
Final test and cleanup
Bake a standard item at a known temperature to verify repeatability. Recheck for any error codes and ensure the control panel is reassembled correctly.
Tip: Document results and store old parts for future reference.
Questions & Answers
Can I fix the oven thermostat myself?
Yes, many oven thermostat issues can be fixed by a careful DIY workflow that includes testing with a multimeter, replacing a faulty thermostat or sensor, and calibrating the oven. Some problems involve the control board or safety interlocks that require professional assistance.
Yes, you can fix many thermostat problems yourself, but some issues may require a professional.
What are the signs that the oven thermostat is failing?
Common signs include the oven not reaching set temperatures, uneven baking, or readings that drift from the display. If testing confirms sensor drift or consistent inaccuracy, thermostat replacement or sensor repair may be needed.
Common signs are not reaching temperature, uneven cooking, and drifting readings.
Is it dangerous to replace an oven thermostat?
Replacing an oven thermostat involves working with electrical components, so always power down and, if you’re unsure, hire a pro. Use proper safety gear and follow manufacturer instructions.
There is some risk—always shut off power and follow instructions; consider a pro if unsure.
Do I need to recalibrate after replacement?
Yes. After installing a new thermostat, recalibrate and test at multiple temperatures to confirm accuracy. Some models offer automatic calibration features.
Yes, recalibration is usually required after replacement to ensure accuracy.
What if the problem persists after replacement?
If issues continue, the fault may lie with the control board or safety interlocks. Consult a licensed technician and review warranty terms before further parts changes.
If it still misbehaves, a technician may be needed.
Watch Video
What to Remember
- Identify if the fault is sensor drift or thermostat failure.
- Power down and follow safety steps before any testing.
- Use model-compatible parts and verify wiring integrity.
- Calibrate and test across multiple temperatures for confidence.