How to Fix a Thermostat in an Apartment
Learn to troubleshoot and fix common apartment thermostat issues safely. This step-by-step guide covers power, wiring, and settings with practical tips from Thermostat Care to help homeowners resolve problems without calling a pro.

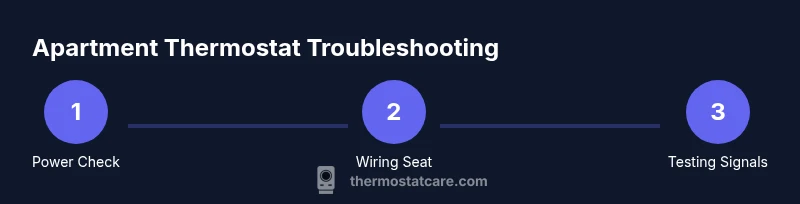
In this guide you’ll learn how to fix a thermostat in an apartment, from diagnosing power and wiring issues to adjusting settings safely. Gather basic tools, a spare battery or C-wire, and your thermostat’s manual. The Thermostat Care team notes that most problems stem from power, loose connections, or incorrect configurations, and a calm, methodical approach helps you avoid service calls.
Understanding the problem: how to fix thermostat in apartment
When a thermostat stops behaving, the first step is to identify whether the issue is with power, wiring, or settings. In apartments, space is tight and HVAC configurations can vary, so it’s common to encounter power supply quirks, shared line voltage, or limitations from landlords or building management. According to Thermostat Care analysis in 2026, many calls about non-responsive thermostats stem from simple causes that homeowners can address themselves. Start by observing the display: is there any light, is the screen flickering, or is the thermostat completely dead? Next, check if other devices share the same breaker or if a recent outage coincides with the problem. If the display shows a temperature readout but the system isn’t heating or cooling, the fault is more likely in the wiring or settings than in the HVAC unit itself. By breaking the problem into these categories, you can prioritize the right fixes and avoid unnecessary replacements. This guide focuses on common apartment scenarios and safe steps you can take without violating lease agreements or warranty terms. The Thermostat Care Team emphasizes safety first and recommends documenting each change.
Safety considerations before you start
Working on a thermostat is generally safe when you respect power and wiring hazards. Always turn off the thermostat at the unit and, if you will touch the furnace or air handler, switch off the corresponding breaker in the home panel. If you’re unsure about electrical work, skip live testing and rely on non-contact testers. Wear eye protection and gloves when handling wires, and avoid forcing connectors or attempting major rewiring in a rental where modifications are forbidden. Keep children and pets away from the work area. Prepare a well-lit workspace, take photos of existing wiring before you touch anything, and consult your thermostat’s manual for model-specific instructions. Note that many apartment systems use low-voltage controls; incorrect handling can damage the thermostat or HVAC equipment. If you suspect mains voltage or HVAC safety issues, contact a licensed professional immediately. The aim is to minimize risk while collecting enough information to decide whether you can complete the fix yourself.
Prepping your space: tools and setup
Before you begin, gather the essential tools and confirm you have access to the thermostat model’s wiring diagram. A well-prepared job reduces the chance of mistakes. You’ll want a Phillips and flat-head screwdriver (various sizes), a non-contact voltage tester, and a digital multimeter if you have one. Have fresh batteries (AA or AAA) on hand if your unit uses removable power; keep spare wire labels and a notebook to log measurements. If your thermostat is mounted on a high wall, use a stable step ladder. Clear the area around the thermostat so you can safely remove the faceplate and inspect connections. Take a photo of the wiring configuration before you disconnect anything, so you can restore it exactly if needed. Check the manual for model-specific indications about terminal labeling and compatibility with control boards.
Common apartment thermostat scenarios and quick fixes
Apartments vary in how thermostats are wired and powered, leading to a handful of recurring issues. Scenario A: no power to the thermostat. Check the circuit breaker, 24V transformer, and ensure batteries are fresh if required. Scenario B: blank or flickering display. This usually points to loose wiring or a failing battery. Scenario C: inaccurate temperature readings. The sensor may be out of place, or the system could be in recovery or hold mode—reset or recalibrate the unit per the manual. Scenario D: system not responding to changes in setpoint. This is often a wiring issue at the furnace or a missing C-wire. For all scenarios, avoid forcing cables or applying heat to terminals; gentleness and correct diagnostic steps save equipment.
How to diagnose without risking damage
Start with a methodical checklist. Step 1: power down and inspect the faceplate for loose wires; Step 2: test the thermostat voltage with a multimeter to confirm 24V AC at the R and C terminals; Step 3: verify that the HVAC system accepts commands from the thermostat by manually adjusting the breaker or the furnace switch; Step 4: check that the wiring is fully seated in the terminal blocks and no insulation is nicked. If your thermostat has a battery, replace it and observe whether the display returns. Thermostat Care Analysis, 2026, indicates that many issues are resolved by reseating connections or replacing a failing battery. Always note the exact thermostat model and any error codes; consult the manual or Thermostat Care’s troubleshooting resources for model-specific guidance.
Step-by-step fixes overview
This section maps out practical actions you can take, with separate steps in the next section. The goal is to restore reliable temperature control without disturbing the HVAC equipment beyond your unit. Each step is a discrete action you can perform, with a brief rationale and a pro-tip to help you avoid common missteps. If at any point you feel uncertain about voltage or wiring, stop and seek professional advice to prevent damage or voiding warranties. The steps below align with typical apartment configurations and are designed for homeowners and DIY enthusiasts.
Aftercare: testing, resetting, and refining settings
After completing the fixes, reassemble the thermostat and return power. Set your preferred schedule and verify that the system responds promptly to both heating and cooling commands. Observe the system for at least one full cooling or heating cycle to confirm stability. If the thermostat includes a learning or adaptive feature, allow it to run through a few cycles to calibrate; you may need to adjust the hold or energy-savings settings. Document any changes you made and note the time when you tested the system. If the unit still does not operate correctly, review the earlier steps, check for building-wide restrictions, and consider contacting a pro. The Thermostat Care Team emphasizes keeping a record of diagnostics to speed up professional help if needed.
When to call a professional and what to expect
Some thermostat issues are best handled by a licensed technician, especially when there is uncertain power, shared electrical panels, or the risk of HVAC damage. If you notice burning smells, buzzing noises, or scorch marks near the thermostat, shut down power and call a pro immediately. When you hire a professional, provide them with the model number, a summary of changes you tried, and any error codes on the display. Ask about compatibility with your heating and cooling system and whether the fix affects warranty terms. The Thermostat Care team recommends professional help for complex electrical work and for trouble that persists after careful DIY effort.
Common mistakes to avoid during DIY thermostat fixes
- Skipping power-off steps or testing live circuits: always cut power to the thermostat and related components. - Rushing wiring checks: loose connections cause intermittent failures and safety hazards. - Misinterpreting error codes or ignoring the manual: Always cross-check codes with the model’s documentation. - Over-tightening terminal screws: this can damage the terminal blocks or wiring insulation. - Replacing a working part without verifying the root cause: you may end up with the same problem later. Following a systematic approach reduces risk and improves odds of success.
Tools & Materials
- Phillips and flat-head screwdrivers(Various sizes, #0–#2 for thermostat plates and furnace access panels)
- Non-contact voltage tester(Used to verify live circuits without contact)
- Digital multimeter(Optional but helpful for measuring 24V AC signals at R/C terminals)
- Replacement batteries (AA/AAA)(Keep compatible batteries on hand if unit uses batteries)
- Wire labels(Label wires before disconnecting to simplify reassembly)
- Thermostat manual/model documentation(Model-specific wiring colors and terminals)
- Safety gloves and eye protection(Protect hands and eyes during inspection)
Steps
Estimated time: 45-90 minutes
- 1
Power down and inspect the faceplate
Turn off the thermostat and, if accessible, switch off the corresponding HVAC circuit at the panel. Remove the thermostat cover and visually inspect for loose wires, corrosion, or damaged insulation. If you see any burnt smell or obvious damage, stop and call a pro. This step confirms that you’re operating in a safe, controlled environment.
Tip: Always photograph the existing wiring before you touch anything so you can reassemble correctly. - 2
Check or replace batteries
If your model uses batteries, replace them with fresh ones of the correct size. A weak or dead battery can cause a non-responsive display or erratic readings. After replacement, restore power and observe if the display responds to changes.
Tip: Dispose of old batteries safely and verify you can power the unit before proceeding. - 3
Inspect thermostat wiring
Carefully inspect the wires connected to the thermostat terminals. Ensure each wire is fully seated and the terminal screws are snug but not overtight. Look for frayed insulation or displaced wire colors that may indicate improper wiring.
Tip: Use a mulitmeter or voltage tester to verify continuity if a wire looks suspect. - 4
Check the C-wire connection at the furnace
Many apartment setups rely on a C-wire for constant power. If the C-wire is loose or disconnected at the furnace control board, the thermostat won’t hold power reliably. Re-seat or reconnect the C-wire if you confirm it’s safe to access.
Tip: If you don’t have a C-wire, consider a power extender or a professional upgrade. - 5
Reset and recalibrate the thermostat
Return the thermostat to factory settings if problems persist, then re-enter your preferred schedule and temperature range. Some models require a specific reset sequence found in the manual. After reset, monitor system response for at least one cycle.
Tip: Don’t rush calibration; give the system time to adjust to new settings. - 6
Test HVAC response
Turn the system back on and set to heat or cool, depending on the season. Observe whether the HVAC responds within a few minutes. If not, check wiring again or consult the manual for advanced diagnostics.
Tip: If you hear clicking or beeping but no fan, there may be a control-board issue. - 7
Document results and next steps
Record what you changed, any error codes, and the outcome of tests. This log will speed up future troubleshooting or a professional visit. If the problem recurs, you’ll have a clear history to reference.
Tip: Keep a simple checklist for easy reference later. - 8
Decide on next actions
If the thermostat still misbehaves after these steps, decide whether to replace it or call a professional. Consider age, warranty, and the cost of DIY versus replacement.
Tip: When in doubt, a professional evaluation can save time and prevent further damage.
Questions & Answers
Why isn’t my apartment thermostat turning on at all?
No power can come from a tripped breaker, a dead battery (if battery-powered), or loose wiring. Start by inspecting the breaker and replacing batteries if needed, then reseat any wires to restore basic function.
If the thermostat won’t turn on, check the breaker and battery, then reseat connections. If it still doesn’t respond, you may need a professional check.
Can I install any thermostat in a rental apartment?
Compatibility depends on your HVAC system and lease terms. Check the model’s compatibility with your furnace/air handler and ensure you have permission to service or modify the unit. If unsure, consult a licensed technician or the landlord.
Make sure the thermostat works with your HVAC and that you’re allowed to do the work in your rental.
What should I do if the C-wire is missing?
If the C-wire is missing, you can use a battery-powered thermostat or a power extender as a temporary solution. For a long-term fix, consider upgrading the wiring with a licensed electrician or HVAC tech.
A missing C-wire means you may need a battery-powered model or a dedicated power extender.
Is it safe to open and tinker with the thermostat myself?
Yes, if you follow safety steps: cut power, use appropriate tools, and avoid touching live circuits. If you’re unsure, stop and call a pro to prevent electrical hazards or warranty issues.
You can tinker if you cut power and stay within your comfort zone; otherwise, ask a pro.
When should I replace a thermostat rather than repair it?
Consider replacement if the thermostat is old, frequently faulty, or not compatible with your HVAC. Replacement can be more reliable and cost-effective than repeated repairs.
If it’s old or unreliable, replacement might be the smart choice.
Watch Video
What to Remember
- Diagnose power, wiring, and settings early
- Use the right tools to avoid damage
- Document changes for future troubleshooting
- Reset and recalibrate before replacing parts
- Call a pro if power or safety concerns arise