How to Fix Aux Heat on a Thermostat
Learn to diagnose and fix aux heat activation issues on a heat-pump thermostat with a practical, safe, step-by-step approach. Improve comfort, efficiency, and reliability by following clear guidance.

This guide shows how to diagnose and fix aux heat activation issues on a heat-pump thermostat. Start by confirming the thermostat is in the heating mode with aux heat enabled, then verify temperature settings and schedules. Inspect wiring at the thermostat and outdoor unit, test control voltages, and ensure proper switching between heat and aux heat before deciding if a professional should be involved.
Understanding Aux Heat on a Heat Pump
Auxiliary heat, or aux heat, is a supplemental heat source used by heat pumps when outside temperatures are too cold for the heat pump alone to reach your set point. It typically engages as a backup during peak demand periods or when the system cannot satisfy the temperature with the heat pump alone. Distinguishing aux heat from emergency heat helps you understand why your system behaves a certain way. According to Thermostat Care, many aux heat issues stem from simple misconfigurations you can fix yourself, such as incorrect thermostat mode, a mis-set temperature, or loose wiring. This section explains how aux heat works, why it comes on, and how to tell if the problem is electrical or control-related rather than a refrigerant or hardware fault. You’ll gain insight into the normal cycle of a heat pump and when aux heat is expected to engage, which helps you identify abnormal behavior quickly. A solid grasp of these concepts reduces the guesswork and makes troubleshooting more efficient.
Key concepts to remember include: (1) heat pumps extract heat from outdoor air and transfer it inside; (2) aux heat is typically electric resistance heat that kicks in when the outdoor temperature is too low or when the system detects a larger than expected temperature gap; (3) improper thermostat configuration can mimic aux heat problems even when the HVAC system itself is functioning correctly. As you read, keep in mind that safety and correct wiring are the foundation of any diagnostic process.
Quick Diagnostic Checklist
Before you dive into wiring or component testing, run through a quick diagnostic checklist to rule out simple issues and unnecessary risk. This list is designed to be performed safely and quickly, with the homeowner able to verify most common culprits. Start by setting expectations: aux heat should only run when needed, and the heat pump should work with the thermostat to reach the setpoint without relying on auxiliary heat for extended periods. If you find a mismatch, you’ll know where to focus your investigation.
- Confirm the thermostat is in heat mode and that aux heat (or emergency heat) is enabled when appropriate. Some thermostats label this as Aux/E, Emergency Heat, or a similar term. If the system calls for heat but the aux heat is not engaging or is engaging too eagerly, there might be a control setting misconfiguration.
- Check the temperature setpoint and any setback or vacation modes. A large setback can cause a temporary mismatch where aux heat is used while the heat pump works to catch up.
- Review any schedules or rules in the thermostat app or wall unit. Overrides and time-based settings can inadvertently force aux heat to run longer than necessary.
- Inspect obvious wiring indicators at the thermostat: loose wires, corroded terminals, or mismatched wire colors can all trigger abnormal aux heat behavior. Secure any loose connections and confirm wires are on the correct terminals (R, C, Y, G, and Aux/E).
- Check the outdoor unit for signs of defrost cycling or unusual noises. A stuck defrost cycle can affect heat output and force the system into auxiliary heat more often.
- If you have a multimeter, you can safely test for 24V signals from R to C when calling for heat. A weak or absent signal hints at problems with the transformer, wiring, or control board.
- Finally, verify that the thermostat itself isn’t miscalibrated or out of date. A reset or software update can fix sensor misreads that might trigger unexpected aux heat.
As you complete each item, document what you find. This helps with future troubleshooting and provides a clear history for any technician you might hire. Thermostat Care’s analysis emphasizes that methodical checks are more effective than random adjustments and will save time in the long run.
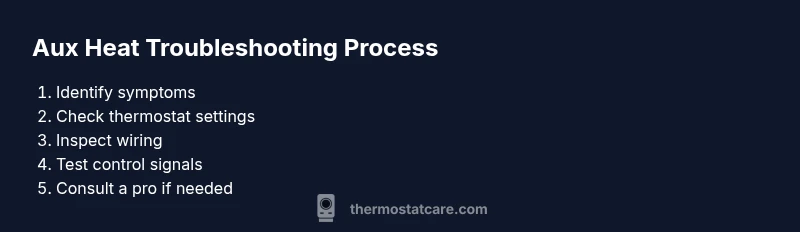
Step-by-Step Fixes for Aux Heat Activation
This section provides a structured, action-oriented approach to diagnosing and addressing common causes of aux heat activation problems. Each step is a single, clear action with an explanation of why it matters, plus a pro tip to help you avoid typical mistakes. If a step requires turning off power, do so safely at the breaker and confirm there is no current in the circuit before proceeding. If you encounter a condition you’re not comfortable with, stop and consult a licensed HVAC technician.
Step 1 — Confirm heating mode and aux heat is enabled
- Action: Check the thermostat display to ensure it is set to heat and that Aux/E heat is active when the temperature call requires it. If your system uses Emergency Heat, understand how it interacts with normal heat mode.
- Why: A misinterpreted setting can mimic an aux heat problem and lead you down an unnecessary repair path.
- Tip: If Aux is shown but the outdoor unit isn’t engaging, you may have a control signal issue rather than a thermal problem.
Step 2 — Verify temperature setpoints and scheduling
- Action: Make sure the setpoint is within the heat pump’s operating range and that no override or vacation mode is forcing a different function.
- Why: A large setback or conflicting schedule can trigger Aux heat as the system tries to reach a distant target.
- Tip: Temporarily reduce the setback by several degrees to test if the heat pump can respond without Aux heat.
Step 3 — Inspect thermostat wiring at the wall
- Action: Power off at the breaker, remove the thermostat cover, and inspect wires for looseness, corrosion, or improper terminal connections. Ensure R, C, Y, G, and Aux/E are securely fastened.
- Why: Loose or swapped wires are a leading cause of intermittent or continuous aux heat calls.
- Tip: Take a photo of the wiring before re-seating to ensure you restore each wire to the correct terminal.
Step 4 — Inspect wiring and components at the outdoor unit
- Action: With power safely off, check the conduit wiring to the outdoor unit for loose connections or damaged insulation. Listen for the outdoor compressor and fan sounds when heat is called.
- Why: A faulty outdoor signal can cause the thermostat to rely on aux heat even when the heat pump should suffice.
- Tip: If you notice frequent outdoor unit cycling, there may be a refrigerant charge issue or a faulty contactor calling for heat.
Step 5 — Check defrost cycle and reversing valve operation
- Action: If the temperature is fluctuating around freezing, listen for defrost cycles and verify the reversing valve position changes as expected.
- Why: A malfunctioning defrost cycle or stuck reversing valve can reduce heat pump performance and trigger longer aux heat use.
- Tip: If the unit runs in defrost repeatedly or seems stuck in a heating-only mode, schedule a service inspection rather than attempting a DIY repair.
Step 6 — Test voltage and continuity of control wires
- Action: With power off, test continuity on the thermostat control wires and verify 24V between R and C when heat is commanded. Check the Y and Aux wires for proper control signals when the thermostat calls for heat.
- Why: Faulty transformers, blown fuses, or damaged wiring commonly cause incorrect heat calls and excessive Aux activation.
- Tip: If you’re uncomfortable testing electrical signals, rely on a professional to avoid shock or equipment damage.
Step 7 — Confirm proper thermostat switching and, if needed, reset or replace
- Action: Run a controlled test by setting a comfortable warm setpoint and observe if the system engages the heat pump first, with Aux heat only if absolutely needed. If switching seems delayed or stuck, perform a factory reset (or software update if available) before considering replacement.
- Why: The thermostat, not the HVAC system, can be misconfigured or outdated and cause erroneous Aux heat activations.
- Tip: If resetting doesn’t fix the issue, a new thermostat with up-to-date software may resolve the problem more reliably.
Estimated total time: 60-120 minutes
Safety and Maintenance Considerations
When performing any electrical checks or wiring work, safety must come first. Always turn off power at the breaker before touching thermostat terminals. If you encounter signs of damaged wiring, burning smells, or buzzing noises from the control board, stop immediately and call a licensed HVAC technician. Regular maintenance—such as cleaning air filters, ensuring clear airflow around the outdoor unit, and scheduling professional checkups—reduces the likelihood of aux heat misbehavior and keeps your system operating efficiently. Thermostat Care notes that properly maintained systems respond more predictably to thermostat calls and minimize unnecessary energy use.
Tools & Materials
- Multimeter(to verify 24V control signals (R to C))
- Screwdriver set (Phillips #2 and flat-head)(for thermostat cover and terminal screws)
- Non-contact voltage tester(safely check live wires)
- Thermostat manual or app access(model-specific settings and wiring diagrams)
- Camera or phone to document wiring(capture wiring layout before changes)
Steps
Estimated time: 60-120 minutes
- 1
Confirm heating mode and Aux/E is enabled
Check the thermostat display to ensure it is set to heat and that Aux/E heat is active when the temperature call requires it. If your system uses Emergency Heat, understand how it interacts with normal heat mode.
Tip: If Aux appears but the outdoor unit is idle, the control signal may be incorrect rather than a heating issue. - 2
Verify setpoints and schedules
Ensure the setpoint is achievable by the heat pump and that no override or vacation mode is forcing a different function.
Tip: Lower the setback temporarily to trigger a heat call and observe system response. - 3
Inspect thermostat wiring at the wall
Power down the circuit, remove the cover, and inspect wires for looseness or corrosion. Confirm R, C, Y, G, and Aux/E are properly connected.
Tip: Take a photo of wiring before re-seating to ensure correct terminal placement. - 4
Check outdoor unit and defrost cycle
Listen for compressor and fan operation. Ensure defrost cycles work and reversing valve changes position as expected.
Tip: Unusual defrost signals or frequent cycling may indicate a service need. - 5
Test control voltages
With power off, test continuity on control wires and verify 24V between R and C when heating is called. Inspect Y and Aux signals for proper commands.
Tip: Voltage testing helps identify transformer or wiring faults. - 6
Verify thermostat switching
Trigger a test heat call and observe whether the heat pump engages first and Aux heat only as needed. If the thermostat misbehaves, reset or update the thermostat.
Tip: If unsure, avoid further changes and contact a pro to prevent damage. - 7
Decide on pro involvement
If tests indicate refrigerant, control board, or compressor issues, professional service is recommended. DIY fixes are best limited to wiring and settings.
Tip: Document symptoms and steps taken to assist the technician.
Questions & Answers
What is aux heat on a heat pump?
Auxiliary heat provides extra warmth when the heat pump alone can't reach the desired temperature. It typically engages as a backup and is less efficient than the heat pump, so it shouldn't run longer than necessary.
Aux heat is a backup heat source for your heat pump that kicks in when temperatures drop or when the heat pump can't reach your set point.
Why would aux heat stay on after the house warms?
If the thermostat keeps calling for heat or there is a wiring issue, aux heat may stay engaged. Check for override schedules, defrost cycling, or incorrect sensor readings.
Aux heat staying on can happen if a setting or sensor signals the system to keep heating.
How can I prevent excessive aux heat use?
Keep the thermostat at a reasonable temperature, ensure proper heat pump sizing, and check for airflow or refrigerant issues that cause reliance on aux heat.
Preventing excess aux heat usually comes down to correct thermostat settings and regular maintenance.
Do I need a professional to fix aux heat issues?
Many aux heat issues involve live electrical components or refrigerant considerations. If basic checks don’t fix the problem, contact a licensed HVAC technician.
If the problem continues after basic checks, it's wise to call a professional.
Can a faulty thermostat cause aux heat problems?
Yes. A miscalibrated sensor or software glitch in the thermostat can incorrectly call for aux heat. Try a reset or software update if available.
A faulty thermostat can misread temperatures and trigger aux heat.
Watch Video
What to Remember
- Verify heating mode and Aux/E is enabled before wiring checks
- Inspect both thermostat and outdoor wiring for loose contacts
- Test 24V signals to confirm proper switching
- Consult a licensed tech for refrigerant or control-board issues