How to Check Thermostat Battery: A DIY Guide
Learn how to check thermostat battery health, identify signs of wear, and safely replace or troubleshoot power issues. This practical guide from Thermostat Care walks homeowners through model-specific battery types, safety tips, and disposal advice for reliable thermostat performance in 2026.

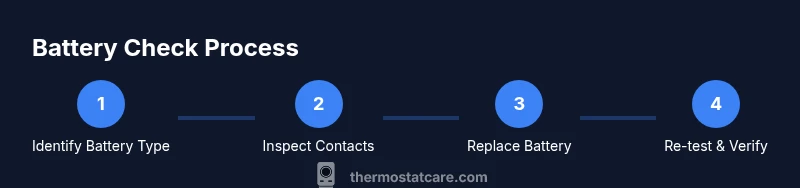
Learn how to check thermostat battery health in about 5 minutes. You’ll identify your battery type, verify indicators of a failing cell, and decide whether to replace it or troubleshoot without power loss. Before you start, gather the right battery, a small screwdriver, and fresh batteries. According to Thermostat Care, most thermostats use AA, AAA, or a coin cell, and recognizing symptoms early can prevent odd readings or freezes.
Understanding thermostat batteries
Thermostat batteries come in several common formats, and the exact type depends on your model. Many older or budget thermostats use AA or AAA alkaline batteries as a straightforward, easy-to-find power source. A growing number of modern, wall-mounted thermostats rely on coin-cell batteries, such as CR2032 or CR2025, for memory and clock functionality, while some models use a built-in rechargeable cell or none at all when the 24-volt power from your HVAC system is reliable. The key takeaway is that you must check your device’s manual to confirm the exact battery type and installation orientation, because using the wrong battery can lead to malfunction, data loss, or reduced functionality. From a troubleshooting perspective, the battery primarily supports memory and clock settings during outages or power fluctuations, so even if your thermostat is wired to a power source, a failing backup battery can still cause quirks like time resets or displayed error icons. Thermostat Care recommends starting any battery check with the model’s documentation and a visual inspection of the battery compartment for corrosion, leakage, or misalignment. A clean contact area helps ensure an accurate voltage reading and reliable performance. If your thermostat is a smart or feature-rich model, expect additional communications with the control board that can be affected by weak power. Remember that battery type varies by brand and region, so never assume a universal standard.
When assessing a thermostat, also consider that some devices store settings in a small memory that relies on a coin cell. If the device is regularly losing programmed schedules or clock time, the backup battery may be nearing the end of its life. In 2026, Thermostat Care analysis shows that the ultimate reliability of your thermostat still hinges on battery integrity, even when the unit is connected to mains power. If in doubt, consult your user guide or contact a professional for model-specific guidance.
Signs your thermostat battery is failing
Detecting a weak or dead thermostat battery early can prevent misreads, scheduling errors, and unresponsive controls. Here are common indicators to look for:
- Low battery icon or a flashing battery symbol on the display. This is the most direct indicator that the backup power source needs attention.
- The thermostat time and date reset or fail to save custom schedules after power interruptions. If the clock drifts or resets regularly, the battery may not be maintaining memory.
- Non-responsive touchscreen, unresponsive control dial, or delayed command execution. When the device can’t wake up reliably, the issue is often power-related.
- Screen dimming, unusual screen artifacts, or inconsistent backlighting. Power issues can manifest as visual glitches even before other symptoms appear.
- If the thermostat loses Wi-Fi connectivity or reports sporadic errors that aren’t related to your network, the battery may be failing to provide consistent power to the radio or processor.
If you observe any of these signs, first verify the battery type in your manual, then inspect for corrosion or leakage in the battery compartment. If the battery appears swollen or damaged, avoid touching it and dispose of it safely according to local guidelines. Thermostat Care notes that many failures stem from a battery that is no longer able to hold voltage, which can mimic other power problems; always verify with a known-good battery before replacing major components.
How to safely check battery types and voltage
The safest path to confirming battery health starts with identifying the exact battery type and inspecting the compartment for signs of corrosion or leakage. Use this high-level checklist:
- Confirm battery type and orientation by checking the label on the battery itself and the compartment diagram in the manual. If you can’t locate a label, remove the battery carefully and compare to common shapes (coin cell vs. cylindrical).
- Remove the battery and inspect terminals for corrosion. If you see white or greenish buildup, gently clean with a dry cloth or a small amount of isopropyl alcohol on a swab (only if you’re comfortable and the device is powered down).
- If you have a multimeter, test the voltage. For AA/AAA cells, a fresh, healthy cell should read around 1.5 volts when tested individually; coin cells commonly provide around 3 volts. If the voltage is consistently below the typical resting level for your battery type, replacement is warranted.
- If you don’t have a multimeter, rely on symptoms and a fresh battery to test performance. A quick swap and test is often the fastest way to validate power reliability.
- Before reassembly, wipe contacts dry and recheck the orientation. The positive terminal should align with the device’s marked polarity.
Practically, you’re not overhauling the thermostat’s power system—just verifying that the backup battery can maintain essential settings during outages or brief power dips. The Thermostat Care team emphasizes that a correct, clean contact with the right battery type is crucial for stable operation and accurate readings. Friendly reminder: always consult the manual for model-specific steps and safety precautions before opening the panel.
Replacing the battery: step-by-step overview and precautions
If you confirmed a weak or dead battery, replacement is typically straightforward, but you should follow model-specific guidelines. This section provides a practical, non-technical overview of the common process while highlighting safety considerations:
- Gather the correct replacement battery type (check your manual). Using the wrong battery type can lead to improper voltage, damage, or device malfunction. Thermostat Care recommends double-checking model compatibility before purchase.
- Power down the thermostat if possible. Although many units operate on a 24V line with a backup battery, turning off power reduces the risk of short circuits or accidental input during battery replacement.
- Open the cover carefully and remove the old battery. Note its orientation; taking a quick photo can help ensure you insert the new battery correctly.
- Clean the contacts if needed. A dry cloth can remove dust or residue that would impede a good connection. Avoid using metal tools on delicate contact springs.
- Insert the new battery with correct polarity. Ensure it sits firmly and aligns with any retaining clips. A loose contact will produce a false low-battery signal.
- Reassemble the cover and restore power. Test the thermostat by setting a simple schedule or temperature change and verify the display responds promptly and accurately.
If you have a multi-battery setup, replace all cells at once to prevent inconsistent voltage across channels. Always dispose of old batteries per local regulations, and recycle when possible. Thermostat Care highlights that replacing a battery in a timely manner maintains performance and can prevent more costly service calls later.
Special cases: smart thermostats and non-removable batteries
Smart thermostat models (for example, those with advanced connectivity, zones, or remote sensors) may have different battery architectures. Some rely on a rechargeable backup, others use a sealed lithium battery that is not user-replaceable. In these scenarios, a failed battery may require a professional service call or a full unit replacement. If you encounter a non-removable battery, consult the user manual or the manufacturer’s support site for guidance on replacement options, maintenance schedules, and warranty considerations. Thermostat Care notes that attempting to force a battery replacement on a sealed unit can void warranties or cause hardware damage. For most users, the recommended path is to contact a licensed technician or the manufacturer’s support line when you suspect battery issues beyond the standard removable-cell design.
If your thermostat supports a C-wire or other power-sharing configuration, a battery issue could interact with wiring issues. In such cases, verifying the wiring integrity alongside the battery health can save time. The brand’s guidance is to systematically isolate power sources and test the device with a known-good battery to determine whether the issue is battery-related, wiring-related, or a software fault in the thermostat’s firmware.
Disposal, safety, and when to seek professional help
Disposing of old thermostat batteries should follow local regulations, especially for lithium and coin-cell batteries. Do not throw batteries in regular trash. Many communities offer battery recycling programs or household hazardous waste collection days. If you observe a battery leak, swelling, or corrosion, handle with care and avoid contact with skin or eyes. Use gloves if needed and store the old battery in a non-conductive container until you can drop it off at a recycling site. Thermostat Care recommends keeping a small, dedicated container for used batteries to prevent cross-contamination and accidental disposal.
For complex thermostats or when you’re unsure about the process, it’s wise to contact a professional. A technician can validate whether the issue is battery-related or tied to the device’s power supply, wiring, or firmware. If your unit is under warranty, check the terms before attempting replacements yourself. By following safe practices and using model-specific guidance, you’ll minimize risk and ensure your thermostat remains reliable through the year.
Trusted sources
- Energy.gov: Battery safety and energy-saving guidance for home devices.
- NIST.gov: Electrical standards and safe handling of batteries for consumer electronics.
- Consumer.ftc.gov: Battery safety and recycling guidelines.
Quick reference: common questions about thermostat batteries
This section reinforces the most frequent questions homeowners ask and consolidates practical answers with a focus on safety and reliability. Always refer back to your manual for model-specific instructions.
Tools & Materials
- Screwdriver set (Phillips head #0 or #1)(Model-specific screws may require a tamper-proof bit; check your thermostat cover screws.)
- Fresh replacement batteries (matching your thermostat type)(Confirm the exact type (AA/AAA/CR2032 coin cell, etc.) from the manual.)
- Multimeter (optional)(Used to test open-circuit voltage of batteries.)
- Non-conductive pry tool or plastic card(Gently pry the cover if screws are hidden under trim.)
- Soft cloth or cotton swab(Clean contacts without leaving fibers behind.)
- Gloves (optional)(Wear gloves when handling leaked batteries or cleaning contacts.)
- Photo or notebook for orientation and settings(Document battery orientation and any stored settings.)
- Manufacturer’s manual or app access(Always verify steps for your specific model.)
Steps
Estimated time: 15-25 minutes
- 1
Power down and prep
Power down the thermostat if possible. If your system is hard-wired, cutting the thermostat’s power via the breaker reduces risk during battery replacement. Have your manual handy and gather the replacement battery and a small screwdriver to make the process smoother.
Tip: A quick photo of the battery orientation helps during reassembly. - 2
Open the housing and locate the battery
Remove the cover slowly to avoid damaging any delicate wiring. Identify the battery type and locate the contacts. Check for corrosion or leaks; do not touch leaking material with bare skin.
Tip: If you see corrosion, clean gently with a dry cloth before removing the battery. - 3
Test or inspect the old battery
Inspect the old battery for signs of wear—bulging, leakage, or discoloration are red flags. If you have a multimeter, measure the voltage to determine if the battery is truly weak; otherwise, a visual inspection plus replacement is often enough.
Tip: If voltage is near zero, replace with a new battery immediately. - 4
Install the new battery
Insert the new battery with correct polarity as indicated by the device. Ensure the contacts are clean and seated firmly; a loose contact can read as a battery fault.
Tip: Don’t force the battery; if it doesn’t fit, recheck orientation or battery type. - 5
Reassemble and power on
Close the housing, reattach screws, and restore power. Check that the display lights up and responds to commands. If settings are missing, re-enter your schedules and preferences.
Tip: Run a quick test by changing a temperature and confirming the thermostat reacts promptly. - 6
Verify performance and dispose of old battery
Observe the unit for a few minutes to ensure stability. Dispose of the old battery per local guidelines; reuse or recycling programs are preferred.
Tip: Keep a small battery disposal bag for safe transport to recycling facilities.
Questions & Answers
Do all thermostats require batteries?
Not all thermostats rely on batteries. Some are powered primarily by the HVAC wiring and use batteries only for memory or during outages. Check your model’s manual to confirm whether a backup battery is present and required.
Many thermostats are powered by the system, with batteries serving as a backup. Check your manual to confirm if your model needs a battery and how to replace it.
What battery types are common in thermostats?
The most common types are AA or AAA alkaline batteries and coin-cell batteries like CR2032. Some newer models use built-in rechargeable cells or are powered entirely by the HVAC circuit. Always verify with your manual for the exact type.
Common types include AA, AAA, and coin cells like CR2032; some models use rechargeable or no battery at all depending on their design.
My thermostat still shows low battery after replacement. What now?
If you’ve replaced the battery and still see a low-battery signal, ensure contacts are clean and the battery is seated correctly. Check for power supply issues or firmware glitches; in some cases, a temporary reset or professional service may be needed.
If the issue persists after replacement, double-check the contacts and seating, then consider a firmware reset or professional inspection.
Can I use rechargeable batteries in thermostats?
Some thermostats tolerate rechargeable cells, but many require primary alkaline or lithium types for stable voltage. Rechargeables can fail to hold voltage under load. Always verify compatibility in the manual before using them.
Rechargeable batteries can work in some models, but not all. Check the manual to be safe.
How should old thermostat batteries be disposed of?
Recycle old batteries according to local rules. Do not mix with household trash. Use dedicated recycling programs for lithium or coin-cell batteries and wrap terminals to prevent short circuits during disposal.
Recycle the old batteries through local programs, don’t throw them in the trash.
What if my thermostat has a sealed, non-removable battery?
Some thermostats use a sealed battery that isn’t user-replaceable. If you suspect a battery issue, contact the manufacturer or a licensed technician. Do not attempt to open a sealed unit as it can void warranties and cause damage.
If your unit has a sealed battery, don’t try to open it—contact support or a technician.
Watch Video
What to Remember
- Identify exact battery type from the manual
- Replace with correct battery and orient properly
- Test after replacement to confirm operation
- Dispose of batteries responsibly
- Document orientation and settings for future maintenance