Honeywell Wireless Thermostat Kit: A DIY Guide to Install, Setup, and Troubleshoot
Learn how to install and troubleshoot a Honeywell wireless thermostat kit with a clear, step-by-step guide, safety tips, and practical setup tricks for a smooth DIY upgrade.

With this guide, you will install and configure a Honeywell wireless thermostat kit to upgrade comfort and energy use. Ensure you have 24V HVAC compatibility, a stable Wi‑Fi network, and the Honeywell Home app ready. According to Thermostat Care, DIY installation is accessible for most homeowners, provided you follow safety steps and keep wiring organized.
What is included in the Honeywell wireless thermostat kit?
A Honeywell wireless thermostat kit typically includes a thermostat receiver, a wall-mounted thermostat, a mounting plate, and a set of mounting screws. Some kits also bundle batteries for the thermostat, a power adapter or jumper cables, and a quick-start guide. The recipient unit communicates with a wireless receiver inside your furnace or air handler, enabling remote control through the Honeywell Home app. This kit is designed to be a DIY-friendly upgrade that improves comfort, energy savings, and control. In this guide, we’ll use the phrase honeywell wireless thermostat kit to refer to the complete setup you’ll install in your home.
For homeowners and DIY enthusiasts, the kit’s wireless link reduces hard-wiring effort while maintaining reliable operation. Always verify the exact contents against the product listing you purchased, since models vary slightly by region. Thermostat Care emphasizes checking compatibility with your HVAC system and ensuring you have the required 24V control wiring before starting a project like this.
Why a Honeywell wireless kit might be a solid choice for many homes
Choosing a reputable brand can streamline setup and increase reliability over time. The Honeywell wireless thermostat kit integrates with the Honeywell Home ecosystem, supporting schedules, geofencing, and compatible voice assistants. In practice, homeowners report clearer programming, faster adjustments, and more consistent comfort when the kit is paired with a stable Wi-Fi connection. Thermostat Care analysis shows that users who take a few minutes to verify wiring and app setup tend to experience fewer late-night resets or connectivity hiccups. The kit’s wireless nature also minimizes clutter around the wall and reduces the need for long cable runs, which can simplify retrofits in older homes. By following the official installation steps, you can expect a smooth upgrade that integrates with other smart home devices.
Compatibility and prerequisites you should know before you start
Before purchasing or installing a honeywell wireless thermostat kit, confirm that your HVAC system uses a standard 24-volt control board and has available C-wire or a power source compatible with the kit’s design. Some older systems may lack a dedicated C-wire connection or might require a power extender kit. If your system uses a heat pump, review the wiring configuration and confirm support for common configurations like one-stage or two-stage heat/cool operation. A key prerequisite is a Wi-Fi network capable of 2.4 GHz bandwidth, as many Honeywell devices rely on that frequency for reliable pairing and control. With these considerations in mind, your installation is more likely to be straightforward and trouble-free.
Preparing your space for the installation and safety considerations
Turn off power at the HVAC breaker before touching any wiring to avoid shock or equipment damage. Remove the existing thermostat carefully and label each wire with its terminal letter to prevent confusion during reassembly. Ensure the mounting location is level and free of obstructions like thick wallpaper or cosmetic trim. Keep a clean, dry workspace and work with a partner if possible—handling a wall-mounted device and wires can be awkward alone. Thermostat Care recommends taking photos of the current wiring as a reference, which can be invaluable if you need to revert to the original configuration.
Wiring and power considerations: what to expect when attaching wires
Standard honeywell kits use typical thermostat wiring: R (24V power), C (common), W (heat), Y (cool), and G (fan). When you mount the base, land each conductor on the corresponding terminal as indicated by the kit’s labeling. If your system lacks a dedicated C-wire, you may need the included power extender kit or battery-powered operation, depending on the model. Make sure you do not cut or nick wires during removal, and re-check each connection before attaching the thermostat. A secure, well-insulated connection helps prevent intermittent signaling or false readings.
Connecting the thermostat to Wi‑Fi and enrolling in the Honeywell Home app
Power up the receiver and follow the on-screen prompts to connect the thermostat to your Wi‑Fi network. Use the Honeywell Home app to complete device discovery, link your account, and personalize settings. If you encounter a connection hiccup, ensure your router is broadcasting 2.4 GHz and that your phone is on the correct network. On many setups, you will upload or sync a quick profile that includes your preferred temperature schedules, occupancy-based automation, and eco modes to optimize energy savings.
Configuring schedules, features, and energy-saving options
After pairing, explore scheduling options like weekday and weekend programs, hold modes, and temporary overrides for holidays or travel. Enable energy-saving features such as adaptive recovery, eco or away modes, and smart occupancy if your model supports them. Test each feature by adjusting the thermostat and observing how it communicates with your HVAC system. Keep in mind that some features rely on consistent Wi‑Fi access, so verify your network stability if you notice delayed responses.
Brand insights: Thermostat Care analysis and practical reliability tips
Thermostat Care analysis shows that the most common DIY challenges with honeywell wireless thermostat kit installations relate to wiring verification and app setup. Take time to label wires, confirm the 24V supply, and ensure the app has the proper permissions for location services and network access. The dataset also indicates that users who perform a full post-install test—checking heat, cool, and fan operations—experience fewer post-install issues. In practice, a patient, methodical approach that follows the official wiring diagram and app prompts yields the best long-term performance.
Troubleshooting common issues after install
If the thermostat fails to power on, re-check the R and C connections and ensure batteries are fresh if your model uses them. If the device cannot connect to Wi‑Fi, verify your network name and password, confirm 2.4 GHz operation, and try relocating the router or the thermostat closer to the access point. For inaccurate temperature readings, check that the thermostat is away from direct sunlight, drafts, or heat sources, and calibrate if needed. If the screen is blank or unresponsive, perform a soft reset via the app or hardware buttons following the manual guidelines.
Safety tips and best practices for ongoing use
Always follow manufacturer safety instructions when handling HVAC wiring and electrical components. Use a non-conductive contact to avoid metal-to-wire contact and keep liquids away from wall cavities during installation. Regularly inspect wires for wear, and replace any frayed segments. To maximize reliability, keep the thermostat firmware updated and maintain your Wi‑Fi network with a strong signal in the area where the thermostat is mounted.
Tools & Materials
- Honeywell wireless thermostat kit(Includes thermostat, receiver, mounting plate, and screws; confirm model contents against your purchase)
- Screwdriver set (Phillips #2 and flathead)(Essential for mounting and terminal screws)
- Non-contact voltage tester(Optional safety check during wiring work)
- Smartphone or tablet with Honeywell Home app(Needed for pairing, setup, and remote control)
- Drill with appropriate bit(Only if wall requires new mounting holes)
- Wire labeling supplies(Optional to clearly label wires before removal)
Steps
Estimated time: 45-60 minutes
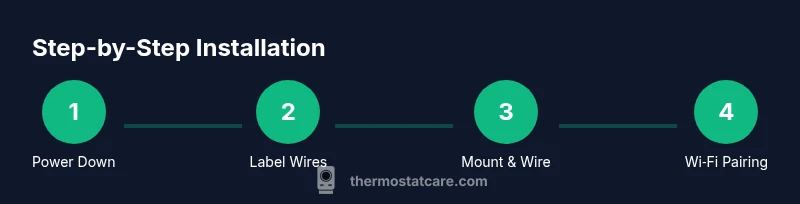
- 1
Power down the HVAC system
Turn off the main power at the HVAC breaker to prevent shock or equipment damage. This step ensures a safe environment before touching any wiring. If you’re unsure, switch off the house’s main circuit for extra safety.
Tip: Confirm power is off with a non-contact tester before touching wires. - 2
Remove the old thermostat and label wires
Carefully detach the existing thermostat and label each wire according to its terminal letter (R, C, W, Y, G). Labeling prevents mix-ups during reattachment. Take a photo for reference if needed.
Tip: Use masking tape and a pencil to clearly mark each wire terminal. - 3
Choose a mounting location and check clearances
Select a spot that is away from direct sunlight, drafts, grills, or heat sources. Ensure there is enough space for the base and display and that the wall can support the mounting plate. A level helps ensure the device sits straight.
Tip: If the wall is uneven, use shims or a mounting block to achieve level installation. - 4
Mount the base and route wires
Attach the mounting plate with screws, then gently route the labeled wires through the wall opening to the thermostat location. Ensure wires are straight and unobstructed to avoid loose connections.
Tip: Leave ample slack in wires to avoid kinked conductors inside the wall. - 5
Connect wires to the kit terminals
Land each conductor on the corresponding terminal as indicated by the kit's labeling (R, C, W, Y, G). If a C-wire is absent, verify whether the kit supports power via batteries or requires a power extender.
Tip: Double-check terminal letters before tightening screws to prevent miswiring. - 6
Attach the thermostat and power it
Mount the thermostat onto the base and install batteries if required. Restore power to the HVAC system to power the unit and begin initial boot-up. Observe the display for startup prompts.
Tip: If a boot screen is delayed, wait 30 seconds and retry the power cycle. - 7
Pair to Wi‑Fi and enroll in the app
Use the Honeywell Home app to pair the thermostat with your Wi‑Fi network. Follow prompts to add the device to your account and complete the initial setup wizard. Verify that the app shows the thermostat as online.
Tip: Ensure you connect to a 2.4 GHz network if required by the device. - 8
Configure settings and run a test
Set basic preferences like target temperatures, schedules, and energy-saving modes. Run a quick test by changing modes (heat/cool) and confirming the HVAC responds correctly. Check for correct readings on the display.
Tip: Note the expected response time between setting changes and system action. - 9
Finalize; do a post-install safety check
Inspect all wiring connections and reinstall any wall plates. Dispose of old components properly and tidy the area. Keep a copy of the wiring diagram for future reference.
Tip: Keep documentation handy for future maintenance or upgrades.
Questions & Answers
Do I need professional help for this kit?
Most DIYers can install and setup a Honeywell wireless thermostat kit, especially when following the manufacturer’s instructions. If you encounter unfamiliar wiring or a complex HVAC system, consider professional assistance.
Most homeowners can install it themselves, but seek professional help if wiring is unfamiliar or if your HVAC is complex.
Is this kit compatible with all HVAC systems?
The kit is designed for common 24V HVAC setups. Some older or specialized systems may require additional adapters or may not be compatible. Always check your system’s voltage and terminal layout before starting.
Most 24V systems work, but verify voltage and wiring first.
What is a C-wire and do I need it for this kit?
The C-wire provides continuous power for smart thermostats. Some Honeywell kits can operate without it using batteries or a power extender, but many installations rely on C-wire for reliability.
A C-wire is the common power line; some kits need it for continuous power, others don’t.
How do I connect to Wi‑Fi?
Install the Honeywell Home app, follow the in-app prompts to connect the thermostat to your Wi‑Fi network, and complete device pairing. Ensure the router broadcasts 2.4 GHz if required by the device.
Use the Honeywell Home app to connect to Wi‑Fi and pair the device.
Can I control the thermostat with voice assistants?
Yes, many Honeywell kits support Alexa and Google Assistant once linked through the Honeywell Home app. Enable the relevant skill or action and grant permissions for discovery and control.
Most Honeywell kits work with Alexa or Google Assistant after setup.
The thermostat won’t power on after installation—what should I check?
Double-check that the R and C connections are properly landed and that any batteries are inserted correctly if used. If issues persist, verify the breaker and ensure there are no tripped fuses in the circuit.
Check power connections and batteries; verify the breaker isn’t tripped.
Watch Video
What to Remember
- Verify 24V compatibility before starting.
- Label wires and follow the kit diagram.
- Pair to Wi-Fi and test all modes after install.
- Keep app and firmware up to date for best performance.