Honeywell Thermostat Says Heat On But No Heat: Troubleshooting Guide
A practical, step-by-step guide to fix a Honeywell thermostat showing heat on but no heat. Learn causes, safety tips, and a proven diagnostic flow to restore comfort quickly.

If a Honeywell thermostat says heat on but no heat, the most likely causes are wrong wiring, a tripped circuit, a stuck relay, or a fault in the thermostat's sensor. Start by confirming the thermostat is set to heat, then verify wiring at the furnace control board and ensure the breaker is on. This quick check often resolves the issue.
Why a Honeywell thermostat says heat on but no heat happens
When your thermostat displays that it’s heating, but your home stays cold, it can be frustrating and uncomfortable. The phrase honeywell thermostat says heat on but no heat is a common troubleshooting trigger because it points to a mismatch between what the thermostat is commanding and what the HVAC system actually delivers. According to Thermostat Care, most heat-on-but-no-heat scenarios begin with simple issues you can fix without specialized tools. Start with the basics, then progressively move to electrical checks and system tests. A quick, systematic approach saves time and reduces the risk of unintended damage to equipment. Remember: safety first, and never bypass protective devices. If the problem persists after you complete the steps below, you likely need hands-on support from a qualified technician. The Thermostat Care team found that many such cases are resolved by verifying mode, power, and wiring before moving to more involved repairs.
Common culprits behind the problem
There are several frequent causes behind a Honeywell thermostat saying heat on but no heat. The most common include a mis-set thermostat mode (heat vs auto), incorrect wiring at the thermostat or control board, a tripped circuit breaker, a blown fuse, or a stuck relay in the furnace. Dirty flame sensors, a weak thermostat battery (for model types that use batteries), or a faulty temperature sensor can also lead to this symptom. In some cases, ductwork issues or a blower motor fault prevents heat from reaching living spaces. Keep an eye out for error codes on the thermostat display, as these can point to specific components needing attention. Thermostat Care notes that addressing wiring and mode issues first often resolves the problem without major parts replacement.
How to check basics before diving deeper
Before you dive into deeper diagnostics, confirm a few basics. Ensure the thermostat is set to heat and that the fan isn’t forcing heat to run continuously. Check that the temperature setpoint is clearly higher than the room temperature. Look for any warning lights or error codes on the thermostat display. Inspect the furnace area for power status: is the inducer motor running, is the blower turning, and are there any unusual smells or noises? If you have a smart thermostat, confirm it’s connected to Wi-Fi and that there are no pending software updates. At this stage, you’re validating user settings and power to eliminate the simplest causes quickly.
Electrical and power-related issues to inspect
Electrical faults are a frequent source of heat-on-but-no-heat problems. Start by turning off power to the HVAC system at the breaker panel or disconnect switch, then re‑establish power to reset any minor control glitches. Check that the branch circuit isn’t overloaded and that GFCI outlets (if any) are functioning. Inspect wiring at the thermostat for loose terminals, corroded contacts, or exposed conductors. On the furnace/air handler, verify the control board terminals (R, C, W, Y, G) are secure and that the 24V power supply is steady. If you see a tripped breaker or an blown fuse, address that hardware issue before testing the thermostat again. Safety note: never work on live circuits; if you’re unsure, call a pro.
Fixing the most common cause: wiring and mode settings
The top fix for many heat-on-but-no-heat cases is correcting wiring and mode settings. Start by turning off power, then re-tighten all thermostat terminals (R, W, Y, G, C). If your Honeywell model uses a C-wire, confirm the common wire is properly connected. For battery-powered models, replace weak or dead batteries. After reassembling, power the system and set the thermostat to heat with a higher setpoint. If heat doesn’t respond, test the system by selecting emergency heat or fan-on modes to see if the equipment responds. If the issue remains, the problem could be a stuck relay or sensor fault.
When to suspect faulty components or professional help
If wiring and mode corrections don’t fix the issue, the problem may lie with a stuck relay in the furnace, a failed flame sensor, a faulty limit switch, or a malfunctioning control board. These components require specialized tools and expertise, and attempting to replace them without proper training can be dangerous. Call a licensed HVAC technician if you notice signs like unusual furnace noises, error codes indicating fault codes, or if the system doesn’t sequence properly after resets. The Thermostat Care team recommends seeking professional help when you encounter electrical hazards, refrigerant-related concerns, or gas furnace safety risks.
Prevention tips to avoid future heat-on-but-no-heat issues
Routine maintenance reduces the chance of recurring heat-on-but-no-heat problems. Schedule seasonal checks, replace old wiring or worn-out relays where recommended, and keep the thermostat and furnace area free of dust and obstructions. Regularly test the system by setting a heat cycle once a week, and monitor any unexpected thermostat feedback or error codes. Use a high-quality thermostat shield or enclosure to protect wiring from moisture and dust. Thermostat Care’s ongoing guidance emphasizes keeping a clear line of communication between the thermostat and the HVAC system to prevent miscommunication that leads to this symptom.
Quick checks you can perform monthly to prevent recurrence
Set a monthly reminder to review thermostat settings and test the heat cycle. Wipe dust from the thermostat’s terminals and test batteries (if applicable). Confirm that the HVAC filters are clean and the air handler has adequate airflow, as restricted airflow can mimic wiring issues. Keeping a log of any error codes and action taken helps you identify patterns and prevents wasted calls for service. The Thermostat Care team’s approach is proactive and preventative, reducing downtime and keeping comfort consistent.
Steps
Estimated time: 45-90 minutes
- 1
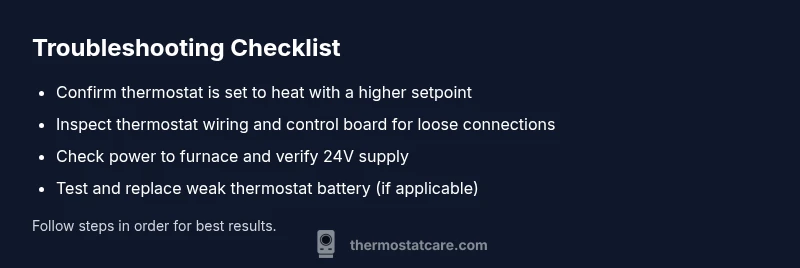
Confirm heat mode and setpoint
Check that the thermostat is in heat mode and that the setpoint is higher than the current room temperature. This ensures the system is commanded to heat and not remaining in idle or cool mode. If the setpoint is equal to or below current room temp, adjust accordingly.
Tip: Document the current setpoint to compare after fixes. - 2
Inspect thermostat wiring
Turn off power to the HVAC system, then remove the thermostat faceplate to inspect wiring. Ensure terminals are secure and no copper is exposed. If you see loose wires, tighten them and re-seat the connector.
Tip: Take a photo of wiring before disconnecting any wires. - 3
Check furnace power and control board
With power off, verify the furnace control board terminals (R, C, W, Y, G) are firmly connected. Restore power and listen for the inducer/blower sequence when you call for heat.
Tip: If you hear no fan or hot air, the relay or control board could be at fault. - 4
Reset the system
Reset the thermostat and the furnace/air handler. Wait a few minutes, then set to heat again and monitor for response.
Tip: Resetting can clear minor control glitches. - 5
Test power continuity
If you have a multimeter, check that the 24V supply is present between R and C at the thermostat and at the furnace. A lack of 24V indicates a power issue that needs attention.
Tip: Only test with proper safety procedures. - 6
Evaluate relay and sensor status
If heating still doesn’t engage, the furnace relay may be stuck or the flame sensor may be dirty. Clean or replace as needed under professional guidance.
Tip: Dirty flame sensors are a common but solvable problem. - 7
Call a professional if unresolved
If the issue persists after these steps, a licensed HVAC tech should diagnose the control board, gas valve, and safety switches. Do not bypass safety interlocks.
Tip: Safety interlocks protect you and the equipment.
Diagnosis: Honeywell thermostat says heat on but no heat
Possible Causes
- highThermostat set to the wrong mode or an incorrect setpoint
- highLoose or incorrect wiring at the thermostat or control board
- mediumTripped breaker, blown fuse, or power issue to the furnace
- mediumStuck relay or faulty sensor on the furnace/air handler
- lowFaulty thermostat (defective sensor or internal fault)
Fixes
- easyVerify thermostat mode is set to heat and the setpoint is above room temp; correct if needed
- easyInspect and tighten thermostat and furnace/air-board wire connections; replace damaged wires
- easyReset power to the HVAC system, check breakers/fuses, and test after power return
- mediumTest and replace stuck relays or faulty sensors in furnace/air handler with professional assistance
- mediumIf the thermostat is suspected defective, consider replacement or professional evaluation
Questions & Answers
What does 'heat on but no heat' mean on a Honeywell thermostat?
It means the thermostat is calling for heat, but the furnace or heating system isn’t delivering heat. This can be due to wiring, power, or component failures. Start with the basics and escalate as needed.
It means the thermostat is calling for heat, but the heater isn’t delivering heat. Start with wiring and power checks, and escalate if needed.
Should I replace my thermostat if it shows heat on but no heat?
Only after ruling out wiring, power, and control issues. If those are ruled out and the thermostat still misbehaves, replacement or professional evaluation may be needed.
Only replace the thermostat if wiring and power checks are clear and the problem persists.
Can a dirty flame sensor cause this issue?
Yes. A dirty flame sensor can prevent the furnace from maintaining heat, even if the thermostat calls for heat. Cleaning or replacing the sensor often fixes the problem.
A dirty flame sensor can stop the furnace from heating even when the thermostat calls for heat.
Is it safe to test electrical components myself?
Only perform safe, non-contact checks and when power is off. For 24V circuits and gas furnaces, many tasks should be handled by a licensed technician.
Testing electrical components can be risky; if in doubt, call a pro.
What codes indicate a thermostat fault?
Many Honeywell models show error codes indicating wire problems, sensor faults, or communication issues. Refer to the manual for exact code meanings and recommended steps.
Look up the error code in your model's manual for precise guidance.
When should I call a professional?
If power checks fail, you hear unusual furnace noises, or the issue persists after resets, call a licensed HVAC technician for a safe, accurate diagnosis.
Call a professional if basic checks don’t fix the issue or you notice risky signs.
Watch Video
What to Remember
- Verify heat mode and setpoint first
- Check wiring at thermostat and control board
- Inspect power, breakers, and fuses to the furnace
- Consider professional help for relays/sensors
- Regular maintenance prevents recurrence