Google Nest Thermostat Repair: DIY Troubleshooting Guide
Learn to diagnose and repair common Google Nest thermostat issues at home. This comprehensive guide covers power, wiring, and firmware checks to safely restore heating and cooling control.

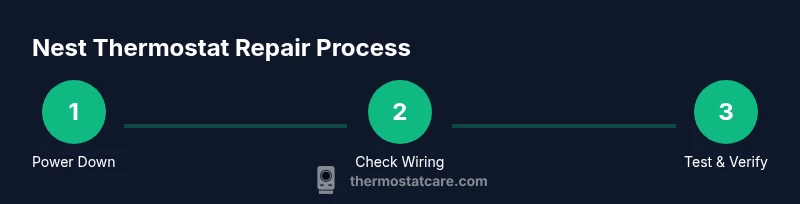
Goal: Diagnose and repair common Google Nest thermostat issues at home, including power loss, unresponsive controls, and connectivity problems. You’ll start by safely powering down, verify the 24V supply and C-wire, then reseat or replace wiring as needed. This guide covers the tools, steps, and safety precautions to complete a successful repair at home, minimizing downtime and avoiding expensive service calls.
Why Google Nest thermostat repair is accessible to homeowners
The Google Nest thermostat is a popular smart device for modern homes, and many common problems can be resolved without professional help. If you’re experiencing power loss, unresponsive controls, or erratic connectivity, a careful, methodical approach to the repair often fixes the issue. By focusing on safe power checks, wiring integrity, and firmware considerations, you can restore reliable performance without replacing the entire unit. Throughout this guide, we refer to the Nest ecosystem and emphasize safety, compatibility, and best-practice wiring. The Thermostat Care team notes that a large percentage of Nest-related faults stem from simple electrical or wiring faults that homeowners can address with proper precautions.
Common symptoms and probable causes
Symptoms like a thermostat that won’t power on, a blank or flickering display, unresponsive touch controls, inaccurate readings, or the HVAC system failing to respond to commands are all common indicators of electrical issues, power draw problems, or wiring faults in Nest thermostats. The most frequent causes are a missing or weak C-wire, loose terminal screws, or power dithering caused by the furnace control board. Firmware glitches can also manifest as delayed responses or occasional resets. By recognizing these patterns, you can triage safely and decide whether a DIY repair is appropriate or if professional assistance is needed.
Safety and preparation before you start
Before touching any wiring, power must be removed from both the thermostat and the HVAC system. Start by switching off the circuit breaker for the thermostat circuit and the air handler or furnace. Use a non-contact voltage tester to confirm no voltage is present at the thermostat base. Work in a dry area, keep tools organized, and avoid wearing jewelry that could catch on components. Note the wire colors and terminal labels, and keep a photo record of how wires are connected before you disconnect anything. These precautions reduce the risk of electric shock and wiring mistakes during the google nest thermostat repair process.
Tools and materials you’ll need
To perform the troubleshooting steps safely and effectively, assemble the following items: a screwdriver set (Phillips and flathead), a non-contact voltage tester, a multimeter capable of reading 24V AC, electrical tape for insulation, and a spare or replacement C-wire if the existing one is damaged or missing. A small pair of needle-nose pliers and a clean work surface are helpful. Optional but useful: a digital camera or smartphone to document connections, and the thermostat manufacturer’s wiring diagram for your specific Nest model. Having these on hand reduces repeated trips to the toolbox.
Safety checks and power testing steps
Power safety is the foundation of any Nest thermostat repair. Confirm that the breaker is OFF, then test the thermostat terminals with a multimeter to confirm there is no residual voltage. At the furnace control board, verify that the R and C terminals are present and delivering the expected 24V AC when power is restored. If you do not see 24V, stop and investigate upstream issues such as blown fuses, tripped breakers, or an interrupted C-wire path. Always recheck power before handling any conductors, and never probe live circuits with bare hands.
Wiring checks: C-wire, power stealing, and common faults
A common Nest thermostat issue is an absent or unstable C-wire, which can cause the unit to reboot or display low-power warnings. Inspect the C-wire at both the thermostat and the furnace/control board, ensuring a solid connection and that the wire is not damaged or corroded. If the C-wire is missing, consider installing a dedicated C-wire from the furnace to the thermostat or using a common jumper, following the Nest wiring diagram. For power-stealing types, verify that the R–C voltage remains stable across load cycles, and reseat any loose terminals to prevent intermittent power loss.
Step-by-step diagnostic workflow overview
This section outlines a structured approach to diagnosing Nest thermostat issues, without duplicating the detailed steps that follow in the STEP-BY-STEP block. Begin with confirming power, then verify C-wire integrity, inspect terminal screws, and test signal continuity from the thermostat to the furnace. Use a process-driven mindset: isolate the problem by system (power, wiring, or firmware), document findings, and proceed with targeted repairs. Keeping a clear log helps you avoid backtracking and makes future maintenance straightforward.
Verifying operation after repair and minimizing future issues
After completing the repairs, restore power and test the Nest thermostat across heating and cooling modes. Check that the display is stable, that temperature readings respond accurately to adjustments, and that the HVAC system activates promptly when commands are issued. Confirm Wi-Fi connectivity and firmware status, and run a quick energy check to ensure no abnormal current draw. Schedule periodic checks every 6–12 months to verify wiring integrity and to catch aging components before they fail.
When to call a professional and how Thermostat Care can help
Not all Nest thermostat issues are safe or practical to repair yourself. If you detect burnt wiring insulation, damaged connectors, a short, or if 24V is inconsistent and you cannot trace the source, seek professional help. High-voltage concerns and complex control-board repairs require a licensed electrician or HVAC technician. The Thermostat Care team can help assess when DIY repair is appropriate, or guide you toward professional options, ensuring your Nest thermostat remains safe and reliable.
Tools & Materials
- Screwdriver set (Phillips and flathead)(Phillips #1 and #2; 1/4 inch shaft)
- Non-contact voltage tester(Verify no voltage present at thermostat terminals)
- Multimeter (AC 24V capable)(Test voltage between R and C at thermostat and furnace)
- Electrical tape(Insulate exposed conductors after wiring)
- Spare C-wire or extra thermostat wiring(Use if the existing C-wire is damaged or missing)
- Needle-nose pliers(Grip small wires and snug terminals)
Steps
Estimated time: 30-60 minutes
- 1
Power down and safety check
Turn off the circuit breaker for the thermostat circuit and the HVAC unit. Wait 60 seconds to discharge capacitors before touching any wiring. Use a non-contact tester to confirm no voltage at the thermostat base.
Tip: Always double-check power is off before removing the faceplate; one lapse can cause shocks. - 2
Remove thermostat faceplate and inspect wiring
Carefully loosen the mounting screws and detach the faceplate. Photograph the back of the terminal strip to record wire positions, then gently pull wires to inspect for loose ends or corrosion.
Tip: Label wires with tape if you remove multiple conductors; this helps during reassembly. - 3
Test for 24V supply and check C-wire at furnace side
With power off, set the multimeter to AC voltage and test between R and C at the furnace and at the thermostat. You should observe ~24V AC when re-powered. If voltage is absent, stop and investigate upstream issues.
Tip: If the C-wire appears damaged, consider replacing the wire segment or installing a dedicated C-wire from the furnace. - 4
Inspect and reseat wires at thermostat terminals
Tighten all screws fully and reseat each wire in its corresponding terminal. Check for loose strands that could short, trim them, and re-strip the insulation at the wire ends if necessary.
Tip: Use a small screwdriver to snug terminals; avoid overtightening which can damage terminals. - 5
Check for loose or damaged wiring at furnace control board
Open the furnace or air handler access panel and visually inspect the R, C, W, Y, and G wires for secure connections. Reseat any loose wires and look for signs of heat or corrosion that suggest a faulty connector.
Tip: Only touch components with the power off; replace any damaged connectors or wires rather than forcing a fit. - 6
Power up and perform a controlled test
Restore power and test the Nest across heating and cooling modes, watching for stable operation and correct scheduling. Verify that the Nest UI responds promptly to changes and that the HVAC system engages as commanded.
Tip: Document the results; if behavior is inconsistent, it may indicate a deeper control-board fault that requires professional help.
Questions & Answers
Can I repair a Google Nest thermostat by myself?
Yes, many common issues like power, wiring, and basic resets can be handled safely at home if you follow step-by-step safety guidelines and use proper tools. Do not attempt high-voltage work or repairs beyond your comfort level.
Yes—you can often fix power and wiring problems yourself if you stay safe and follow the steps carefully.
My Nest thermostat won’t turn on. What should I check first?
Start with power and C-wire checks, ensure the thermostat is wired correctly, and test for 24V between R and C. If power remains absent, there may be upstream issues with the furnace or breaker.
Check power and the C-wire first; if that doesn’t fix it, you may need professional help.
Is a missing C-wire always the culprit?
Not always, but a missing or unstable C-wire is a very common cause of Nest issues. If the C-wire is absent, you may need to install a proper C-wire or use an alternative power solution per the Nest wiring guide.
A missing C-wire is a frequent cause, but verify other wiring and power factors as well.
Can firmware updates fix Nest thermostat problems?
Firmware updates can resolve software bugs and improve compatibility. Ensure the Nest thermostat is connected to Wi‑Fi and check for updates in the settings. If issues persist after updating, further hardware checks may be needed.
Firmware updates can help; keep the device connected and updated.
When should I replace rather than repair a Nest thermostat?
If repeated failures occur due to aging hardware, persistent power issues, or mounting/wiring damage, replacement may be more cost-effective and reliable in the long run.
If repairs keep failing, replacement might be the better option.
Where can I get professional help for Nest thermostat repair?
Seek a licensed HVAC technician or an electronic repair specialist if you encounter electrical hazards, a damaged control board, or if you are uncomfortable performing any steps.
For hazardous or complex issues, call a professional.
Watch Video
What to Remember
- Verify power and C-wire before handling wiring.
- Secure all terminal connections to prevent intermittent faults.
- Document wiring configurations for future maintenance.
- Know when to escalate to a professional to avoid safety risks.