Furnace Thermostat Repair: A Homeowner's Step-by-Step Guide
Learn how to diagnose and repair common furnace thermostat issues. This practical guide covers power checks, wiring, calibration, safety, and when to replace the thermostat for reliable heating.

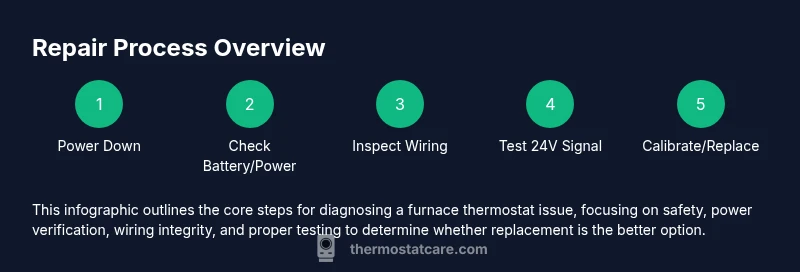
By the end of this guide you will diagnose and repair common furnace thermostat problems, restore heat control, and prevent needless calls to a technician. You’ll verify power, inspect wiring, test sensors, and calibrate readings, while knowing when it’s time to replace the thermostat. This approach emphasizes safety, step-by-step checks, and using readily available tools.
Understanding furnace thermostat repair
According to Thermostat Care, furnace thermostat repair focuses on restoring accurate temperature control without unnecessary system disassembly. A well-functioning thermostat communicates with the furnace control board to start or stop heating, regulate fan operation, and maintain comfort. In many homes, failures stem from simple issues like a loose wire, a drained battery, or a miscalibrated setting. The Thermostat Care team emphasizes safety and methodical checks to avoid accidental shocks or furnace shutdowns. Recognize that repairs range from battery swaps and wiring reseats to full replacement when the device no longer communicates with the furnace. By understanding these fundamentals, homeowners can save time and money while keeping your heating system operating efficiently.
Common symptoms and what they mean
- Heating won’t turn on when the thermostat calls for heat: Could indicate power issues, miswired terminals, or a dead thermostat battery.
- Inaccurate temperature readings or frequent cycling: May signal sensor drift, calibration needs, or a failing internal clock.
- Thermostat display blank or unresponsive: Often points to power supply problems, loose connections, or a faulty backplate.
- Uneven temperatures between rooms: Might reflect improper sensing, installation location, or furnace airflow problems.
Understanding these symptoms helps you prioritize checks and decide whether a DIY repair is appropriate or if you should call a pro. Thermostat Care analysis shows that most issues are resolvable with basic tools and careful safety practices.
Safety first: hazards and precautions
Working near a furnace involves electrical and gas components. Always power down at the furnace switch and circuit breaker before touching any wiring. Use a non-contact voltage tester to confirm the circuit is dead before removing faceplates or panels. Wear safety glasses and keep kids and pets away from the work area. If you smell gas, evacuate and contact your utility or a licensed technician immediately. These precautions minimize the risk of shock, gas leaks, and fire hazards while you perform furnace thermostat repair.
Tools and materials overview
Before you start, assemble common tools and supplies. Having everything at hand reduces the temptation to rush and miss a connection. A well-prepared workspace helps you stay organized and minimizes mistakes that could damage the furnace control board.
Troubleshooting approach: a practical plan
Adopt a systematic plan: confirm power, inspect the thermostat and its wiring, check the 24V signal from the furnace, test the temperature sensor, and evaluate whether the thermostat itself is failing or if the issue lies with the furnace control board. Document each step and test the system after any adjustment. A methodical approach reduces time spent on false leads and improves the chance of a successful repair.
Diagnosing power and wiring
Verify the thermostat receives power. If your model uses batteries, replace them with fresh ones of the correct size and polarity. Check the thermostat backplate connections for loose screws or corroded terminals. At the furnace, confirm the 24V supply to the thermostat terminals and ensure the furnace switch and breaker are in the ON position. A failing 24V transformer or a loose wire is a common culprit and often the simplest fix.
Calibrating and verifying temperature readings
If the thermostat seems to read differently than the actual room temperature, recalibrate or replace the sensor if your model allows. Use a separate thermometer to compare room temperature against the thermostat reading and document any consistent discrepancy. Some models require a small adjustment screw or a software setting; consult the manual to avoid overshooting the desired temperature. Calibration improves comfort and reduces energy waste.
Common fixes you can perform safely
- Re-seat all wires at the thermostat and at the furnace terminal strip.
- Clean any corrosion from terminal screws and apply fresh, appropriate contact lubricant if needed.
- Replace dead batteries in battery-powered thermostats and ensure a clean battery compartment contact.
- Move the thermostat to a location away from direct sunlight, drafts, or heat sources that can skew readings.
These actions fix many everyday thermostat issues without special tools. If problems persist after these steps, it may be time to consider a thermostat replacement.
When to replace vs repair
Thermostats are electronic devices with finite lifespans. If the display is intermittently failing, connections are corroded beyond cleaning, or the control module cannot reach the furnace, replacement is often the most cost-effective option. Upgrading to a modern programmable or smart thermostat can also improve energy efficiency and usability. The decision to replace should consider cost, compatibility with your furnace, and the long-term reliability of the device.
Maintenance to prevent future issues
Routine checks help prevent recurring thermostat problems. Periodically replace backplates and batteries, inspect wiring for wear or insulation damage, and keep dirt from terminal screws. Update any firmware or software when available, and ensure the thermostat’s schedule aligns with your heating needs. Regular maintenance reduces the likelihood of unexpected outages and extends the life of both thermostat and furnace.
Documentation and future troubleshooting
Keep a simple repair log: date, observed symptoms, actions taken, parts replaced, and the outcome. This log is invaluable if problems recur or if you hire a technician later. Note any unusual furnace behavior, such as unusual cycling, frequent resets, or odd error codes, and reference the manual or manufacturer support when needed.
Tools & Materials
- Digital multimeter(For checking voltage at the thermostat and furnace terminals.)
- Non-contact voltage tester(Verify power is off before handling wiring.)
- Screwdriver set (flathead and Phillips)(For removing and securing screws.)
- Replacement batteries (AA or AAA)(If your thermostat uses batteries.)
- Replacement thermostat(Choose a model compatible with your furnace.)
- Wire stripping tool(Useful for trimming wires if needed.)
- Electrical tape(Insulate exposed wires.)
- Safety glasses(Eye protection when working near wiring.)
- Heat-resistant gloves(Optional for handling equipment near heat sources.)
Steps
Estimated time: 60-90 minutes
- 1
Power down the system
Turn off the furnace at the wall switch and switchable circuit breaker. Confirm power is fully off with a non-contact tester before touching any wiring. This prevents shocks and accidental furnace operation during the repair.
Tip: If the panel is hard to reach, label wires first so you can reassemble correctly. - 2
Inspect thermostat placement and power
Remove the thermostat cover to inspect for loose wires or signs of corrosion. If battery-powered, replace with fresh batteries and reseat the battery contacts. If it uses 24V power, verify the supply from the furnace terminal block is stable.
Tip: Take a quick photo of wire connections before disconnecting anything so you can replicate exactly. - 3
Check batteries and backplate
Insert fresh batteries if applicable and ensure clean contacts. Re-secure the backplate to avoid intermittent connections. A marginal contact can cause flickering or unresponsive displays.
Tip: Clean battery contacts with a dry cloth; avoid using liquid cleaners that could leak into the thermostat. - 4
Test thermostat wiring
With power still off, loosen screw terminals and reseat each wire firmly. Check for frayed insulation and replace damaged wires. Reconnect only the wires specified in your model’s wiring diagram.
Tip: Use a small amount of terminal grease if permitted by manufacturer to improve contact durability. - 5
Verify furnace 24V signal
Back at the furnace, confirm 24V is present between R and C terminals when the thermostat is calling for heat. A missing signal indicates a problem in the transformer or wiring path. If you’re unsure, stop and call a pro.
Tip: Record the voltage reading for reference when you consult support. - 6
Calibrate or replace sensor
If the room temperature reading differs from a separate thermometer, adjust the thermostat’s sensor calibration if available or consider replacing the thermostat if miscalibration persists. Sensor drift is a common failure mode in older units.
Tip: Avoid over-tightening calibration adjustments; small changes produce noticeable effects. - 7
Address wiring and terminals again
Re-seat all connections at both thermostat and furnace terminals. Clean corrosion and apply proper insulation. Ensure there are no stray strands touching adjacent terminals.
Tip: Double-check wire color codes and follow the manufacturer's labeling. - 8
Test heating response
Return power, set a simple heat program, and observe whether the furnace starts reliably. Listen for clicking sounds indicating relay operation and watch the thermostat display for status indicators.
Tip: Allow a few minutes for the system to respond after each change. - 9
Decide on replacement
If issues persist after the above steps, evaluate the cost of repair vs. replacement. A newer thermostat can improve efficiency and reliability, especially if your current unit is older or lacks modern features.
Tip: Check compatibility with your furnace model and homeowner capabilities before purchasing a new unit. - 10
Document results and monitor
Log the steps taken, the parts replaced, and the observed outcomes. Monitor performance over several days and re-check connections if symptoms recur. This record helps future troubleshooting and service calls.
Tip: Keep the log with your thermostat and furnace manuals for quick reference.
Questions & Answers
Do I need to turn off power to the furnace before inspecting the thermostat?
Yes. Always switch off power at the furnace switch and the corresponding circuit breaker before touching wiring or terminals. Use a non-contact tester to confirm the circuit is dead.
Always power down at the switch and breaker before inspecting wiring. Verify with a tester to stay safe.
Can a thermostat replacement fix a furnace that won’t turn on?
Sometimes a failing thermostat is the root cause. If the furnace responds inconsistently to the thermostat, or the control board never receives the call for heat, replacement may resolve the issue.
If the furnace won’t respond consistently, a replacement thermostat could fix the problem, especially if wiring looks intact.
What is the difference between a standard thermostat and a smart thermostat for furnace repair?
Smart thermostats add scheduling, energy insights, and remote control. They can improve energy use and comfort but require compatibility with your furnace and Wi-Fi. A standard thermostat may be more reliable in older systems.
Smart thermostats offer convenience and energy insights but check compatibility; older furnaces may perform better with standard models.
How can I tell if the thermostat or furnace is at fault?
If the thermostat display is bright and functional but the furnace doesn’t respond, the issue may lie in wiring or the furnace control board. Conversely, a dead thermostat often points to power or battery problems.
If the display works but heat won’t start, suspect wiring or the furnace control board rather than the thermostat itself.
How long does a furnace thermostat repair typically take?
Most DIY thermostat repairs take about 60-90 minutes, depending on wiring access and whether parts need replacement. Complex control-board issues can take longer or require professional service.
Usually about an hour or so for DIY fixes; longer if the control board needs service.
Should I hire a professional for wiring repairs?
If you’re uncertain about wiring, power connections, or 24V signals, it’s safest to hire a licensed technician. They can verify the transformer, sequence sequencing, and ensure code compliance.
If wiring is unclear or risky, it’s wise to bring in a licensed technician for safety and reliability.
Watch Video
What to Remember
- Diagnose in a safe, methodical sequence
- Battery, wiring, and 24V signals cover most issues
- Calibration improves accuracy and comfort
- Replace when reliability is poor or upgrades offer value