Fix Fridge Thermostat: A Practical How-To Guide
Learn to diagnose, calibrate, and replace a faulty fridge thermostat with a safe, step-by-step approach for homeowners and DIY enthusiasts. This guide covers safety, tools, troubleshooting, and when to call a pro.

Goal: diagnose and fix a fridge thermostat to restore accurate cooling. You’ll need basic tools, a multimeter or replacement thermostat, and careful safety steps. Start by unplugging the unit, locating the thermostat sensor and control, and verifying settings. If readings are off or the compressor runs constantly, testing or replacing the thermostat often resolves the issue.
What a fridge thermostat does
The fridge thermostat is the thermostat's control center, deciding when the compressor should turn on or off to keep interior temperatures within the set range. It reads from a temperature sensor and compares it to the user-setpoint. When the sensed temperature drifts away from the target, the control signal drives the compressor or fans accordingly. According to Thermostat Care, a well-functioning thermostat helps maximize energy efficiency and prevents food spoilage by maintaining consistent cooling. If your unit fails to reach the correct temperature or cycles on too often, the thermostat may be the culprit, though other components can contribute as well. Understanding the role of the thermostat helps you diagnose issues without replacing parts unnecessarily.
Key takeaway: a faulty thermostat affects both cooling consistency and energy use, making accurate diagnosis essential for a safe DIY repair.
Safety first: unplug, power down, and de-energize
Before touching any fridge components, disconnect power entirely. Unplug the unit from the wall outlet, and if necessary, switch off power at the circuit breaker to eliminate any risk of shock. Wear safety gloves when handling metal panels or exposed wiring, and work in a dry area to avoid moisture contact with live components. Keep children and pets away while you troubleshoot. Take a quick photo of how wires are connected before disconnecting anything so you can restore it accurately later. If the unit is hardwired, consult a professional rather than attempting panel removal yourself. Safety always comes first in DIY thermostat work.
Pro tip: label wires as you disconnect them to simplify reassembly and reduce the chance of miswiring.
Common symptoms of a failing thermostat
If the fridge temperature readings are inconsistent or the unit never reaches the setpoint, the thermostat could be at fault. Other symptoms include the compressor running continuously, frequent cycling on and off, frost buildup in the freezer, or uneven cooling across shelves. Smell or heat from the control housing can indicate wiring or component damage. Note that environmental factors such as door gaskets, airflow obstructions, and dirty condenser coils can mimic thermostat symptoms, so a thorough check of the system is essential. Thermostat issues often show up as inaccurate temperature control rather than a single fault; treat symptoms as clues rather than conclusions.
Tip: rule out sealing and airflow problems first, then focus on the thermostat as the likely cause.
Diagnostic strategy: check sensors, calibration, and wiring
Start by validating the temperatures inside the fridge and freezer with an accurate thermometer placed away from the vents. Compare readings to the thermostat’s display. If there’s a persistent discrepancy, recalibration or sensor replacement may be needed. Inspect the wiring harness for loose connections, corrosion, or damaged insulation. Look for signs of moisture intrusion around the control board or sensor housing. If you notice burnt smells or melted insulation, stop immediately and call a professional, as this indicates a serious electrical issue. Keep a log of ambient temperatures and observed behavior to aid your decision.
Remember: a precise diagnosis often requires checking both sensor accuracy and the integrity of wiring.
How to test the thermostat with basic tools
A basic resistance test with a multimeter can help determine if the thermostat sensor is within spec. Disconnect power, access the thermostat, and measure resistance across the sensor terminals at known temperatures. Compare readings to your model’s expected range (found in the service manual or manufacturer site). If readings vary beyond tolerance, the sensor or thermostat module may be faulty and require replacement. For some models, a simple recalibration of the setpoint can correct drift without component replacement. Document all measurements for reference when you source replacement parts.
Caution: only perform electrical testing with the unit powered down and the capacitor discharged where applicable.
Recalibration vs replacement: when to choose
If the sensor is accurate but the displayed temperature drifts, recalibration might fix minor drift. Most modern fridges allow you to adjust the setpoint or calibration via the control panel or service menu. If calibration doesn’t bring the readings into line, or the compressor runs excessively, replacement of the thermostat module is often the best long-term fix. For older units, consider the overall health of the cooling system; a failing thermostat can mask other issues like a failing compressor or sealed system. In short: recalibrate for minor drift; replace when drift persists or sensor readings are inconsistent across tests.
Note: replacing the thermostat may be the most reliable long-term solution when multiple tests indicate a faulty component.
Maintenance to prevent future thermostat issues
Keep the interior clean and free of dust that can affect sensor readings and airflow. Check door seals regularly for leaks; a poorly sealed fridge causes the thermostat to run more often to compensate. Ensure the condenser coils are clean and unobstructed to prevent temperature fluctuations that mislead the thermostat. If your model offers a self-cleaning or diagnostic mode, use it periodically to catch sensor drift early. Regularly inspect wiring for signs of wear or aging and address any moisture exposure promptly. These preventive steps extend thermostat life and keep cooling predictable.
When to call a pro: red flags and decision points
If you identify burning smells, melted insulation, or exposed live wiring, stop work and contact a licensed technician. Electrical components inside a fridge can pose shock hazards, and improper reassembly can cause refrigerant release or electrical faults. If you have replaced the thermostat but cooling remains erratic, a pro has the tools to test the sealed system, compressor health, and refrigerant charge. DIY fixes save money for minor issues, but some situations require professional calibration and safety protocols.
Bottom line: use DIY methods for simple fixes and seek professional help for complex or unsafe conditions.
Tools & Materials
- Multimeter(Digital preferred; set to resistance (ohms) mode)
- Replacement thermostat module(Select model compatible with fridge brand and series)
- Screwdriver set(Phillips and flathead; size to fit screws on panel)
- Nut drivers or socket set(For stubborn fasteners)
- Wire cutters/strippers(For trimming or re-terminating wires)
- Electrical tape or heat-shrink tubing(Insulate exposed connections)
- Digital thermometer or fridge-safe thermometer(Place away from vents to log accurate temps)
- Camera or phone for photos(Document wiring before disassembly)
- Safety gloves(Protect hands from sharp edges)
- Flashlight(Improve visibility in tight panels)
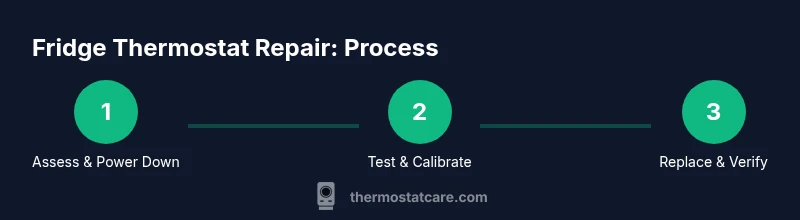
Steps
Estimated time: 45-90 minutes
- 1
Power down and access thermostat
Unplug the fridge or switch off at the breaker. Open the control panel to reveal the thermostat and sensor housing. Identify the thermostat housing location and note how wires connect to the module.
Tip: Take a photo of wire connections before disconnecting anything. - 2
Disconnect wires carefully
Gently loosen terminal screws and detach wires one at a time. Label each wire opposite the terminal to ensure correct reassembly. If wiring is brittle, replace with care to avoid breakage.
Tip: Work slowly to avoid bending delicate terminals. - 3
Test the sensor with a multimeter
With power off, measure resistance across sensor leads at known temperatures. Compare results to the factory spec for your model. If readings are out of range, the sensor or module is faulty.
Tip: Document resistance at 0°C and 25°C for reference. - 4
Calibrate or replace the thermostat
If drift is minor, adjust the setpoint or calibration in the control panel. If drift persists or readings are inconsistent, replace the thermostat module with a compatible unit.
Tip: Always power down before replacing components; reuse fittings as needed. - 5
Reassemble and test
Reconnect wires in the correct order, secure panels, and restore power. Set the fridge to a target temperature and monitor for 24 hours to confirm stability.
Tip: Avoid placing food directly against vents during testing to prevent heat bias. - 6
Evaluate results and finalize
If temperatures stabilize within the expected range, you’ve completed the fix. If not, review prior steps to verify calibration and wiring, or consult a professional for sealed-system diagnostics.
Tip: Keep a maintenance log for future reference.
Questions & Answers
What are common symptoms of a faulty fridge thermostat?
Inaccurate temperatures, the compressor running constantly, frost buildup, or uneven cooling can signal thermostat issues. Always rule out door seals and airflow first before assuming the thermostat is to blame.
Common thermostat problems include incorrect temperatures and constant compressor cycling. Check seals and airflow first, then test the thermostat.
Can I recalibrate my thermostat instead of replacing it?
Yes, minor drift can often be corrected with recalibration or adjusting the setpoint. If drift remains after recalibration, consider replacing the thermostat module.
You can try recalibration for small drift. If it doesn't fix the issue, replacement is usually the better long-term option.
Is it safe to repair a fridge thermostat myself?
DIY repairs can be safe if you power down completely and follow standard electrical precautions. If you encounter damaged wiring or unsure about connections, hire a licensed technician.
DIY work is fine for simple checks, but avoid dangerous wiring. If unsure, get a pro.
How long does a fridge thermostat repair typically take?
A straightforward diagnostic and calibration can take 30-60 minutes. Replacing the thermostat adds 15-30 minutes, depending on access and model.
Most repairs take between 30 and 90 minutes depending on access and part availability.
What tools are essential for fixing a fridge thermostat?
You’ll need a multimeter, a screwdriver set, replacement thermostat (if needed), wire strippers, electrical tape, and a digital thermometer for testing.
A multimeter, screwdriver, and a replacement thermostat are key tools, plus basic safety gear.
When should I call a pro for thermostat issues?
If you notice burning smells, melted insulation, or exposed wiring, stop and contact a licensed technician. Refrigerants and electrical safety require professional handling.
Call a pro if you smell burning or see damaged wiring. Safety first.
Watch Video
What to Remember
- Verify power before any work.
- Test sensor and calibration with a multimeter.
- Calibrate first; replace thermostat if drift persists.
- Maintain proper airflow and door seals to reduce thermostat load.
- Document steps and keep a repair log for future reference.