Blinking Cool Indicator on Honeywell Thermostats: Quick Troubleshooting Guide
Urgent, step-by-step guide to troubleshoot a blinking 'Cool' indicator on Honeywell thermostats. Diagnose common causes, fix issues, and prevent future faults.

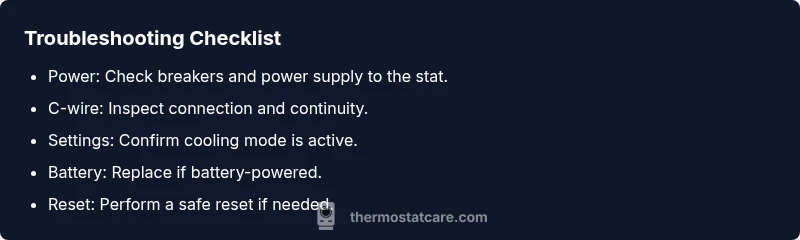
The blinking 'Cool' indicator on a Honeywell thermostat usually signals that cooling is either actively commanded or a fault in the control circuit. Start by confirming the thermostat is powered, the battery is good, and the wiring is intact. Ensure the system is set to cool with a proper C-wire, then perform a safe reset. If the blink persists, proceed with the guide below.
Why the Cool on Blinking on Thermostat Honeywell Happens
The symptom you described—cool on blinking on thermostat honeywell—can signal either a legitimate cooling command or a fault in the control circuit. According to Thermostat Care analysis, blinking indicators often reflect switching activity, sensor errors, or communication issues between the thermostat and the air handler. Recognizing the distinction helps you triage quickly and avoid unnecessary service calls. In this guide, we provide urgent, practical steps to diagnose, fix, and prevent this issue, with homeowners taking safe, incremental actions before contacting a pro. The goal is to restore reliable cooling while preserving equipment life and indoor comfort.
Interpreting the Indicator: Cooling Command or Fault?
A blinking indicator can mean the thermostat is actively calling for cooling, or it could indicate a fault in sensing, wiring, or communication. Thermostat Care recommends treating persistent blinks as potential faults requiring systematic checks rather than assuming a simple command. Start with the easiest, safest steps and work toward more in-depth tests if the blink persists.
Quick Safety Checks: Power, Breakers, and Batteries
Safety first. Before you touch any wiring, switch off power at the breaker to the HVAC system and the thermostat. Check the thermostat batteries (if it uses them) and replace if weak. Inspect the outdoor unit’s disconnect and the indoor air handler power for signs of tripped breakers or blown fuses. A quick power verification often reveals a stubborn blink caused by a simple supply issue.
Wiring and C-Wire Verification
The C-wire (common) provides a return path for the thermostat’s 24V power. A loose, damaged, or disconnected C-wire is a frequent cause of a blinking cooling indicator. Remove the thermostat faceplate carefully, reseat the C-wire at both the thermostat and the air handler control board, and look for damaged insulation or frayed strands. If you don’t see 24V between R and C with a multimeter, power delivery may be the culprit.
Settings, Sensors, and System Status
Verify that the thermostat is configured for cooling, not heat or auto, and that the schedule isn’t overriding the desired mode. Check the room-temperature sensor for drafts or placement that might skew readings. If the sensor reads abnormally, the system may repeatedly trigger cooling attempts, resulting in a blink. Thermostat Care suggests validating sensor data against a known-good thermometer in the room.
Diagnostic Flow: From Symptom to Diagnosis
A methodical approach helps isolate the root cause. First confirm power and wiring. If power is solid, test the C-wire and reseat connections. If the blink remains, inspect the HVAC control board wiring and sensors. Only after ruling out wiring and power should you consider sensor faults or control-board issues. This flow aligns with Thermostat Care recommendations for safe, effective troubleshooting.
Step-by-Step Fix for the Most Likely Cause
If the most likely cause is a loose or faulty C-wire, the fix is straightforward: shut off power, re-seat the C-wire at both ends, replace damaged wire insulation, and power the system back on. Then perform a test run in cooling mode to observe whether the indicator blinks again. This section provides clear, actionable steps you can follow safely at home.
Prevention Tips to Avoid Future Blinks
Schedule regular thermostat and HVAC maintenance, keep firmware updated, and ensure proper thermostat placement away from heat sources or direct sunlight. Label wires during any future work and replace aging batteries promptly. These best practices reduce the chance of recurring blinks and extend system life.
When to Call a Pro and What to Expect
If the blink persists after completing all safe DIY steps, contact a licensed HVAC tech. A professional can verify electrical integrity, perform insulation tests, and diagnose potential control-board faults. Expect a diagnostic visit to include voltage checks, wire resistance tests, and confirmation of system refrigerant status if applicable.
Steps
Estimated time: 45-60 minutes
- 1
Power down safely
Switch off power at the breaker for both the thermostat and HVAC unit. Wait 60 seconds, then turn the power back on to reset minor glitches.
Tip: Use a non-contact tester to confirm no live voltage before touching components. - 2
Inspect C-wire and connections
Remove the thermostat faceplate and verify the C-wire is connected firmly at both the thermostat and the control board. Look for damaged insulation or bent connectors.
Tip: Label wires before disconnecting anything to simplify reassembly. - 3
Test power between R and C
With power restored, use a multimeter to confirm 24V AC between R and C. If you don’t see 24V, the problem is upstream (breaker or transformer).
Tip: If you’re unsure, consult a licensed technician rather than forcing power through. - 4
Check thermostat settings
Ensure the thermostat is set to cooling, not heat, auto, or emergency settings. Review any active schedules that could force a different mode.
Tip: Temporarily set to a fixed cooling temperature to test response. - 5
Reset the thermostat
Perform a soft reset (restart) or a factory reset if the device remains unresponsive. Note any personalized settings that may need reconfiguration.
Tip: Back up favorites or routines before resetting. - 6
Test operation
Power up the system and switch to cooling. Observe whether the indicator blinks again and if the HVAC responds correctly.
Tip: If the blink recurs, document indicators and times to share with a professional.
Diagnosis: Thermostat displays 'Cool' blinking or fails to exit cooling mode
Possible Causes
- highLoose or damaged C-wire/power supply
- highThermostat wiring misconfiguration or thermostat setpoints incorrect
- mediumSensor or communication fault between thermostat and HVAC control board
- lowDirty or faulty temperature sensor within the HVAC or thermostat
Fixes
- easyTighten or replace C-wire; ensure 24V power is present at the stat
- easyVerify cooling mode is selected and reset the thermostat to defaults if needed
- easyRe-seat thermostat wires at both ends; check for damaged insulation or shorts
- easyReplace batteries if required and perform a controlled reset
Questions & Answers
What does a blinking 'Cool' mean on a Honeywell thermostat?
A blinking Cool usually signals cooling is active or there is a fault in the control circuit. Check power, batteries, and wiring, then reset the device.
A blinking Cool usually means cooling is active or there’s a fault. Check power, batteries, and wiring, then try a reset.
Can I fix a blinking Cool indicator myself?
Yes, many blinking issues are caused by simple power or wiring problems. Start with power, C-wire, and settings checks before calling a technician.
Yes, many blinking issues come from simple power or wiring problems. Start with basic checks before calling a pro.
What safety steps should I take before working on the thermostat?
Turn off power at the breaker, wear insulated gloves if needed, and avoid touching live terminals. Use a non-contact tester to verify de-energized components.
Turn off the breaker and verify de-energized components before touching wires.
If the blink persists after DIY fixes, what should I do?
Document symptoms and times, then contact a licensed HVAC technician for a professional diagnosis and possible control-board repair.
If it keeps blinking after DIY steps, call a licensed HVAC tech for a professional check.
Is it safe to replace the thermostat myself?
Replacing a thermostat can be safe if you follow manufacturer instructions and disconnect power. For complex wiring or multiple zone systems, hire a pro.
It can be safe if you follow instructions and power is off, but for complex systems, hire a pro.
How can I prevent future blinking issues?
Schedule regular maintenance, keep firmware updated, and ensure clean wiring connections. Regular checks reduce the likelihood of future blinks.
Regular maintenance and keeping connections clean helps prevent future blinks.
Watch Video
What to Remember
- Identify whether blink indicates cooling command or fault
- Verify power, C-wire, and settings before attempting fixes
- Power off safely before wiring checks
- Call a pro if unresolved after steps