How to Change the Thermostat on a Hot Water Heater
Learn how to safely change the thermostat on a hot water heater, with practical steps for electric and gas models, necessary tools, safety tips, and troubleshooting.

According to Thermostat Care, this guide shows homeowners how to safely change the thermostat on a hot water heater. You'll learn how to identify electric vs gas models, shut off power or gas, remove the old thermostat, install a compatible replacement, and test the system. Expect to need basic hand tools, safety gear, and the correct thermostat for your unit.
Why changing a thermostat matters for a hot water heater
Temperature accuracy on a hot water heater affects comfort, energy use, safety, and appliance longevity. If your hot water fluctuates, runs too hot, or you notice cold patches, the thermostat may be out of calibration or failing. According to Thermostat Care, safety and precision are non-negotiable; a faulty thermostat can lead to scalding or inefficient heating. This section explains why a thermostat swap can resolve common problems and how to choose a compatible replacement for your model. By understanding the basics, you can approach the swap confidently and avoid common missteps that trigger leaks or electrical hazards.
Beyond the immediate comfort issue, a correctly functioning thermostat helps prevent overheating that can stress the water heater tank and heating elements. You’ll save energy and reduce wear when the thermostat maintains a steady temperature. This discussion sets the stage for identifying your water heater type and selecting the right replacement part. It also emphasizes that if you feel unsure at any point, pausing and consulting a professional is the safest option.
Electric vs gas water heater thermostats: what changes when you switch models
Electric water heaters typically rely on two thermostats (upper and lower) housed behind insulated panels. These thermostats control the heating elements and are wired into the circuit with the corresponding high-temp cutoffs. Gas-powered units use a gas control valve with an integrated thermostat and pilot/ignition system. Replacing the thermostat on an electric unit is a more straightforward wiring task, but you still must confirm the exact model and wiring configuration. For gas units, you must ensure the gas control valve is compatible and that venting and gas safety requirements are met. Always consult your unit’s manual and follow local codes. This section helps you determine which replacement part to buy and what to expect during installation.
Safety first: prerequisites before you start
Preparation is the key to a safe thermostat swap. Always power down the heater’s supply at the main breaker for electric models or shut off the gas supply for gas models, then confirm no voltage or gas flow before touching components. Wear safety glasses and insulated gloves, and keep a dry workspace. If the water heater is located in a cramped space or near moisture, consider additional protection to prevent slips. Label wires or take photos before disconnection so you can match terminals on the new thermostat. Finally, verify that you have a compatible replacement thermostat—one tailored to your exact make and model—and that the tank is at a safe working temperature.
Step-by-step overview: preparing for the swap
Before you begin the swap, locate the thermostat assembly and check the model numbers on the replacement part. Read the manufacturer’s wiring diagram and note any differences between the old and new thermostat terminals. Prepare your workspace with a clear surface and a container for small screws. If you encounter stubborn screws or corroded terminals, apply penetrating oil and allow a few minutes to work. This overview sets up the actual step-by-step instructions that follow.
Replacing the thermostat: electric water heater (detailed steps)
This section covers the typical process for electric water heaters with upper and lower thermostats. Start by turning off the power at the circuit breaker, then remove the access panels and insulation to expose the thermostats. Photograph or label the wires connected to each terminal. Disconnect the wires, remove the old thermostat, and install the new unit, ensuring each wire goes to the same terminal on the replacement. Reattach the panels and insulation, restore power, and verify operation. If your unit uses a nested digital control, follow the manufacturer’s sequence for enrolling the new thermostat and setting the desired temperature.
After replacement: testing temperatures and ensuring reliability
With power restored, turn on hot water taps at the farthest fixture to purge air from the system and listen for hot water flow. Check the thermostat setting—most households target around 120°F (49°C)—and wait for the tank to recover to the setpoint. Use a calibrated thermometer to confirm water temperature at several fixtures. If the temperature is inconsistent, re-check wiring and terminals for secure connections. Record the new setpoint and test again after 24 hours to ensure stability.
Troubleshooting common issues after replacement and when to call a pro
If you notice no hot water, insufficient hot water, or leaks around the thermostat panels after replacement, there may be wiring mismatches, a faulty thermostat, or a faulty valve. Check for loose connections and signs of corrosion. If you smell gas or detect a gas leak in a gas-powered unit, shut off the gas supply immediately and call a professional. Water heater issues beyond your comfort zone—especially those involving gas safety, venting, or electrical wiring—are best handled by licensed technicians.
Tools & Materials
- Replacement thermostat compatible with your water heater model(Confirm model number and type (electric two-element vs gas control).)
- Screwdriver set (Phillips and flathead)(Flathead for panels; Phillips for thermostat screws.)
- Non-contact voltage tester(Verify no power is present before touching wiring.)
- Multimeter or continuity tester(Used to confirm circuit integrity and sensor function.)
- Labeling materials (masking tape and pen) or camera(Mark wires to ensure correct reattachment.)
- Towels or a small bucket(Contain drips from cold inlet and drain connections.)
- Thread seal tape (PTFE) if installing any fittings(Only needed if you replace fittings or install new valves.)
- Insulation material for exposed pipes(Keep thermal efficiency and protect components.)
Steps
Estimated time: 60-120 minutes
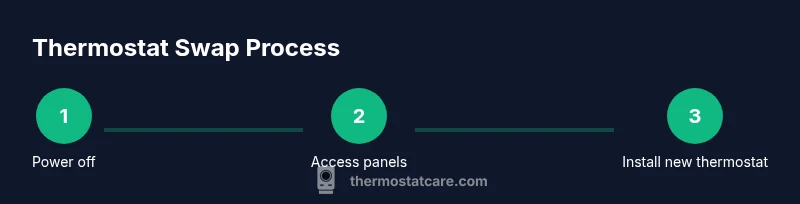
- 1
Power down and confirm no live voltage
Switch off the circuit breaker for the water heater and use a non-contact tester to confirm no electrical power before touching any wires.
Tip: Double-check the breaker label and keep others away from the panel to prevent accidental re-energizing. - 2
Access the thermostat assembly
Remove the outer access panels and insulation to expose the thermostat(s) and wiring.
Tip: Keep track of screws and note which panel belongs to upper/lower controls. - 3
Label and disconnect the wires
Label each wire with its terminal position or take a close photo before disconnecting.
Tip: Be gentle with terminals to avoid bending or breaking connectors. - 4
Remove the old thermostat
Unscrew the thermostat, detach the wiring, and remove the unit from its mounting.
Tip: If screws are corroded, apply a small amount of penetrating oil and allow it to work. - 5
Install the new thermostat
Mount the new thermostat and reconnect each wire to the corresponding terminal.
Tip: Ensure all connections are snug but not overtightened to prevent terminal damage. - 6
Reassemble panels and insulation
Replace insulation, reattach access panels, and secure screws.
Tip: Check that no wires are pinched when mounting panels back in place. - 7
Restore power and test
Turn the breaker back on or re-enable gas supply as appropriate, then verify hot water output at several fixtures.
Tip: Run the hottest tap first to speed up purging air from the system. - 8
Set the desired temperature
Aim for a safe, comfortable temperature around 120°F (49°C) and adjust if needed based on your family’s needs.
Tip: Avoid higher settings to reduce scald risk and energy waste. - 9
Document and monitor
Record the new setpoint and monitor performance for the next 24–72 hours, noting any fluctuations.
Tip: If fluctuations persist, re-check wiring or consider a professional inspection.
Questions & Answers
Do I need to drain the tank before replacing the thermostat?
In many electric-water-heater thermostat replacements you don’t need to drain the entire tank. You may need to shut the cold-water supply and drain a small amount to avoid spills while disconnecting wires. If the tank is hot or you’re uncertain, draining a portion or the whole tank may be safer.
Often you can replace the thermostat without draining the whole tank; if in doubt, drain slowly and proceed carefully.
Can I replace the thermostat myself?
Yes, if you’re comfortable with basic electrical work, have the right replacement part, and follow safety procedures. If you’re unsure about wiring, gas components, or venting, hire a licensed professional.
You can, if you’re confident with electrical work; otherwise, seek a professional.
How do I know which thermostat to buy?
Check your water heater’s model and the existing thermostat type (upper/lower or single control). Purchase the exact replacement or an equivalent compatible part per the manufacturer’s specifications.
Match the model and type exactly to ensure compatibility.
What about gas water heaters with a thermostat?
Gas water heaters often use a gas-control valve with an integrated thermostat. Replacing it may involve more complex gas safety work; consider professional service.
Gas systems are more complex—professional help is wise for safety.
How long does a thermostat replacement take?
Most replacements take about 60–120 minutes, depending on the model and accessibility of the thermostat inside the unit.
Usually about an hour or two, depending on accessibility.
What safety checks should I perform after replacement?
Ensure there are no leaks, confirm the water temp stabilizes at the setpoint, and recheck wiring and connections after the first cycle.
Check for leaks and confirm stable temperature after the first cycle.
Watch Video
What to Remember
- Verify power or gas safety before touching any components
- Use the correct thermostat compatible with your unit
- Label wires and follow wiring diagrams precisely
- Test water temperature and monitor for consistency after replacement