How to Change an Oven Thermostat: A DIY Guide
Learn how to safely change an oven thermostat with a practical, step-by-step guide from Thermostat Care. Includes tools, safety tips, testing methods, and troubleshooting notes for reliable ovens.

By following these steps, you can safely change an oven thermostat and restore accurate baking temperatures. Start by powering off the oven, confirming no voltage, and choosing a compatible replacement part. This guide provides a clear, step‑by‑step process, essential tools, and safety tips to minimize risk. Whether you're DIY‑savvy or a first‑timer, following these instructions helps ensure a safe, reliable replacement without damaging other oven components.
Why Change Oven Thermostat Matters
According to Thermostat Care, a faulty oven thermostat can cause temperature swings, undercooked dishes, or overheating that wastes energy and increases risk. Replacing a worn thermostat improves accuracy, ensures even cooking, and extends the oven life. In many ovens, a malfunctioning thermostat also triggers error codes or bake-light blinking. If your oven runs consistently hot or cold, addressing the thermostat is a priority. This guide walks you through how to safely choose and install a new thermostat, verify calibration, and test results after installation. By understanding the thermostat's role, homeowners gain confidence to fix common problems without calling a repair technician, saving time and money while keeping your kitchen safe.
Safety First: Hazards and Precautions
Thermostat replacement involves working with electrical components and, in gas ovens, potential gas line exposure. Always disconnect power at the breaker and use a non-contact voltage tester to confirm there is no live current. Wear insulated gloves when handling heated parts and avoid touching exposed metal. Keep a clear workspace, keep screws in a labeled container, and never bypass the thermostat wiring. Thermostat Care Team emphasizes that safety is non‑negotiable; if you feel unsure, pause and seek professional help.
When to Replace vs Recalibrate
Some ovens exhibit inaccurate temps due to calibration drift, worn sensing elements, or control electronics. If the thermostat reads high or low by a wide margin across several settings, replacement is often the best long‑term fix. Minor calibration wobbles may be corrected through the oven's built‑in calibration feature, if available, but persistent errors after calibration should prompt a part replacement. Thermostat Care notes that compatibility and mounting accuracy matter just as much as the electrical rating when choosing a new unit.
Tools and Replacement Parts You Need
Before you start, assemble the essential tools and a model‑specific thermostat. A digital multimeter helps verify resistance in old wiring paths, while screwdrivers (Phillips and flat‑head) and a nut driver simplify panel access. Have a compatible replacement thermostat ready, matching the part number and mounting style to your oven model. Keep heat‑resistant gloves, electrical tape, and a calibrated oven thermometer handy for testing. These items ensure you can complete the job with control and confidence.
The Step-By-Step Replacement Process: Overview
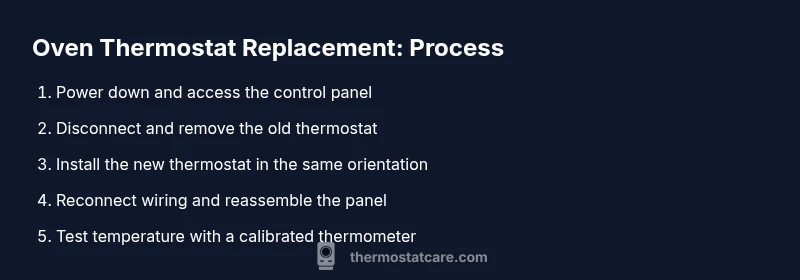
This section outlines the practical sequence you’ll follow in the hands‑on steps. You’ll power down the unit, remove the control panel, disconnect the old thermostat, install the new one, reconnect wiring, and reassemble. After re‑energizing, you’ll test the oven with a thermometer, make any necessary calibration adjustments, and perform a bake test to verify accuracy. Rely on manufacturer manuals for model‑specific torque specs and wiring colors. Thermostat Care recommends documenting the process so future maintenance is faster and safer.
Testing and Calibration After Installation
With the new thermostat in place, restore power and perform a controlled bake at a known setting. Use a calibrated oven thermometer placed inside the oven to compare actual temperature to the setting. If the difference persists, use the oven’s calibration feature (if available) or adjust the thermostat slightly following the model manual. Allow the oven to complete at least one full bake cycle at a mid‑range temperature to confirm stability. Thermostat Care emphasizes validating consistency across multiple temperature points before declaring the job complete.
Common Mistakes and How to Avoid Them
Rushing through panel removal or mislabeling wires is the most common pitfall. Avoid assumptions by taking photos at each connection point before disconnecting anything. Don’t force components or overtighten mounting screws, which can crack the control housing. Skipping a thorough test bake after installation is another frequent error—always verify with a thermometer and multiple settings. Finally, never work on energized components; power must be off during any disassembly.
Tools & Materials
- Digital multimeter(Test thermostat resistance and verify wiring continuity)
- Screwdrivers (Phillips & flat-head)(Remove screws from control panel and access covers)
- Nut driver or hex wrench(Secure mounting screws on the thermostat)
- Replacement oven thermostat (model-specific)(Match exact part number and mounting style)
- Heat-resistant gloves(Handle hot components safely if the oven has residual heat)
- Electrical tape(Secure wiring leads and label connections)
- Calibrated oven thermometer(Verify actual oven temperatures during tests)
- Magnetic parts tray(Keep screws organized during disassembly)
Steps
Estimated time: 1.5-2 hours
- 1
Power off and unplug
Switch off the oven at the wall or circuit breaker and unplug if possible. Verify no heat is present on the control panel and allow any residual heat to dissipate before touching components.
Tip: Use a non-contact voltage tester to confirm no current is present before starting. - 2
Remove the control panel/access cover
Use the appropriate screwdriver to remove screws holding the panel in place. Place screws in a labeled container and reference a photo if wiring positions were noted.
Tip: Take a photo of wire positions before disconnecting anything. - 3
Identify the thermostat and access path
Locate the thermostat behind the control panel or along the back of the range. Note its orientation and how it is mounted to ensure correct reinstallation.
Tip: Consult the model manual to confirm thermostat location and orientation. - 4
Label and disconnect wiring harness
Carefully detach the wiring harness from the thermostat. Label each connection or bag wires by color and terminal so you can reattach correctly.
Tip: Document color-to-terminal mapping with a quick sketch if needed. - 5
Remove the old thermostat
Unfasten the thermostat from its mounting bracket and set it aside. Be mindful of any springs or clips that may drop when released.
Tip: Keep the old thermostat until the new one is secured and tested. - 6
Verify compatibility of the replacement
Compare the new thermostat's part number, mounting Holes, and electrical rating with the old unit. Confirm wiring connection points match the new model.
Tip: If in doubt, contact the manufacturer or consult Thermostat Care resources for compatibility checks. - 7
Install the new thermostat
Position the new thermostat in the same orientation as the old one and secure it with the mounting bracket or screws. Ensure it sits flush to avoid binding components.
Tip: Start with loose screws to align parts before tightening fully. - 8
Reconnect wiring to the thermostat
Reconnect each wire to the corresponding terminal as labeled or documented earlier. Double-check that each connection is secure and free of stray strands.
Tip: Use a bit of electrical tape to secure any loose terminal leads if permitted by the design. - 9
Reassemble the control panel
Carefully reattach the control panel or access cover. Reinsert all screws and ensure the panel sits evenly without gaps.
Tip: Reset any control panel orientation features if your model includes them. - 10
Power up and perform a basic function check
Restore power at the breaker and check that the oven powers up normally and displays expected indicators. Do not run a bake yet until basic function is verified.
Tip: If the display reads error codes, consult the manual or Thermostat Care resources. - 11
Calibrate settings if required
Some models include a thermostat calibration feature. Follow the manual to adjust calibration in small increments if the readings seem off.
Tip: Make only small adjustments and test after each change. - 12
Test with a controlled bake
Place a calibrated oven thermometer inside and run a bake cycle at a mid-range setting. Compare the actual temperature to the setting to assess accuracy.
Tip: Allow the oven to preheat fully and record temperatures at 350°F, 400°F, and 450°F if your model supports it. - 13
Final checks and cleanup
Confirm all screws are secure, wiring is neatly tucked away, and the exterior panels are clean. Return tools to storage and keep the area tidy.
Tip: Dispose or label the old thermostat for disposal or recycling as required.
Questions & Answers
Can I recalibrate instead of replacing the thermostat?
Calibration can fix minor drift in some models, but persistent inaccuracies after calibration typically require a replacement. Always consult your oven’s manual and Thermostat Care guidance before deciding.
Calibration can fix small drift, but if temps stay off, you’ll likely need a replacement. Check your manual and Thermostat Care for model specifics.
How do I know if the thermostat is the issue?
Symptoms like wide temperature swings, hot spots, or mismatched settings compared to the thermometer indicate thermostat issues. Rule out sensor dust, faulty wiring, or control board problems first.
Look for big temperature swings or mismatches between setting and actual temp. If unsure, check wiring and controls as well.
Is it safe to replace the oven thermostat myself?
With the power off and the proper tools, replacing an oven thermostat is a feasible DIY task for many homeowners. If you encounter gas lines, high voltage, or unclear wiring, stop and seek professional help.
If the power is off and you follow the manual, it can be a doable DIY task. If you’re unsure about gas or electrical safety, call a pro.
Will replacing the thermostat affect my warranty?
Replacing a thermostat can affect warranties depending on the manufacturer and service terms. Check the warranty documentation and consult the brand's guidelines before proceeding.
Warranty terms vary by brand. Read your manual or contact support to confirm how a DIY thermostat change might affect coverage.
How long does a thermostat replacement take?
A typical replacement takes about an hour to two hours depending on model access and component complexity. Plan for extra time if you need to remove additional panels.
Usually about one to two hours, depending on access and model specifics.
What are common symptoms of a faulty oven thermostat?
Common signs include inconsistent temperatures, undercooking or burning at expected settings, and error codes on the display. If in doubt, test with a thermometer to confirm actual temps.
Inconsistent temps, undercooked dishes, or error codes can indicate a faulty thermostat. Verify with a thermometer.
Watch Video
What to Remember
- Power off and verify no voltage before starting.
- Match replacement thermostat to model and mounting style.
- Test temperatures with a calibrated thermometer after installation.
- Calibrate only as model instructions allow and verify across settings.
- Keep tools organized and replace the panel securely.