Blinking Heat on Thermostat: Quick Troubleshooting Guide
Learn how to diagnose and fix blinking heat on a thermostat safely. This guide covers common causes, practical fixes, and when to call a pro with Thermostat Care guidance.

The blinking heat indicator usually signals an electrical or sensor fault. Start with powering down at the breaker, reseating the C-wire if present, and then performing a power cycle. If blinking persists after a reset, call a professional—HVAC safety is at stake.
What blinking heat on thermostat means
A blinking heat indicator on a thermostat is a alert signal that something isn’t communicating correctly between the thermostat, power source, and the heating system. According to Thermostat Care, this pattern often points to a power issue, a loose connection, or a sensor fault. Understanding the blink pattern helps you choose the right next step and reduces the risk of electrical shock or equipment damage. In this section, you’ll learn what the blinking heat signal is trying to tell you and how to triage safely, so you can restore reliable heating fast.
This guide emphasizes practical, safe troubleshooting. Treat any flashing display as a warning rather than a normal state. If you’re unsure at any point, pause and seek professional help to avoid hazards.
Immediate safety steps you should take
Safety always comes first. Before touching any wiring, shut off power to the thermostat and the HVAC system at the main breaker. Wear insulated gloves if you need to handle exposed terminals. Do not use tools that could bridge live contacts. Thermostat Care recommends a controlled approach: power down, inspect from a safe distance, and only reconnect when you’re confident all connections are secure. If you smell burning, hear buzzing, or notice damaged insulation, evacuate and call a licensed technician immediately.
Next, verify that the thermostat is receiving stable power. If your model runs on batteries, replace them with fresh ones and test again. If your unit is hardwired, check the circuit breaker and any fuses in the furnace panel. When power returns, observe the blink pattern for changes. If the indicator returns to a normal steady display, the issue is likely addressed; if not, proceed to the diagnostic flow below.
Common causes behind the blinking indicator
There are several frequent culprits behind a blinking heat signal. The most common is a simple power issue, such as a tripped breaker or an unstable 24V supply to the thermostat. Loose or corroded wiring at the thermostat or furnace terminals is another frequent cause, which can interrupt communication between components. A weak or dead thermostat battery can also trigger blinking on battery-powered models.
Other potential causes include a faulty thermostat sensor, a damaged C-wire, or a failing control board in the thermostat or HVAC equipment. In some cases, incompatibilities between the thermostat and the furnace or air handler can produce a blinking pattern. Identifying the root cause relies on a methodical check of power, connections, and wiring.
Step-by-step diagnostic checks you can perform
This section walks you through a structured diagnostic flow you can perform safely. Start with the simplest checks and only advance to more involved tests if the previous steps don’t resolve the blinking.
- Confirm safety: power off at the breaker before inspecting any wires. 2) Power cycle: turn the breaker back on after 30 seconds, then observe the thermostat. 3) Battery check: replace batteries if applicable. 4) Check wiring at thermostat: ensure wires are snug under terminals, especially the C-wire. 5) Inspect furnace panel: look for loose wires or signs of corrosion at the control board connections. 6) Test the C-wire with a multimeter if you have one, or contact a pro for a safe voltage check. 7) If blinking persists, rule out a thermostat fault by testing with a spare unit if available.
If at any point you feel unsure, stop and contact a licensed HVAC technician. Some steps require professional tools or knowledge to avoid damage or injury.
How to fix the most common cause: power and wiring
Power and wiring issues drive the majority of blinking heat alerts. Start with the simplest fixes and progress in a controlled way. Begin by ensuring the thermostat is properly powered: check the circuit breaker, reset it if needed, and confirm that the HVAC fuse is intact. Next, reseat all thermostat wires and confirm the C-wire is securely connected; a loose C-wire is a frequent source of blinking.
After confirming power and wiring, re-test the thermostat. If the blinking stops, you’ve likely addressed the fault. If it continues, you may be dealing with a faulty sensor or a control board problem, which warrants professional assessment. Remember to label wires before disconnecting and avoid testing live circuits without proper equipment.
Preventing future blinking and maintenance tips
Proactive maintenance reduces the odds of blinking heat in the future. Schedule periodic inspections of the thermostat wiring at the furnace and at the thermostat itself. Keep the thermostat and furnace panels clean and free of dust that can affect sensors and terminals. Replace batteries in battery-powered thermostats on a recommended cadence, and ensure the HVAC system is protected by proper grounding.
Use a dedicated 24V power supply where possible, and avoid extension cords that can cause voltage drops. Finally, consider upgrading to a thermostat that supports fault diagnostics and remote monitoring, which can alert you to issues before they affect comfort.
When to seek professional help and safety notes
If you have completed the safe checks and the blinking heat persists, it’s time to call a pro. A licensed HVAC technician can test electrical components with proper tools, verify voltage levels, and diagnose control board faults. Never bypass safety features or attempt high-voltage work. Complex wiring or control board issues can pose shock or fire hazards if mishandled.
Steps
Estimated time: 60-90 minutes
- 1
Power down and verify safety
Turn off the thermostat at the breaker and switch off the HVAC supply. Wait 30 seconds, then restore power. This reset can clear transient faults that cause blinking.
Tip: Always wear insulated gloves when handling exposed terminals; never touch live wiring. - 2
Power cycle and observe
With power restored, watch the display as the system attempts to heat. Note whether the blink pattern changes or clears. If it repeats, move to wiring checks.
Tip: Take a photo of wiring terminal labels before disconnecting anything for later reassembly. - 3
Check C-wire and other connections
Carefully remove the thermostat cover and inspect all wire connections. Ensure the C-wire is securely attached and not frayed. Re-seat any loose wires.
Tip: If you’re not comfortable with wiring, skip to step 5 and contact a pro. - 4
Test or replace batteries
If your model uses batteries, replace them with fresh ones and re-test. Low batteries can trigger blinking indicators and miscommunication.
Tip: Use the exact battery type recommended by the manufacturer. - 5
Inspect furnace wiring and breakers
Check the furnace panel for loose wires or blown fuses. Ensure the 24V control circuit to the thermostat is intact and that the furnace and thermostat share a common ground.
Tip: Only perform furnace-side checks if you’re confident with electrical safety; otherwise call a pro. - 6
Re-test and decide on next steps
Power everything back on and monitor the display. If blinking persists after basic checks, it’s time for a professional diagnostic.
Tip: Document observed patterns (blink rate, duration) to share with the technician.
Diagnosis: Thermostat screen blinking while attempting to heat
Possible Causes
- highPower issue (tripped breaker or unstable supply)
- highLoose or damaged thermostat wiring
- mediumBattery failure in battery-powered models
- mediumThermostat sensor or control board fault
- lowC-wire problem or grounding issue
Fixes
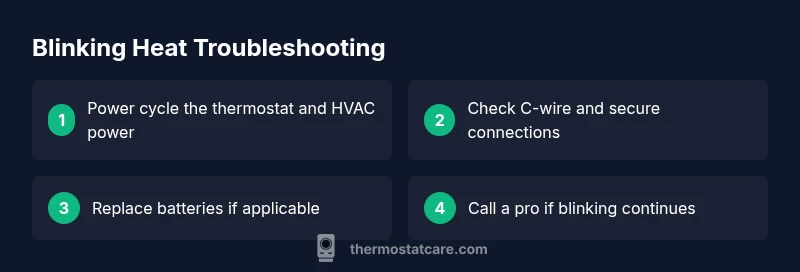
- easyPower cycle the thermostat and HVAC power at the breaker for 30 seconds, then restore power
- easyReseat all wires at the thermostat, especially the C-wire, and tighten terminals securely
- easyReplace thermostat batteries if applicable and re-test
- mediumInspect furnace/air handler wiring for corrosion or loose connections and tighten as needed
- easyIf the blinking persists, arrange professional service to test voltage and sensor circuits
Questions & Answers
What does a blinking heat indicator mean on my thermostat?
A blinking heat indicator usually points to a power, wiring, or sensor issue. It’s a signal to diagnose step by step rather than ignore. Start with power cycling, then check wiring and batteries.
A blinking heat indicator usually means there’s a power or wiring fault. Start with a safe power cycle and check the wiring and batteries.
Is it safe to fix blinking heat myself?
Basic checks like power cycling and reseating wires are generally safe if you cut power first. Do not tamper with furnace wiring or high-voltage components without training.
Some basic checks are safe if you cut power first, but avoid high-voltage work unless you’re trained.
What should I do first when I see blinking heat?
First, switch off power to the thermostat at the breaker, wait 30 seconds, then power back on and observe the display for changes.
First, cut the power at the breaker, wait, then power back up and check the blink pattern.
Can blinking heat cause damage to the HVAC system?
Persistent blinking often signals issues that, if left untreated, may stress control circuits. Addressing power and wiring promptly minimizes risk.
If it keeps blinking, the control circuits could be under stress. Fix the root cause quickly or call a pro.
When should I replace the thermostat?
If blinking persists after professional service or the unit is old, replacement may be the most reliable option.
If it still blinks after service, replacement might be the best long-term fix.
Watch Video
What to Remember
- Start with a power reset and wiring checks.
- Address C-wire and battery issues first.
- If blinking continues, consult a licensed pro.
- Prevent future problems with regular maintenance.