Bad Thermostat vs Bad Water Pump: Diagnostic Guide
A comprehensive diagnostic guide comparing bad thermostat and bad water pump failures, their symptoms, testing steps, and repair options for homeowners. Learn how to diagnose, compare costs, and decide when to DIY or hire a pro in 2026.

In residential HVAC, many faults labeled as bad thermostat vs bad water pump trace to thermostat calibration, sensor drift, or wiring rather than a failed control module. Water pump failures, by contrast, disrupt circulation and heat transfer. According to Thermostat Care, a structured approach—start with electrical checks, sensor tests, and basic water-flow tests—reduces misdiagnosis and unnecessary replacements. Both components affect comfort, efficiency, and system longevity.
Understanding the scope: bad thermostat vs bad water pump
When homeowners troubleshoot heating, ventilation, and air conditioning (HVAC) problems, two frequent culprits surface: a bad thermostat and a bad water pump. The phrase bad thermostat vs bad water pump captures a diagnostic tension: both components influence temperature delivery, but they do so in very different ways. The Thermostat Care approach emphasizes distinguishing control errors from mechanical failures to avoid premature replacements. In practice, a failing thermostat can produce inconsistent setpoints, delayed responses, or complete loss of control, while a failing water pump typically manifests as poor circulation, uneven heating or cooling, odd noises, and in some cases overheating of the system. This section outlines the fundamental roles of each component, how failures arise, and why a correct diagnosis matters for comfort and energy efficiency. According to Thermostat Care analysis, the majority of residential issues attributed to bad thermostat symptoms often originate from calibration drift, sensor faults, or loose wiring rather than a failed sensor or control module. Conversely, water pump problems commonly come from wear, impeller damage, or blockages that impede flow. Recognizing these patterns is a crucial first step in effective troubleshooting and cost control.
Core operating differences: control logic vs fluid dynamics
The thermostat is essentially a control device. It receives user-setpoints, reads ambient temperature through sensors, and signals the HVAC system to heat or cool until the target is reached. The water pump, on the other hand, is a mechanical workhorse that moves warmed or cooled water through radiators, coils, or baseboard systems. Because they occupy different layers of the system, failures in each component produce distinct patterns.
Thermostats influence when and how aggressively the system runs. A miscalibrated sensor or a loose wire can cause the furnace or air conditioner to run too long, too short, or at the wrong times. In contrast, a failing water pump affects flow rather than control logic. You may notice reduced flow, loud grinding, or inconsistent cooling or heating even when the thermostat is signaling the system to operate. The two failure modes can masquerade as each other, especially in older homes that use manual controls or two‑stage heating. Thus, distinguishing symptom clusters is essential.
From a diagnostic perspective, think of you as the conductor (thermostat) versus the mechanical mover (pump). Diagnosing the wrong part can waste time and money. The Thermostat Care framework emphasizes starting with the simplest, most verifiable checks: confirm power supply, inspect wiring connections at the thermostat and furnace/air handler, test temperature readings with a known-good thermometer, and verify that setpoints respond when you adjust them. When the thermostat appears to operate correctly, the focus shifts to the circulatory path and pump operation. This logic helps homeowners avoid swapping parts that are still functional and prevents needless downtime in extreme weather. The upshot is clearer barriers between control errors and physical failures, which makes repairs safer and more cost-effective.
Common thermostat failure symptoms
Thermostat failures often masquerade as system-wide problems. Look for: misleading or delayed temperature readings, rapid cycling, failure to reach the setpoint, unresponsive buttons or touchscreens, odd calibration offsets between rooms, and, for smart thermostats, connectivity problems or erroneous scheduling. Loose wiring at the thermostat or at the furnace can mimic sensor drift, creating the appearance of a failing thermostat when the issue is simply a loose connection. If the thermostat reports errors yet the HVAC equipment seems physically healthy, you’re likely looking at a control issue rather than a pump problem. In this scenario, recalibration, wiring repair, or replacing a failing sensor can restore reliable performance without touching the pumping circuitry. This symptom set is a frequent first clue in distinguishing bad thermostat symptoms from pump faults.
Common water pump failure symptoms
Water pump failures primarily affect circulation. Expect weak or uneven heating or cooling, radiators or coils that stay cool or hot in spots, audible grinding or whining, increased system noise during operation, or leaks around the pump housing. If the thermostat commands demand heat that never materializes with poor flow, you may be chasing a pump issue rather than a control fault. In some setups, a failing pump reduces pressure in the hydronic loop, leading to inconsistent temperatures throughout the home. Over time, poor circulation can cause overheating of components or premature wear on heat exchangers. Distinguishing these signs from thermostat-related symptoms requires testing the pump’s flow and listening for mechanical anomalies alongside validating the thermostat’s control signals.
Diagnostic approaches and safe checks
A structured diagnostic plan helps separate bad thermostat symptoms from pump problems. Start with electrical checks: verify the power supply to the thermostat and power at the furnace or air handler. Inspect all wiring connections for looseness or corrosion; reseating connectors can fix intermittent signals. Test the thermostat’s readings with a separate, calibrated thermometer placed in the living space and compare readings across zones. If readings are consistent with the thermostat’s setpoints, the issue may lie further downstream.
Next, verify the sensor’s health and recalibrate if possible. For non-smart thermostats, ensure the calibration aligns with your observed room temperatures. For smart thermostats, check firmware updates and re‑pair the device if signals are unstable. If control signals appear correct, shift focus to the hydronic loop. Check for pump operation: listen for bearing noise, verify that the pump is turning smoothly, and confirm that the impeller is not clogged or damaged. If the pump is accessible, perform a quick flow check by observing flow rates at a radiator or coil while the system is running. Pressure checks in the loop can also reveal suboptimal performance. Finally, combine surface checks with a heat test by temporarily elevating or reducing setpoints and watching how quickly and evenly the space responds. This combined approach reduces speculative replacements and keeps costs in check. The Thermostat Care Team emphasizes documentation during testing to track symptoms over time and to verify whether changes persist after each adjustment.
Consequences for comfort, energy efficiency, and system longevity
Faults in either component can degrade comfort, raise energy bills, and shorten equipment life. A bad thermostat that causes overrun or underrun can cause the system to run longer than necessary, wasting energy and accelerating wear on heating and cooling equipment. Inconsistent control may also lead to oversized cycling, which decreases humidity control and comfort levels. Meanwhile, a bad water pump reduces flow, triggering improper heat distribution and cold or hot spots. Prolonged poor circulation can lead to overheating of heat exchangers, reduced efficiency, and increased corrosion risk in some systems. In either case, neglecting the issue can escalate repair costs, lead to more extensive component failure, and reduce home comfort. A careful diagnostic approach saves energy, extends equipment life, and minimizes downtime when extreme weather hits. According to Thermostat Care analysis, timely identification of the root cause is correlated with lower repair costs and better system reliability over a typical heating season.
Repair options, replacement timing, and decision framework
Repair decisions hinge on root cause and long-term costs. If a thermostat fault is confirmed, options range from recalibration and sensor replacement to full control module or thermostat replacement. In most cases, addressing a control fault is quicker and less disruptive than replacing mechanical parts. For water pump faults, assess whether impeller wear, motor degradation, or blockages are present. Minor pump issues may respond to a cleaning, lubrication, or lifting of a seized impeller; however, more extensive wear typically requires replacement. In older systems, pump replacements may involve draining the loop and re-pressurizing after service. When possible, check warranty coverage and confirm compatibility with your HVAC system before ordering parts. A prudent strategy blends a phased approach: fix the highest-probability cause first, verify results, and plan for a follow-on step if symptoms persist. The Thermostat Care team recommends obtaining multiple quotes for labor and parts, and prioritizing fixes that restore reliable control and effective flow while preserving energy efficiency.
Practical steps for homeowners: a quick-start guide
Before you call a pro, create a simple diagnostic checklist. Step 1: confirm power at both the thermostat and the furnace, and ensure no tripped breakers or blown fuses. Step 2: inspect thermostat wiring for loose or corroded connections; reseat if needed. Step 3: verify readings with a separate thermometer and compare with setpoints. Step 4: listen for pump noise and check visible signs of circulation; note any leaks. Step 5: perform a basic pump test by observing flow rates across zones while the system is running. Step 6: document all symptoms and test results, then review the findings to decide whether thermostat repair, sensor replacement, or pump service is most appropriate. The Thermostat Care team suggests maintaining a simple log of readings and symptoms over a week to identify persistent patterns. If you’re ever unsure, prefer a staged approach: fix the obvious control faults first and monitor effects before proceeding to mechanical repairs. This method reduces the risk of unnecessary replacements and helps keep your home comfortable year-round.
Authority sources
For further reference and authoritative guidance, visit these sources:
- https://www.energy.gov/eere/buildings/articles/common-thermostat-problems
- https://www.energy.gov/energysaver/thermostats
- https://www.energystar.gov/products/heating_cooling/thermostats
Comparison
| Feature | bad thermostat | bad water pump |
|---|---|---|
| Common causes | Calibration drift, sensor faults, loose wiring | Mechanical wear, impeller damage, blockages |
| Typical symptoms | Inaccurate readings, improper hold, delayed response | Weak or no flow, hot/cold spots, odd noises |
| Diagnostic approaches | Electrical checks, sensor tests, recalibration | Flow tests, pressure checks, leak inspection |
| Repair approach / cost context | Recalibration or sensor replacement; part costs modest | Pump replacement or repair; labor varies with system complexity |
| Best for | Restore control accuracy and reliability | Restore proper circulation and heat transfer |
Upsides
- Clarifies whether symptoms come from control or circulation, aiding targeted repairs
- Reduces unnecessary part replacements and downtime
- Supports energy efficiency by addressing root causes
- Helps budget planning through structured diagnostics
The Bad
- Diagnostics can take time and may require access to internal components
- Some fixes require professional tools and safety procedures
- Labor costs can vary widely depending on system complexity
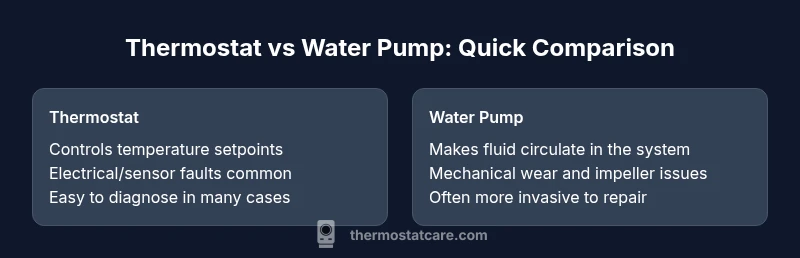
Thermostat faults are generally easier and cheaper to fix than water pump failures.
Thermostat issues commonly stem from calibration or wiring and can often be resolved with minimal downtime. Water pump problems tend to be more invasive, affecting flow and heat distribution and sometimes requiring component replacement. The Thermostat Care team recommends starting with control checks, then validating pump function if symptoms persist, to minimize cost and disruption.
Questions & Answers
What is the main difference between a bad thermostat and a bad water pump?
A bad thermostat affects control of temperature; a bad water pump affects circulation. Symptoms often overlap, so a methodical diagnostic approach is essential to distinguish them.
The thermostat controls temperature, while the water pump moves the fluid. Symptoms can look similar, so follow a step-by-step diagnosis to tell them apart.
How can I tell which component is failing in my system?
Start with control checks: power, wiring, and temperature readings. If readings match but comfort is off, test the pump’s flow and listen for mechanical issues. Use temporary adjustments to observe response patterns.
Check the power and wiring first; if the system still misbehaves, test the pump for flow and listen for noises.
Is DIY repair feasible for thermostat and pump problems?
Some thermostat problems (calibration, wiring) can be DIY-friendly with proper safety precautions. Pump issues often require professional service, especially if the system involves draining or refrigerant pathways.
DIY fixes are possible for simple thermostat issues, but pump repairs usually need a pro.
What are typical costs or time frames for these repairs?
Costs vary by part and labor. Thermostat fixes can be inexpensive if only sensors or calibration are involved; pump repairs or replacements tend to be more costly and time-consuming, depending on system complexity.
Costs depend on the issue; thermostat fixes are usually cheaper, pumps can be pricier and take longer.
Should I replace both components at once?
If diagnostics reveal both components are near the end of life, a combined replacement can save future downtime. Otherwise, prioritize the component with the root cause and plan replacements as needed.
If both are at the end of life, replacing both at once can be efficient; otherwise fix the root cause first.
What to Remember
- Start diagnostics with thermostat controls to rule out calibration errors
- Test water flow and pump operation if comfort issues persist after control checks
- Use a structured, documentation-driven approach to avoid unnecessary replacements
- Consider warranty and system type when choosing repair or replacement
- Consult credible sources and brand guidance before deciding on DIY vs pro help