Bad Thermostat Symptoms: Quick Troubleshooting Guide
Learn the most common bad thermostat symptoms, why they happen, and step-by-step fixes to recover control of your home climate quickly and safely.

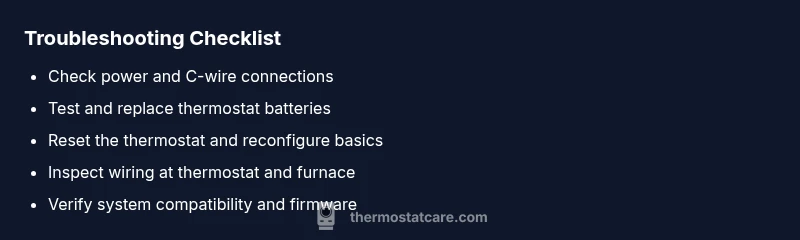
Most bad thermostat symptoms come from power issues or sensor faults. Start by confirming the thermostat is powered (check the outlet or C-wire), replace or reseat batteries if applicable, and perform a simple reset. If the symptom persists, inspect wiring for loose connections and verify the thermostat is compatible with your HVAC system. When in doubt, call a professional.
Recognizing bad thermostat symptoms
When homeowners search for bad thermostat symptoms, they expect fast, practical guidance. In most homes, symptoms fall into a few telltale patterns: the thermostat won’t turn on the heat or AC, the display flickers or loses power, or the system seems to run continuously without changing the indoor temperature. According to Thermostat Care, many of these issues stem from simple power or sensor faults rather than a failing HVAC unit. Before you assume the worst, start with the basics: verify power at the thermostat, inspect the wiring, and consider a battery replacement if your model uses one. A systematic approach saves time and reduces the risk of personal injury or accidental damage to your equipment. By walking through a clear, repeatable checklist, you’ll distinguish transient glitches from real hardware faults. In this article, you’ll find practical steps, safety notes, and a diagnostic path you can follow to reach a reliable conclusion without unnecessary panic.
What a 'bad thermostat symptoms' signal about your system
Most issues fall into two buckets: power/reliable power delivery and sensor/calibration faults. If the thermostat has no power, the display won’t illuminate or will flicker, and temperature control becomes impossible. If the display is responsive but the heater or AC ignores commands, the problem is often communication or sensor input rather than the HVAC itself. Understanding this distinction helps you avoid costly replacements when a simple fix exists. Thermostat Care notes that early attention to power and wiring can prevent more serious failures and extends the device’s life.
Safety first: quick checks you can perform today
Before you touch any wiring, power down the circuit or unplug the thermostat if the model is battery-powered. Wear protective equipment if you access electrical components, and never work on live circuits. Start with the simplest checks: confirm the thermostat has a stable power source, swap in fresh batteries if needed, and perform a soft reset. Verify that the HVAC breakers aren’t tripped and that there are no obvious signs of damage to the thermostat or wall plate. If you’re uncomfortable with any step, stop and call a licensed professional.
Diagnostic checklist you should follow (step-by-step)
- Confirm power to the thermostat and check the C-wire for a solid connection. If your model uses batteries, replace them.
- Perform a soft reset or factory reset as appropriate for your model and reconfigure basic settings like temperature units and scheduling.
- Inspect the wiring at both the thermostat and furnace air handler for loose or corroded terminals.
- Check that the thermostat is compatible with your HVAC system and that any needed wire is present (e.g., the common wire, or 'C').
- If you have a smart thermostat, verify Wi‑Fi connectivity and app integration.
- Observe behavior after each change and document which step resolves or doesn’t resolve the symptom. If none of these steps restore proper function, escalate to a professional.
How to test power delivery and sensor health safely
Power delivery tests include verifying that the thermostat receives 24V from the HVAC system via the R and C terminals, checking that the C-wire is not loose, and confirming that any inline fuses or breakers are intact. Sensor health can be inferred from inconsistent readings or large temperature swings when the sensors are exposed to stable ambient conditions. A miscalibrated sensor can also cause the system to over- or under-react. If you’re comfortable, use a multimeter to check voltage on the C and R wires; many thermostats will display a live value when in test mode. If readings fall outside normal ranges, the issue is likely wiring or a defective thermostat.
Calibration, compatibility, and long-term prevention
Calibrating the thermostat can correct gradual drift in temperature readings. Ensure the device supports your system’s heat type (gas, electric, heat pump) and verify sensor data against an independent thermometer placed near the thermostat. Compatibility problems often arise after HVAC upgrades or thermostat replacements; in such cases, the thermostat may appear functional but fail to communicate effectively with the furnace. Keeping a regular maintenance routine and using a compatible, up-to-date thermostat model reduces future bad thermostat symptoms. Thermostat Care emphasizes documenting all changes so you can spot recurring patterns and act quickly.
When to consider replacement vs repair
If the thermostat is old or frequently fails despite careful troubleshooting, a replacement can be more cost-effective than continued repairs. Look for a device with robust power management, good sensor accuracy, and compatible wiring with your HVAC system. A smart thermostat can offer enhanced control and diagnostics, but ensure your home’s wiring and Wi‑Fi setup are reliable. In some cases, a professional assessment may reveal hidden issues in the HVAC system that a thermostat alone cannot fix; the Thermostat Care team recommends a full system check when problems persist after multiple fixes.
Steps
Estimated time: 60-90 minutes
- 1
Power check
Locate the thermostat’s power source. If there is a battery, replace it with a fresh alkaline or lithium cell. If the device relies on a C-wire, ensure it is firmly connected at both the thermostat and furnace control board.
Tip: When replacing batteries, avoid touching metal contacts with bare skin to reduce shorts. - 2
Reset and reconfigure
Perform a soft reset (or factory reset if recommended by the manufacturer). Re-enter date/time, heating/cooling mode, and basic scheduling to confirm proper response after reboot.
Tip: Note down your settings before resetting so you can restore them quickly. - 3
Check wiring
Turn off power to the HVAC system. Remove the thermostat faceplate and inspect terminals; tighten loose wires and look for corrosion. Pay attention to the C, R, W, Y, and G terminals if present.
Tip: Only handle one wire at a time to avoid miswiring. - 4
Test system response
Turn the system back on and manually test heating and cooling calls from the thermostat. Observe whether the HVAC responds correctly and whether you see stable temperature readings.
Tip: If the system still misbehaves, log the observed commands vs. actual system actions for reference. - 5
Check compatibility
Verify that the thermostat is compatible with your HVAC type (gas, electric, heat pump, etc.). Update firmware or install recommended sensor modules if needed.
Tip: Compatibility cards are often listed in the product manual or manufacturer website. - 6
Decide on replacement
If issues persist after the above steps, evaluate replacing the thermostat with a newer model that better matches your system and supports diagnostic features.
Tip: Choose a model with a robust support channel and easy warranty coverage.
Diagnosis: Thermostat displays odd temperatures or fails to respond to changes
Possible Causes
- highPower issue (outlet, battery, or C-wire)
- mediumSensor or calibration fault
- lowWiring loose or damaged at thermostat or furnace
Fixes
- easyCheck outlet or power source to thermostat and reseat or replace batteries; reattach C-wire if present
- easyReset thermostat and re-enter configuration; calibrate sensor readings if supported
- mediumInspect and secure all wire terminals at both ends; replace damaged wires if needed
- easyConfirm thermostat compatibility with HVAC system and update firmware if available
Questions & Answers
What are common bad thermostat symptoms?
Common bad thermostat symptoms include temperature fluctuations, an unresponsive interface, a display that won’t power on, or the HVAC running continuously. These usually indicate power or sensor issues rather than a failed air handler. Start with power, battery, and wiring checks before replacing equipment.
Common symptoms are temperature swings, unresponsiveness, or a display that won’t power on. Begin with power, battery, and wiring checks before anything else.
How can I tell if the thermostat battery is dead?
If your thermostat uses batteries and the display dims or flickers, replace with fresh batteries and test again. A dead battery can cause misreadings and intermittent operation, especially in older models.
A dim or flickering display usually means the battery is weak; replace and test again.
Is a blinking thermostat a red flag?
A blinking indicator often signals power loss or miscommunication. Check the power source, ensure the C-wire is connected, and reset the device. If blinking continues, the issue may be wiring or compatibility.
Blinking usually means power or communication problems. Check power and wiring, then reset.
When should I call a professional?
If you cannot locate a power issue, your system is older, or you notice burning smells or buzzing, contact a licensed HVAC technician. They can verify wiring safety, system compatibility, and perform advanced diagnostics.
Call a professional if you suspect wiring issues, unusual smells, or persistent faults after basic troubleshooting.
Can a thermostat reset fix issues?
Resetting can clear temporary glitches, but it may not resolve deeper sensor or wiring problems. If issues persist after a reset, proceed with further checks or replacement as needed.
Reset may fix minor glitches, but persistent problems require deeper checks or replacement.
Watch Video
What to Remember
- Troubleshoot power and battery first to resolve most symptoms
- Secure wiring and verify thermostat compatibility before replacement
- Use a step-by-step diagnostic flow to avoid needless repairs
- Calibrate or replace only after confirming sensors are faulty
- Consult a professional for safety-critical checks or persistent issues