What thermostat wire do I need: A homeowner's guide
Learn how to choose the right thermostat wire, understand conductors, gauge, and when you need a C-wire. Practical, DIY-friendly guidance for 2026.

To determine the correct thermostat wire, start by counting the conductors in your existing cable and identifying whether you have a C-wire for power. Verify the system uses a 24-volt control circuit and that the terminals at both the thermostat and the furnace/air handler label R, C, W, Y, and G. If you lack a C-wire or insufficient conductors, plan for a replacement cable with enough conductors.
Understanding thermostat wiring basics
Thermostat wiring is the backbone of how your climate system communicates with your heating and cooling equipment. Most homes use low-voltage, 24-volt circuits that power the thermostat through a control transformer. The wire run between the thermostat and the furnace or air handler carries multiple conductors—each color typically corresponds to a terminal on the thermostat and control board. Before you buy new cable, take a moment to map out which terminals you need to support your setup. According to Thermostat Care, the right wire arrangement starts with confirming you have a reliable R power feed and a common C wire if your thermostat requires constant power. In older homes, you may find a 2- or 4-conductor bundle that only supports basic heating; modern smart thermostats, however, often need additional conductors for cooling, fan control, and power. This section will help you translate terminal labels into a practical wiring plan, so you can choose a cable that matches your system’s needs.
wordCountNote”:null,
Tools & Materials
- Non-contact voltage tester(Safely check for live wires at thermostat and furnace connections)
- Wire stripper/culler(Prepare conductor ends for terminal connections)
- Digital multimeter(Confirm voltage and continuity if unsure about wiring integrity)
- Replacement thermostat cable (e.g., 18/5 or 18/6)(Choose with at least 5 conductors for common modern setups)
- Notepad and camera(Document current wiring for reference)
Steps
Estimated time: 60-180 minutes
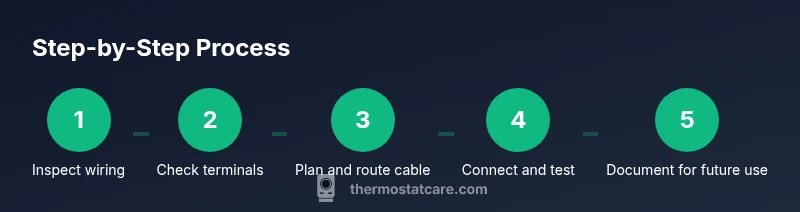
- 1
Inspect the current wiring at the thermostat
Power down the system first to avoid shock. Remove the thermostat faceplate, photograph the wire colors, and note which terminal each conductor lands on (R, W, Y, G, C, etc.). This step creates a reference map for your installation and helps you avoid guessing later.
Tip: Take a close, well-lit photo from multiple angles to capture terminal labels and wire routing. - 2
Check the furnace/air handler control board
Locate the same terminal strip on the furnace or air handler and verify that the same letters exist there (R, C, W, Y, G). If C is missing, you’ll know you need to add a common wire or upgrade the cable. This cross-check ensures your thermostat wiring plan aligns with the equipment.
Tip: If you see jumpers between RH and RC, note whether the installer bridged them; you may not need to reconnect them later. - 3
Count conductors and look for a C-wire
Count the wires in the cable run from the thermostat. A 5-conductor cable (18/5) covers R, W, Y, G, and C. If you only have 2–4 conductors, you’ll either reuse the existing ones with a battery-powered thermostat or plan to run newer cable with a C-wire for power-hungry smart thermostats.
Tip: If you’re unsure about gauge, bring a sample to the hardware store to compare. - 4
Assess cable gauge and compatibility
Most residential thermostat installations use 18 AWG or 20 AWG wire. If you plan to install a high-end smart thermostat or long cable run, 18 AWG is generally safest. The gauge affects voltage drop and signal reliability, especially on longer runs.
Tip: Avoid undersized cable that can cause intermittent power loss or unreliable readings. - 5
Decide whether to reuse or replace the cable
If the existing cable has enough conductors and is in good condition, you can reuse it. If not, plan to install a new cable with adequate conductors and compatible insulation for in-wall use.
Tip: Label each conductor on both ends to prevent miswiring during reassembly. - 6
Plan the route for new cable (if needed)
Map a safe, unobtrusive path from the thermostat to the furnace. Avoid walls with potential moisture, high heat, or damage-prone areas. If you must pass through walls, use proper grommets and keep bends gentle to avoid wire damage.
Tip: Use a cable pull string or fish tape to minimize wall damage. - 7
Connect wires at the thermostat and furnace
Attach each conductor to its matching terminal (R, C, W, Y, G, etc.) following the manufacturer’s labeling. Ensure tight, clean connections. If you’re bridging RH and RC, confirm the jumper is present or reinstalled as needed.
Tip: Double-check that C is truly connected before powering up. - 8
Test the system and verify power
Power the system back on and test each function: heat, cool, fan, and any dehumidification controls. Confirm the thermostat maintains stable power and that all modes respond correctly. If something doesn’t operate, recheck wire-to-terminal assignments.
Tip: If the thermostat runs on power stealing, consider using the C-wire to improve reliability. - 9
Document wiring and prepare for future upgrades
Create a quick diagram of terminal labels and wire colors for future reference. Include the cable gauge, conductor count, and route. This makes future upgrades easier and minimizes risk during maintenance.
Tip: Keep digital and physical copies in a centralized place.
Questions & Answers
What wire gauge do I need for a thermostat?
Most residential thermostats use 18 AWG conductors with 5 or more wires to support common features like C, G, Y, W, and R. If your run is longer or your thermostat is more feature-rich, you may need thicker or additional conductors. Always verify with your thermostat’s installation guide and your HVAC control board.
Most homes use 18 gauge wire with five conductors. If you’re unsure, check the thermostat manual and the control board for required terminals.
Do I always need a C-wire?
No. Battery-powered thermostats don’t require a C-wire, and some power-stealing models get enough energy from existing conductors. However, most modern smart thermostats benefit from a dedicated C-wire for consistent power and reliability.
Not always, but a C-wire helps many smart thermostats stay powered reliably.
Can I reuse existing wires?
If the existing wires are intact, correctly labeled, and meet the thermostat’s required conductor count, you can reuse them. If any conductor is damaged or the count is insufficient for your new thermostat, plan to replace the cable.
You can reuse wires if they’re in good condition and meet your new thermostat’s needs.
What if there is no C terminal on my furnace?
If there is no C terminal, your system might have a common connected internally or you may need to install a C-wire adapter or run a new cable from the transformer. In some cases, a professional installation is the safer option.
If there’s no C, you may need a converter or new cable. A pro can help determine the best path.
Is it safe to run thermostat cable myself?
Yes, if you follow proper safety steps: power off at the breaker, use approved in-wall cable, and follow wiring diagrams. If you’re uncomfortable, hire a licensed tech. Local codes may require pro installation for certain setups.
You can do it safely if you follow safety steps and local codes, but don’t hesitate to call a pro.
What is power stealing in thermostats?
Power stealing is when a thermostat draws current from the existing wires without a dedicated C-wire. It can work in some setups but may lead to unreliable operation or nuisance power draw, especially with long or complex runs.
Power stealing uses existing wires to power the stat, but a dedicated C-wire is often more reliable.
Watch Video
What to Remember
- Count conductors and confirm a C-wire before buying cable
- Prefer 18 AWG, 5-conductor cable for most installs
- Ensure R, C, W, Y, G terminals match on both ends
- Turn off power before handling wiring
- When in doubt, consult Thermostat Care guidance