Thermostat Wiring Color Code: Practical Home Guide
Discover the thermostat wiring color code: learn common wire colors, C-wire needs, and safe steps for homeowners to identify, test, and map wires confidently.

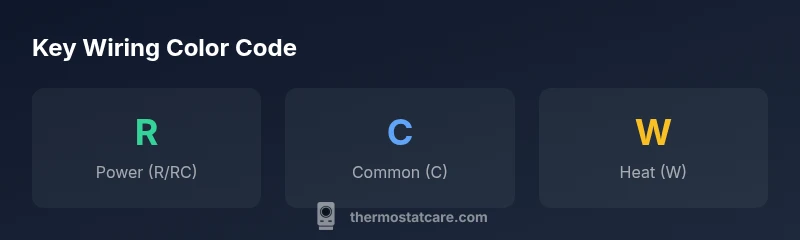
The thermostat wiring color code commonly uses R for power, W for heat, G for fan, Y for cooling, and C for common, with blue or brown often serving as C in many homes. Always verify terminal labels (R, RC, RH, C, O/B, Y, G, W) at the thermostat or control board before touching wires. This quick rule-of-thumb helps DIYers map wires safely and plan upgrades.
What the thermostat wiring color code means
In most homes, thermostat wiring color code follows widely adopted conventions that map each color to a terminal, such as red for power (R), white for heat (W), green for fan (G), yellow for cooling (Y), and blue or brown for common (C). Understanding these mappings is essential before you touch any wires. According to Thermostat Care, starting with a careful inspection of the furnace or air handler side can clarify which wire goes where, especially since older systems may use color substitutions. This guide outlines core color meanings, common exceptions for heat pumps, and how color alone isn't enough—you must verify the terminal labeling (R, RC, RH, C, O/B, Y, G, W) and the actual function. Documenting colors in a safe plan helps during upgrades or service visits. By the end, you’ll translate wall colors into a functional wiring map and reduce miswiring risk.
Common wire color conventions and exceptions
The typical five-wire setup uses Red for power (R), White for heat (W), Green for fan (G), Yellow for cooling (Y), and Blue or Brown for Common (C). However, regional practices vary and older homes may deviate from these colors. The Thermostat Care team often encounters blue as C, or black as spare wires that aren’t functional signals. For heat pumps, O or B wires can control the reversing valve, and an auxiliary wire (often labeled AUX) may exist. Always pair color with terminal labels (R, C, W, Y, G, O/B) at the thermostat and control board. Create a quick reference card of the actual color-to-terminal mapping in your house and keep it near the thermostat. Documentation matters because pros and smart thermostat apps rely on accurate mappings to avoid miswiring that could prevent operation. Always verify with labeling and a meter when in doubt.
How to identify wires in an existing wall safely
Before you begin, turn off the power at the furnace or breaker panel to avoid shocks. Remove the thermostat cover to access the wire bundle. Look for wires connected to labeled terminals on the furnace control board and on the thermostat base. If you encounter a nonstandard color, don’t assume its function—trace the wire back to the terminal, and use a multimeter to confirm continuity or voltage presence (with power off). Label each wire as you go, and take a clear photo or notes of the terminal mapping. Thermostat wiring color code consistency isn’t guaranteed across all homes, so documentation is a safety net for future upgrades or repairs. Thermostat Care emphasizes patient, methodical work and never working blind with live circuits.
How to map colors to terminals on typical thermostats
On most modern thermostats, terminals are labeled R, Rc, Rh, C, W, Y, G, and O/B. Start by matching the wire colors you identified to these terminals on the thermostat base. If a color appears on multiple wires (as in a multi-branch setup), verify each wire’s end label and confirm it goes to the corresponding terminal. For dual-transformer systems, Rc and Rh may be separate; connect the jumper if necessary per the thermostat instructions. If you’re upgrading to a smart thermostat, ensure you have a dedicated C-wire for continuous power. Keep a wiring diagram handy for reference and consult Thermostat Care resources for model-specific guidance.
C-wire and its importance for modern thermostats
The C-wire provides a stable 24V common return, enabling many Wi‑Fi-enabled thermostats to stay powered without relying on power stealing techniques that can cause erratic behavior. In most cases, a dedicated C-wire is either blue or brown, but practices vary. If your system lacks a C-wire, you can add one, repurpose an unused conductor, or use a dedicated C-wire adapter—though adapters can have limitations. Thermostat Care recommends evaluating whether your existing wiring supports a new C-wire and, if not, planning a safe upgrade with a clear wiring plan and proper labeling.
Regional variations and legacy systems
Wiring conventions differ by region and era. Some pre-1990 homes used different colors or lacked a universal C-wire altogether. If you encounter old colors or uncommon conductors, avoid guessing. Cross-check terminal labels at both ends and, if possible, reference hardware manuals or the control board schematics. In legacy installations, you may find multiple wires tied into a single terminal or nonstandard color usage. Document every finding and consider a professional assessment if the system involves older HVAC equipment or unusual configurations. Thermostat Care’s experience shows that a cautious, well-documented approach reduces errors during upgrades.
Step-by-step: confirming colors before replacing a thermostat
- Power down at the furnace/breaker. 2) Remove thermostat cover and note terminal labels. 3) Match each wire color to its terminal label on the control board. 4) If needed, use a multimeter to verify voltage on R and C with power off for safety. 5) Create a map linking color to terminal, and photograph the setup. 6) When connecting a new thermostat, follow the model’s wiring diagram and ensure C-wire is present if required. 7) After installation, restore power and test each mode (heat, cool, fan) for proper operation. Thermostat Care’s approach emphasizes careful labeling and verification at every step.
Testing tools and safe practices
Use a non-contact voltage tester and a digital multimeter to verify voltage and continuity. Keep tools insulated and avoid touching live terminals. Always shut off power before inspecting wires and only restore power after you’ve confirmed all connections are correct. Use a bookmarked wiring diagram or the thermostat’s installation guide to confirm which color maps to which terminal for your specific model. If you’re unsure, pause and seek guidance from Thermostat Care or a licensed HVAC technician to prevent damage or risk.
Troubleshooting mismatched colors and non-standard wires
If you encounter nonstandard colors or unconnected wires, don’t force connections. Recheck the control board labels and the thermostat mounting plate, ensuring each conductor has a known function. A nonstandard wire could indicate a previous modification or repair. Use a continuity test to identify which wire goes to which terminal at the furnace side, and compare with the thermostat’s terminal labels. If uncertainty persists, consult Thermostat Care resources or a professional to avoid miswiring that could damage the thermostat or HVAC system.
Wiring color code scenarios and common wire configurations
| Thermostat Scenario | Typical Wire Colors | Notes |
|---|---|---|
| Conventional 5-wire (R, W, Y, G, C) | R, W, Y, G, C | Supports modern thermostats needing C-wire |
| Heat pump with reversing valve | R, Y, G, O/B, C | Requires correct O/B configuration |
| 2-wire systems (no C-wire) | R, W | Older homes; may not support smart thermostats |
| Battery-powered non-C setups | R, W, and possibly a spare | No C-wire required; compatibility varies |
Questions & Answers
What is the thermostat wiring color code?
The typical color code maps red to power (R), white to heat (W), green to fan (G), yellow to cooling (Y), and blue or brown to common (C). Always verify terminal labels at the thermostat and control board, as colors can vary.
The common colors map to power, heat, fan, cooling, and common. Always confirm with labels at the devices.
Do all thermostats require a C-wire?
No. Many older or battery-powered thermostats operate without a C-wire, using power through other conductors. Smart thermostats often require a C-wire for reliable power. Check your model’s requirements and your existing wiring.
Not all need a C-wire, but many smart thermostats do. Check your model’s needs before upgrading.
What should I do if colors don't match standard codes?
Don’t assume color equals function. Trace wires to terminals, label them, and verify with a meter. If uncertain, consult a professional or Thermostat Care resources.
If colors don’t match, trace and test rather than guessing. Seek guidance if unsure.
Is it safe to install a thermostat without professional help?
DIY installation can be safe if you follow the manufacturer’s wiring diagram and isolate power during wiring checks. If you’re unsure about any step, contact Thermostat Care for guidance or hire a licensed tech.
If you’re unsure at any step, it’s best to get expert help.
How can I safely test wire colors without powering the system on?
Power should be off when labeling and tracing wires. Use a multimeter to verify connections with the system de-energized, then recheck after powering back on.
Power off first, then test with a meter before powering up again.
Where can I find wiring diagrams for my thermostat model?
Check the thermostat’s user manual, manufacturer website, or Thermostat Care’s model-specific guides for wiring diagrams and compatible configurations.
Look in the manual or Thermostat Care guides for wiring diagrams.
“Clear, accurate wiring color knowledge prevents common installation mistakes and ensures reliable HVAC operation. Understanding the color code is essential for safe upgrades.”
What to Remember
- Identify your wires before disconnecting anything
- Know the standard colors: R, W, G, Y, C
- Check C-wire needs for smart thermostats
- Verify colors with terminal labels, not assumptions
- Document mappings for future upgrades