Thermostat Wire Splice Guide: Safe DIY Fixes
Learn how to safely perform a thermostat wire splice with step-by-step instructions, essential tools, safety tips, and when to call a pro. Thermostat Care guides homeowners through a reliable, code-compliant repair.

To perform a thermostat wire splice safely, first power off at the breaker, then identify the correct gauge and connector, trim damaged insulation, and secure the splice with heat shrink or wire nuts. This guide covers when a splice is appropriate, the tools required, common mistakes to avoid, and how to test the circuit before restoring power.
What is a thermostat wire splice and when is it needed
A thermostat wire splice is a joined connection between two wires that continues a circuit or repairs a damaged conductor in a thermostat wiring harness. In practice, you’ll perform a splice when the insulation is compromised, a wire breaks, or you need to extend a run to reach the thermostat. For safety and reliability, a proper splice uses a connector rated for low-voltage thermostat wires and adequate insulation. According to Thermostat Care, the decision to splice should weigh the repair versus replacement and the critical role of the circuit in HVAC control. If a splice is done poorly, you risk intermittent signals, misreads by the thermostat, or worse, a short that could trip breakers. This article walks you through safe, practical steps to handle a thermostat wire splice and keep your system working smoothly.
Wire types, gauges, and connectors
Thermostat cables typically use low-voltage conductors, commonly in the 18-22 AWG range, with two to five conductors inside a single jacket. The most important factor for a splice is matching the conductor type (solid vs stranded) and gauge across the joined wires. Use connectors rated for thermostat wire and the indicated gauge: wire nuts with appropriate size, crimp butt connectors, or solder connections with proper insulation. Keep in mind that solid copper conductors are stiffer and may require longer stripping, while stranded wires are more forgiving in crimp connections. For reliability, avoid using spring-loaded or cheap molex-style connectors that aren’t rated for HVAC control circuits, and always verify compatibility with the thermostat’s manufacturer guidance. In practice, plan to replace damaged sections with the same gauge wire and identical insulation type to maintain impedance and signal integrity.
Choosing the right splice method
There are several ways to join thermostat wires, each with pros and cons. Wire nuts are quick and inexpensive but must be sized correctly for the gauge and number of conductors. Crimp connectors (butt or splice types) provide a robust, vibration-resistant joint if you have a proper crimp tool. Soldering offers low resistance and a durable bond but is not always practical in tight spaces and requires careful heat management to avoid insulation damage. Pre-insulated butt connectors with heat-shrink sleeves can combine ease of use with good insulation, especially in damp or dusty environments. For most DIY home setups, a high-quality wire nut or a crimp connector with heat shrink is sufficient; reserve soldering for exposed, accessible joints where you can manage heat safely.
Safety considerations and risk factors
Working with low-voltage systems in a home HVAC setup reduces shock risk compared to high-voltage work, but there are still hazards. Always power down at the main breaker and verify no voltage at the wires with a multimeter or non-contact tester. Ensure you’re using the correct tools and protective gloves. Keep moisture away from the work area, as damp conditions can degrade insulation and increase the risk of corrosion. If you’re replacing long sections of wire or combining aluminum and copper conductors, you should consult a pro. If the thermostat is part of a heat pump or specialized control circuit, extra care is required. In short, err on the side of caution: if the job involves unfamiliar wiring or the system handles critical climate control, call a licensed HVAC technician.
Troubleshooting common issues after a splice
After completing a thermostat wire splice, you may encounter intermittent readings, thermostat not powering the display, or the HVAC system cycling unexpectedly. First, re-check the joint to ensure there is no loose strand or exposed conductor. Re-test continuity and verify the insulation; any gaps can create a short or corrosion. If the thermostat reads false temperatures or loses connection, inspect the wires for heat damage or fraying, which can compromise the splice. In some cases, the splice may introduce impedance that confuses the thermostat; replacing the segment with a clean, insulated joint can resolve the issue. Document what you changed so future service visits can trace the problem.
Maintenance and long-term reliability
To keep a thermostat wire splice reliable, keep the joint clean and dry, re-inspect every year, and avoid rerouting near moisture sources. Use color-coded labels to identify wires at a glance, and replace any damaged insulation promptly. Store spare connectors and heat-shrink tubing in a small container so you can fix future problems quickly. Finally, consider a professional evaluation if you notice recurring failures, since repeated splices may indicate a larger underlying wiring problem.
Tools & Materials
- Insulated wire stripper(For 18-22 AWG thermostat wires)
- Wire cutters(Straight cuts without fraying)
- Needle-nose pliers(For manipulating small conductors)
- Heat shrink tubing (various diameters)(Pre-sized to fit the splice)
- Heat gun or lighter(To shrink tubing evenly; use with caution)
- Electrical tape(For additional protection and concealment)
- Appropriate wire nuts (for 18-22 AWG)(Confirm quantity and color code)
- Crimp connectors (butt/splice)(If using crimp method, choose correct size)
- Crimping tool(For sturdy crimp connections)
- Multimeter or continuity tester(Verify no voltage before work and test splice)
- Replacement thermostat wire (same gauge)(Have extra length on hand)
- Labeling tags or markers(Identify wires after repair)
- Safety gear (gloves, eye protection)(Protect from sharp edges and insulation dust)
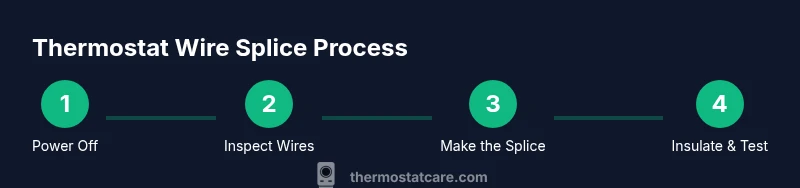
Steps
Estimated time: 30-45 minutes
- 1
Power off
Shut off power at the main breaker feeding the HVAC circuit. Use a non-contact tester to confirm no voltage on thermostat wires before touching any conductors.
Tip: Always double-check the supply before starting; assume wires are live until proven safe. - 2
Identify wires and gauge
Inspect the thermostat cable to identify the individual conductors and confirm they are 18-22 AWG. Note whether wires are solid or stranded to choose the appropriate splice method.
Tip: If you’re unsure about gauge, measure with calipers or refer to the insulation markings. - 3
Expose and inspect
Carefully expose a small length of each conductor you’ll splice. Remove only the damaged section and avoid nicking adjacent insulation. Check for corrosion or darkened insulation.
Tip: Keep stripped ends clean and dry; moisture will compromise the joint. - 4
Cut damaged portion
If insulation or conductor is damaged, trim back to solid, shiny copper. Ensure both wires have equal exposed length so the splice can sit flush.
Tip: Do not leave jagged edges; neat cuts improve joint reliability. - 5
Strip insulation to length
Use the wire stripper to remove the appropriate amount of insulation from each conductor. Aim for a clean, uniform bare length that fits inside your chosen connector.
Tip: Avoid tearing insulation; a clean edge helps the connector grip better. - 6
Prepare connectors
Select the splice method (wire nut, crimp, or solder) and gather the matching connectors. If using heat shrink, slide tubing onto the wires before joining.
Tip: Verify compatibility: some connectors require a specific insulation type. - 7
Make the splice
Join the conductors using the chosen method. Twist and align the wires for a solid joint if you’re twisting, or crimp firmly with the tool if using crimp connectors.
Tip: Keep the joint tight and avoid leaving loose strands that can short. - 8
Insulate joint
Slide heat shrink over the joint and apply heat to seal. If using electrical tape, wrap thoroughly to cover exposed conductors.
Tip: Ensure insulation covers all exposed metal and overlaps the wire jacket. - 9
Test and restore power
With the joint insulated, test continuity and resistance to ensure a solid connection. If everything checks out, restore power and observe thermostat operation.
Tip: Monitor for any signs of heat buildup or loose readings in the first 15 minutes. - 10
Document and monitor
Label the splice area and note the repair in your maintenance log. Check operation periodically over the next week for stability.
Tip: Keep spare parts and tools neatly stored for next time.
Questions & Answers
What is a thermostat wire splice and when is it needed?
A thermostat wire splice joins two conductors to continue a circuit or repair a damaged run. You typically splice when insulation is damaged or you need to extend a wire to reach the thermostat. Always use low-voltage connectors rated for thermostat wire and verify the system’s requirements.
A thermostat wire splice connects wires when damage or extension is needed. Use proper low-voltage connectors and verify the system’s requirements.
Can I splice thermostat wires myself?
Yes, if you have basic electrical familiarity and follow safety steps. This guide provides a safe, methodical approach, but if the wiring appears unusual or the system handles critical loads, consult a licensed HVAC technician.
You can, if you’re comfortable with basic electrical work. When in doubt, consult a licensed tech.
What tools do I need for a thermostat wire splice?
Essential tools include wire strippers, wire nuts or crimp connectors, a crimp tool or heat gun for heat shrink, electrical tape, and a multimeter to verify no voltage before starting and to test the joint afterward.
You’ll need strippers, connectors, a crimp tool or heat gun, tape, and a multimeter.
What are the risks of a bad splice?
A poor splice can cause intermittent thermostat readings, false temperature control, or short circuits that trip breakers. Proper insulation and secure connections minimize these risks.
Bad splices can cause misreads or system trips; secure, insulated connections reduce risk.
How do I test a splice safely?
Use a multimeter to verify continuity and absence of voltage on the line before touching. After completing the splice, re-test the circuit and monitor the thermostat for proper operation.
Test continuity and voltage with a multimeter before and after the splice.
When should I call a professional?
If the wiring is damaged beyond a simple splice, involves aluminum conductors, or the thermostat controls critical HVAC functions, seek a licensed HVAC technician.
Call a pro if you encounter aluminum wiring or complex HVAC controls.
Watch Video
What to Remember
- Power off before you begin
- Use correct gauge and connectors
- Preserve insulation integrity
- Test thoroughly before restoring power
- Call a pro if wiring seems unusual