How to Connect a Thermostat to a Boiler: A Step-by-Step Guide
Learn how to safely connect a thermostat to your boiler with clear wiring steps, compatible configurations, and troubleshooting tips for reliable heating control.

In this guide we explain how is thermostat connected to boiler, including common wiring setups, essential safety checks, and a practical step-by-step approach. You’ll learn how to identify control voltages, choose the right configuration, and verify heat calls so your heating system works reliably. This answer targets homeowners and DIY enthusiasts looking to connect a thermostat to their boiler safely.
Understanding the Basics: Thermostat and Boiler Control
When you ask how is thermostat connected to boiler, you’re asking about how a home heating control signal travels from a thermostat to a boiler’s burner logic. In most modern homes, the thermostat acts as a low-voltage switch that closes a circuit when heat is needed. The boiler then interprets that call and starts circulating hot water or steam. The exact wiring depends on your boiler type (combi, system, or conventional) and the control philosophy (24V thermostat vs line-voltage). According to Thermostat Care, understanding how the thermostat communicates with the boiler is the first step toward safe, reliable heating. In practice, you’ll see two common setups: a 24V low-voltage control and a higher-voltage control in older systems. Knowing which one you have helps prevent miswiring and boiler faults.
Boiler-Control Signals: 24V Thermostats vs Line Voltage
Most modern boilers use a 24V thermostat circuit, which is a small control signal carrying minimal current. A 24V thermostat closes a pair of wires that feed the boiler’s control module; the boiler reads this call for heat and starts burner operation. In contrast, some older or specialty systems use line-voltage controls (120V or 240V), where the thermostat directly switches the main power. Mixing voltage types is dangerous and can damage components. Before you touch any wires, confirm your boiler’s control voltage label, consult the manual, and plan your wiring around the appropriate voltage class. This distinction matters because incorrect voltage wiring can cause nuisance calls for heat or boiler damage.
Common Boiler-thermostat Configurations
Two-wire setups use simply two conductors to complete the call for heat; no common wire is required. Three-wire configurations add a dedicated C-wire for power, which can improve the reliability of smart thermostats and prevent power drift in longer runs. In any system, the boiler's control board might support S-Plan or Y-Plan configurations, mapping to zones in a multi-zone heating setup. If you have a modern combi boiler, you’ll likely be in a 24V, two-wire or three-wire configuration; older boilers may require more planning. The key is matching your thermostat’s wiring requirements to your boiler’s control outputs and any existing zone controls.
Wiring Readiness: Tools, Colors, and Planning
Before you touch a wire, map your routes and confirm wire types. In most homes the thermostat uses 18-22 AWG low-voltage conductors. Label wires as you disconnect them, and keep the wiring diagram from your boiler handy. The plan should address where the R (hot), W (heat call), Y (cooling if present), G (fan), and C (common) terminals live on your boiler’s control board. If you’re adding a C-wire for a smart thermostat, you’ll need to provide a reliable path back to the boiler’s common terminal. Planning reduces rework and helps you stay compliant with local codes.
Wiring Diagrams Simplified
A simple 24V boiler-thermostat wiring diagram looks like a small loop: the thermostat closes a circuit between two boiler terminals, typically labeled TH and TR or R and W, depending on the model. A C-wire provides a continuous supply for smart thermostats. If you’re wiring a multi-zone system, you’ll see additional connections to zone valves or relays. Always reference your boiler’s wiring diagram and the thermostat’s installation guide to ensure compatibility. A clear diagram helps you avoid accidental cross-wires and miscalls for heat.
Safety and Code Compliance: What You Need to Know
Wiring a boiler involves electrical and heating-system safety. Always turn off power at the boiler and at the main breaker before touching any wires. Use a non-contact tester to verify no voltage is present. If the boiler acts as your primary heat source, you should understand basic electrical codes, and in some regions, a licensed technician may be required for final connections. Never bypass safety devices, and avoid extending thermostat wiring through unfinished spaces without proper protection. Adhering to safety standards reduces the risk of shock and fire.
Testing, Commissioning, and Fine-Tuning
After wiring, power up the system and set the thermostat to call for heat. Listen for the boiler activating and observe whether the radiators heat evenly. Check for only brief, controlled banging or rumbling noises, which can indicate air in the system or a water-pumping issue, not wiring faults. If the heat call doesn’t trigger boiler activity, re-check the terminal connections and voltage compatibility. Fine-tuning often involves adjusting boiler temperature settings or updating thermostat configuration to match your home’s heating schedule.
Smart Thermostats: Compatibility and App Setup
Smart thermostats bring scheduling, remote control, and energy analytics to your boiler system. Most smart thermostats operate on 24V circuits and require a C-wire for stable power. Some models can work without a C-wire but may rely on power-stealing methods that reduce reliability. Verify compatibility with your boiler model and ensure the thermostat app is configured for your zone setup. When in doubt, choose a model with built-in boiler compatibility checks and clear wiring diagrams.
Final Checks and Documentation
Label every wire and photograph the wiring before reassembly. Record boiler model, control voltages, and thermostat type. Keep a copy of the wiring diagram and any changes to your system in your home maintenance notes. Regular testing during the first heating season helps catch issues early, such as stuck calls for heat or thermostat drift. By documenting the wiring, you’ll have a reliable reference if you move or upgrade components in the future.
Tools & Materials
- Non-contact voltage tester(Verify zero voltage at all wiring points before touching conductor)
- Screwdriver set (Phillips and flathead)(Fits boiler terminals and thermostat base screws)
- Wire strippers/cliers(Prepare wires for clean connections)
- Multimeter(Check continuity and voltage if needed)
- Electrical tape or wire nuts(Insulate and secure splices)
- Low-voltage thermostat wire (18-22 AWG)(Spare conductor for C-wire if needed)
- Labeling supplies (masking tape, marker)(Label wires as you disconnect)
- Boiler wiring diagram/manual(Reference model-specific terminals)
Steps
Estimated time: 60-120 minutes
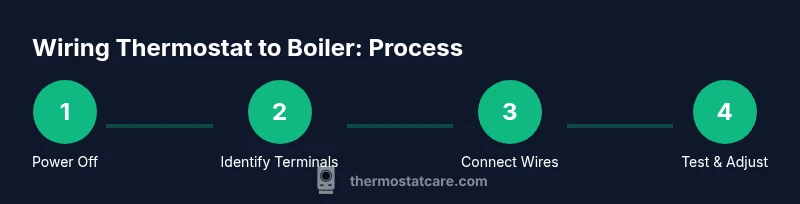
- 1
Power down and isolate the system
Shut off power at the boiler and the main circuit breaker. Confirm with a non-contact tester that no voltage is present at terminals to prevent electric shock while wiring.
Tip: Label the power-off switch locations for easy future reference. - 2
Identify boiler control type and terminals
Consult the boiler manual to locate thermostat-related terminals (often labeled R, W, Y, G, and C). Note whether the system uses 24V control or line voltage and whether a C-wire is available or required.
Tip: Take a photo of the current terminal layout before disconnecting anything. - 3
Plan wiring path and route conductors
Decide whether you will add a C-wire and which conductors will run from the thermostat to the boiler. Keep runs short and avoid sharp bends; use proper cable routing and clips.
Tip: Keep thermostat cable separate from high-voltage lines to minimize interference. - 4
Connect thermostat wires to boiler terminals
Attach the thermostat wires to the designated 24V control terminals on the boiler’s control board. Ensure secure, clean connections and double-check polarity where applicable.
Tip: If adding a C-wire, connect it to the boiler’s C terminal and ensure the other end reaches the thermostat C input. - 5
Restore power and configure the thermostat
Turn the power back on and set the thermostat to heat mode. If using a smart thermostat, complete pairing and confirm the system type (balance, O/B, heat pump, etc.).
Tip: Disable any energy-saving holds during initial testing to observe immediate behavior. - 6
Test call for heat and verify boiler response
Set a calling heat and observe boiler firing, water circulation, and radiator warmth. If there is no heat call, re-check terminal connections and voltage compatibility.
Tip: Run several warm-up cycles to ensure consistent performance across the house.
Questions & Answers
Can I connect a smart thermostat directly to a boiler?
Most smart thermostats require a 24V circuit and a C-wire for reliable power. Some models support power-sharing, but compatibility with your boiler is essential. Always check the boiler’s compatibility list and wiring diagram before purchasing.
Most smart thermostats need a 24V circuit and a C-wire. Check your boiler’s compatibility before buying.
Do I need a C-wire to connect a thermostat to a boiler?
A C-wire provides a constant power source for many thermostats, improving reliability. If your thermostat can work without a C-wire, wiring may still be possible, but adding a C-wire is recommended for best performance.
A C-wire gives constant power and is usually best for reliability. If possible, include one.
What are the signs my boiler-thermostat wiring is incorrect?
Common signs include no heat when calling for heat, short cycling, boiler firing unexpectedly, or HVAC zones not responding. Recheck wiring connections against the boiler’s wiring diagram and voltage requirements.
If heat doesn’t respond or the boiler cycles oddly, double-check the wiring against the diagram.
Is it safe to work on boiler electrical wiring?
Wiring a boiler involves electricity and hot water systems. Always power down at the boiler and main breaker, and follow local codes. If you’re unsure, hire a licensed professional to avoid risk.
Safety comes first. If unsure, hire a pro.
How do I test the wiring after installation?
Power up, set the thermostat to heat, and verify the boiler fires on heat calls. If the boiler doesn’t respond, re-check terminals, voltage, and the C-wire presence. Repeat tests to confirm stable operation.
Power up and test heat calls. If it doesn’t respond, recheck wiring and voltage.
What should I do if my boiler uses a different voltage than 24V?
Do not mix voltage types. If your boiler is line-voltage controlled, you cannot use a standard 24V thermostat without a proper interface. Consult the boiler manual or a professional for a compatible solution.
If your system isn’t 24V, don’t force- wire. Check manual or call a pro.
Watch Video
What to Remember
- Identify the boiler control type before wiring.
- Use a C-wire when possible to improve smart thermostat reliability.
- Power off and verify before handling wires.
- Test heat calls and adjust settings for proper cycling.