Replacement Fridge Thermostat: Step-by-Step Guide
A practical, expert guide on replacing a fridge thermostat: identify the right part, safety steps, wiring checks, installation, testing, and maintenance for reliable cooling.

Replace a fridge thermostat by verifying model compatibility, safely powering off the unit, installing the new thermostat, and testing temperature control. This quick path covers required tools, wiring checks, and post-install testing to restore reliable cooling. Safety first: unplug the fridge, discharge capacitors if present, and follow your appliance's wiring diagram.
Understanding fridge thermostats and why replacement is needed
A fridge thermostat acts as the brain of your cold storage by sensing temps inside the fresh food compartment and signaling the compressor to turn on or off. When the thermostat drifts out of calibration, your fridge may run too warm, frost may form in the freezer, or the unit may cycle on and off repeatedly. According to Thermostat Care, consistent temperature control is essential not only for food safety but also for energy efficiency. If you notice warm shelves, uneven cooling between sections, or a noticeable rise in energy bills, a faulty thermostat is a likely culprit.
Replacement is sometimes straightforward, especially with models that use standard temperature dials or readily available electronic modules. However, some fridges use built‑in digital controllers or proprietary sensor assemblies that require careful replacement. The goal is to restore accurate temperature sensing and stable compressor operation without compromising wiring safety or warranty terms. Before you begin, confirm your fridge model and serial number, locate the existing thermostat, and review the wiring diagram in the owner’s manual or the manufacturer’s support page.
Identifying the right replacement thermostat
Thermostats come in several styles, including mechanical dial types and electronic sensors with a temperature probe. The first step is to verify compatibility with your refrigerator’s model, voltage, and sensor type. Check the existing part number on the thermostat housing, then cross‑reference with the spare parts list from the manufacturer or a reputable parts supplier. If you own an energy‑savvy or smart‑appliance, you may need a digital thermostat that matches the control board or uses a C‑wire connection. Always ensure the replacement part’s electrical rating (amperage, voltage) matches your fridge’s spec and that the mounting bracket aligns with the original. When in doubt, contact the manufacturer’s support or a licensed technician.
Thermostats are sometimes sold with pre‑assembled wiring pigtails or plug connectors. In many cases a simple swap is enough, but some units require transferring sensors or adapting connectors. Make a quick sketch or photo of the old wiring before disconnecting anything, so you can reassemble correctly. If your fridge has a frost control feature, verify that the new thermostat provides a compatible cycle pattern. In short, the safer approach is to match model numbers, sensor types, and connector styles rather than guessing from appearance.
Safety considerations and prep work
Electrical work inside a fridge can be hazardous if you skip protective steps. Always unplug the appliance and, if accessible, switch off the circuit breaker serving the kitchen outlet. Allow components to discharge and wait several minutes before handling any wiring. Wear safety glasses and insulated gloves to guard against sharp edges and accidental contact with live terminals. Keep a dry workspace and avoid touching metal tools to exposed conductors. Have a plan for securing the fridge away from the wall so you can reach the rear panel without bending cords. Finally, consult the service manual for any special cautions about refrigerant lines or sealed systems; if you encounter a component that looks damaged, stop and seek professional help.
Tools and parts you’ll need before you start
- Replacement fridge thermostat (make sure it matches your model and sensor type)
- Screwdrivers (Phillips and flathead)
- Voltage tester or multimeter (to verify power is off)
- Wire nuts or crimp connectors
- Optional: thermal anti‑shock gloves and a magnetic parts tray
Before you order the part, gather the thermostat, read the installation notes, and confirm the mounting method. Clear the work area of jars, lids, and food items so you can work comfortably. If your unit uses a plug‑in harness, consider unplugging the harness connector gently to avoid pinching wires.
High‑level replacement process overview
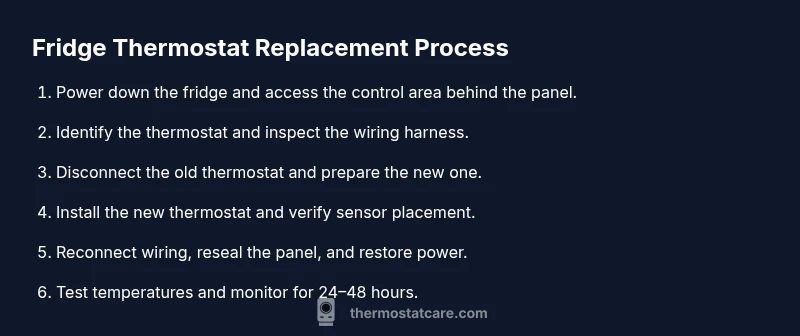
- Power down and access the control area behind the rear panel or decorative cover.
- Identify the existing thermostat housing and inspect the wiring harness.
- Disconnect the old thermostat carefully, preserving sensor wires and connectors.
- Install the new thermostat, ensuring the sensor placement and mounting bracket align with the old position.
- Reconnect the wiring harness, secure all connections, and replace the cover.
- Restore power, set the thermostat to the manufacturer’s recommended temperature, and monitor performance for 24–48 hours.
Note: If your replacement thermostat requires a C‑wire or a different connector style, you may need to install a quick adapter or modify the wiring as described in the product docs. For sealed‑system fridges, avoid vacuuming or opening refrigerant lines yourself; this work is best left to a pro.
Testing, calibration, and validation
After powering up, verify the fridge maintains a safe temperature (typically around 37–40°F or 3–4°C) and the freezer stays at 0°F (−18°C) where applicable. Use a thermometer to check several shelves and, if your fridge has multiple zones, confirm even cooling. Listen for compressor cycling and note any unusual noises. If the temperature drifts, recheck sensor connections and confirm the thermostat setting is within the recommended range. Keep an eye on frost buildup in frost‑free models, which can indicate sensor misplacement or wiring issues. Document readings for the first 48 hours to confirm stability.
Maintenance tips and common pitfalls
- Keep the thermostat clean and free from dust; a dirty sensor can misread temperature.
- Avoid over‑tightening screws that hold the thermostat in place to prevent mounting distortion.
- Do not bypass safety interlocks or disconnect harmless quick‑connectors to speed the task.
- If you replace with a mismatched part, you risk inaccurate cooling and potential warranty void.
- Seek professional help if you feel uncertain about electrical work or see refrigerant signs such as hissing or oily residues.
Authoritative sources: For deeper guidance, consult official resources from government and university energy pages.
Authoritative sources
- https://www.energy.gov/energysaver/appliances/refrigerators
- https://www.energystar.gov/products/fridges
- https://www.nist.gov/topics/electrical-safety
Tools & Materials
- Replacement fridge thermostat (compatible with your model)(Ensure electrical rating matches fridge spec; check sensor type and mounting.)
- Safety gear (safety glasses, insulated gloves)(Wear eye protection and insulated gloves during handling.)
- Screwdrivers (Phillips and flathead)(Have a medium Phillips (#2) and a flathead on hand.)
- Voltage tester(Verify power is off before touching wiring.)
- Wire nuts or connectors(For securing any spliced wires if needed.)
- Multimeter (optional)(Only if you plan to verify sensor resistance.)
Steps
Estimated time: 45-60 minutes
- 1
Power down and unplug
Unplug the fridge at the outlet and switch off the circuit if possible. Confirm no power is flowing by testing with a voltage tester. This prevents electric shock and protects sensitive control electronics.
Tip: Double‑check that the appliance cannot be re‑energized by a stray cord or switch. - 2
Access the thermostat area
Remove the rear access panel or decorative cover to expose the thermostat housing. Note how wires are arranged and take a photo for reference before disconnecting anything.
Tip: Keep track of all screws with a magnetic tray to avoid losing parts. - 3
Disconnect the old thermostat
Carefully detach the thermostat wiring harness, keeping note of sensor wires and connectors. Do not yank; use gentle prying if connectors are snug. Label wires if there are multiple similar colors.
Tip: Use needle‑nose pliers lightly to ease tight connectors. - 4
Prepare the new thermostat
Compare the new thermostat to the old one for physical fit and sensor placement. If it requires a mounting bracket or adapters, install those per the instructions before wiring.
Tip: Avoid bending sensor wires sharply; maintain the original routing path. - 5
Install the new thermostat
Connect the wiring harness to the new thermostat, ensuring connectors click firmly. Reposition the sensor so it sits where the old sensor was located and fasten the unit with screws.
Tip: Torque screws just enough to secure without stripping threads. - 6
Reconnect, reseal, and power up
Reconnect any harnesses, replace the rear cover, and plug the fridge back in. Restore power at the circuit breaker and wait for the compressor to start.
Tip: Listen for smooth compressor cycling; skip if you hear grinding sounds. - 7
Test and monitor
Set the thermostat to the manufacturer’s recommended temp and monitor for 24–48 hours. Check multiple shelves and the freezer to ensure even cooling.
Tip: Document readings and adjust if drift occurs.
Questions & Answers
Do I need to unplug the fridge before replacing the thermostat?
Yes. Unplug the fridge and switch off the circuit to avoid electric shock. Wait a few minutes for capacitors to discharge before handling wiring.
Unplug the fridge and switch off the circuit; wait a few minutes, then begin.
How do I know which thermostat to buy for my fridge?
Check the model number on the old thermostat, review the manual, and cross‑reference with the manufacturer’s parts list. Match sensor type, mounting, and electrical rating.
Look up your model number and check the manual to match sensor type and wiring.
Can I replace the thermostat myself or should I hire a technician?
If you’re comfortable with basic electrical work and have the right part, you can replace it. If you encounter sealed refrigerant lines or uncertain wiring, hire a technician.
It’s doable for confident DIYers, but call a pro for complex wiring or refrigerant concerns.
What if the fridge still doesn’t cool after replacement?
Recheck wiring, sensor placement, and thermostat settings. If the compressor isn’t running or cycles abnormally, there may be a different fault such as a relay or refrigerant issue.
Double-check wiring and sensor placement; if problems persist, seek expert help.
Are there safety risks when handling electrical components in a fridge?
Yes. Electricity and sharp components pose risks. Always disconnect power, use insulated tools, and avoid working near the refrigerant system unless trained.
Yes—disconnect power and use insulated tools; refrigerants require professional handling.
How long does a fridge thermostat typically last?
Thermostats vary by model and usage. If you notice erratic temperatures or frequent cycling, replacing the thermostat can restore performance.
Lifespan varies; replacement is suggested when temperatures are unstable.
Watch Video
What to Remember
- Verify compatibility before buying.
- Power off and confirm no voltage before touching wiring.
- Install with correct sensor placement and mounting.
- Test cooling and monitor for 24 hours.