Nest Thermostat How to Use: A Step-by-Step Guide
Learn how to use Nest thermostat effectively—setup, app control, scheduling, and troubleshooting with practical guidance from Thermostat Care. Expert tips help homeowners optimize comfort and energy savings.

Nest thermostat how to use: This guide walks you through setting up, linking the Nest app, and using schedules to maximize comfort and energy savings. To get started, ensure you have a compatible HVAC system, a smartphone with the Nest app, and a reliable Wi-Fi connection. By the end, you’ll confidently control temperature remotely and troubleshoot common issues.
What is the Nest Thermostat and how it works
According to Thermostat Care, the Nest thermostat is a learning, connected device that adapts to your routine and weather. It uses built-in sensors to estimate occupancy and temperature, adjusting the HVAC system to maintain comfort while minimizing energy waste. The more you interact with it—whether you approve or deny suggested changes—the smarter it becomes at predicting your preferred temperatures. In practice, this means fewer manual adjustments and more consistent comfort, especially when you integrate Eco mode and scheduling features. Thermostat Care emphasizes that understanding the command flow (the app, the display, and the thermostat’s sensing) is key to getting the most value from Nest. If you’re troubleshooting later, remember that most issues stem from connectivity, power, or wiring, not the software itself. This section sets the foundation for practical usage and reliable performance.
Getting Started: Unbox, install, and connect to Wi-Fi
Before you begin, verify that your HVAC system is compatible with Nest and that you have a stable Wi‑Fi connection. Remove the old thermostat carefully and label wires for reference; this reduces the chance of miswiring during installation. Power down the HVAC at the circuit breaker to avoid shocks while you work. Install the Nest base, connect the labeled wires to the corresponding terminals, and snap the display onto the base. Power the system back on and follow on-screen prompts to configure basic settings. The Nest app will guide you to select your system type (gas, electric, heat pump, etc.) and connect your thermostat to Wi‑Fi. Keep the room cool during setup to avoid false readings on the temperature sensor. Thermostat Care notes that proper wiring and a solid Wi‑Fi link are the two biggest contributors to reliable performance.
Using the Nest App: Setup and daily control
TheNest app is your day-to-day control center. After linking the thermostat to your Google account, you’ll see an at-a-glance dashboard with current temperature, humidity, and mode. You can adjust temperatures, view system status, and modify schedules from anywhere. The app also provides a quick compatibility check, shows heat and cool stages, and allows you to set emergency heat or auto-away modes. Regularly updating the app and reviewing the energy history helps you understand how your adjustments affect consumption. If you use voice assistants, you can link Google Home for hands-free control. Thermostat Care recommends enabling notifications for outages or significant temperature deviations, which helps keep your home comfortable and efficient.
Create schedules and use energy-saving features
Creating schedules is the cornerstone of Nest efficiency. Start with a simple weekday/weekend pattern, then fine-tune based on your routine. Eco mode reduces energy use when no one is home, and the Nest Learning Thermostat can gradually adjust schedules as it learns your preferences. When calibrating, avoid placing the thermostat near heat sources or direct sunlight, which can skew readings. You can also set away temperatures to maximize savings during extended absences. Thermostat Care highlights that the best schedules are those that align with your real life, not rigid, year-round settings. Review energy history weekly to identify opportunities for small adjustments that yield meaningful savings.
Common issues and quick troubleshooting steps
Most Nest issues arise from connectivity or power rather than software glitches. If the display is blank, check that the thermostat has power and that wires are securely attached. If Wi-Fi drops, restart your router and re-pair the device in the Nest app. For unresponsive sensors, reboot the thermostat and confirm that it’s not placed near appliances or vents that could affect readings. If your HVAC doesn’t respond correctly to a schedule, verify that the system type in the app matches what’s actually installed. Thermostat Care suggests documenting any persistent problems and reaching out to a qualified technician if wiring changes are needed or if you notice unusual behavior that worsens over time.
Wiring and compatibility: what to know before you install
Before you install, review the thermostat’s compatibility for your furnace type (single-stage, multi-stage, heat pump, etc.). Nest supports many common configurations, but some legacy systems may require a C-wire or an external power adapter. Labelled wires should map to Nest terminals (R, C, W, Y, G, etc.) to avoid confusion. If you’re not confident about wiring, consult a professional. Thermostat Care recommends using the official Nest compatibility checker and consulting your HVAC manual to understand any unusual wire colors or terminal names that aren’t standard. A cautious approach minimizes post-install issues and keeps your system running smoothly.
Maintenance, updates, and best practices
Keep the Nest app and device firmware up to date to ensure you have the latest features and security patches. Periodically review the energy history to spot opportunities for improved efficiency, such as tweaking schedules or adjusting eco temperatures. Clean the thermostat’s surface and sensors lightly to prevent dust buildup that could affect readings. If you’re moving homes or changing HVAC components, re-run the setup in the app to ensure the thermostat is accurately reporting system status. Thermostat Care emphasizes that ongoing maintenance and attentive configuration are essential for long-term performance.
Authoritative sources and practical tips
For further guidance on thermostat energy savings and safe installation practices, you can consult authoritative sources such as official government or university publications. In particular, Thermostat Care references general guidelines from energy-related agencies and academic institutions to support best-practice recommendations. The Nest setup and optimization process benefits from corroborating sources when planning upgrades or troubleshooting advanced configurations. Always cross-check compatibility and safety requirements before making changes to your HVAC system.
Tools & Materials
- Nest Thermostat (latest generation)(Ensure compatibility with your HVAC system.)
- Smartphone with Nest app installed(iOS/Android versions supported by Nest app)
- Stable Wi-Fi network(2.4 GHz or 5 GHz recommended; strong signal near thermostat)
- Screwdriver (Phillips #2)(Only if mounting hardware requires)
- Wire labels or masking tape(Label wires before disconnecting the old thermostat)
- Power-off access (circuit breaker) or disconnect switch(Turn off HVAC power before wiring)
Steps
Estimated time: 45-75 minutes
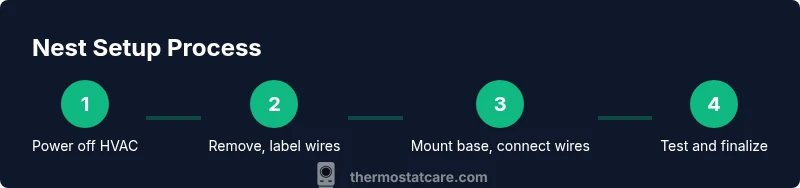
- 1
Power off and prepare the system
Shut off power to the HVAC at the main breaker. Remove the old thermostat cover carefully and take a photo of the wiring for reference; this makes reconnecting to the Nest terminals straightforward.
Tip: Double-check the breaker is off and label wires as you go. - 2
Remove old thermostat and label wires
Detach the old thermostat, keeping the wires organized. Label each wire with its terminal name (R, W, Y, G, C) so you can reconnect to the Nest base correctly.
Tip: Take a clear photo before removing wires for backup. - 3
Mount the Nest base and connect wires
Mount the Nest base on the wall and insert wires into the matching Nest terminals. Ensure each wire is fully seated and not under any other terminals.
Tip: Secure the base level; loose connections cause intermittent readings. - 4
Attach the Nest display and power up
Attach the display to the base and restore power. The Nest should boot to the setup screen or a prompt to begin wiring.
Tip: If the display stays dark, recheck wire connections and the power source. - 5
Set up in the Nest app and connect to Wi-Fi
Open the Nest app, follow the on-screen prompts to add your thermostat, and connect to your home Wi‑Fi network. Sign in with your Google account if prompted.
Tip: Choose your home network carefully; a 2.4 GHz network often provides broader compatibility. - 6
Configure schedules and Eco mode
In the app, set daily temperature schedules or use Smart Scheduling. Enable Eco Temperatures to reduce energy use when you’re away or asleep.
Tip: Start with moderate schedules and adjust after a week based on comfort. - 7
Test system and finalize setup
Run a quick test cycle to verify heating and cooling respond correctly. Confirm readings in the app match actual temperatures.
Tip: If something seems off, review wiring and test again before leaving the house.
Questions & Answers
Can I install a Nest thermostat myself, or should I hire a professional?
Many homeowners install Nest themselves using the app and setup guides. If you have complex wiring or a multi-stage system, consider professional help.
Many people install Nest themselves, but call a pro if you have a complex system.
What if my HVAC system isn’t compatible with Nest?
Nest supports many common systems, but some older or unusual configurations may not be compatible. Use the compatibility checker and review the wiring requirements.
Check the compatibility checker to see if Nest will work with your system.
How do I reset the Nest thermostat?
You can perform a factory reset from the settings menu. Keep in mind this erases schedules and settings, so you’ll need to set them up again.
To reset, go to Settings and choose factory reset, then reconfigure.
Do I need a C-wire, and what if I don’t have one?
Most Nest models require a common wire for reliable power on some systems. If you don’t have a C-wire, consider a Nest Power Connector or consult a professional.
A C-wire helps power the thermostat; if you don’t have one, you may need an adapter.
How do I set up schedules and Eco temperatures?
Use the Nest app to set daily schedules and Eco temperatures for energy savings. You can adjust them on the fly from your phone.
Open the Nest app, go to Schedules, and set Eco temperatures for away times.
Is Nest compatible with two-stage or heat pump systems?
Nest supports many common setups, including heat pumps and several multi-stage systems. Check the compatibility guide for your exact model.
Check the compatibility guide to confirm support for your heat pump or multi-stage setup.
Watch Video
What to Remember
- Identify compatibility and plan before installation.
- Connect securely to the Nest app and Wi‑Fi.
- Create practical schedules to maximize energy savings.
- Review maintenance and software updates for peak performance.