Nest Thermostat Home Assistant: A Step-by-Step Guide
Learn how to connect a Nest thermostat with Home Assistant for centralized control, automation, and energy insights. This step-by-step guide covers prerequisites, setup, automations, privacy, and troubleshooting.

By the end of this guide, you will be able to integrate a Nest thermostat with Home Assistant to automate heating schedules, monitor performance, and control your HVAC from a single dashboard. You’ll need a Nest thermostat, a Home Assistant install, and a way to bridge the two platforms. This hands-on approach is designed for homeowners and DIY enthusiasts today.
What You’ll Achieve with Nest and Home Assistant
The Nest thermostat home assistant integration unlocks centralized climate control for your house. By connecting your Nest device to Home Assistant, you can schedule, automate, and monitor heating and cooling from a single dashboard. This is especially useful for homeowners who want to reduce energy waste and maintain comfortable indoor temperatures without manual tweaks every day. According to Thermostat Care, combining Nest with Home Assistant can yield more consistent comfort while minimizing energy spikes that happen when HVAC systems run unnecessarily. In practice, you’ll be able to create automations that respond to occupancy, weather forecasts, and time of day, and you can visualize temperature trends alongside other smart devices such as lights, blinds, and humidifiers. The Nest thermostat home assistant setup also improves incident response: if your system detects a fault, you’ll see alerts in Home Assistant and can trigger maintenance reminders. Expect a learning curve if you’re new to smart home ecosystems, but the payoff is a more efficient, predictable climate across your home. This section sets the stage for successful integration and practical usage, from prerequisites to day-to-day operations.
This approach aligns with Thermostat Care’s guidance on practical DIY home automation, helping you maximize comfort while safeguarding energy budgets.
Compatibility and Prerequisites
To successfully integrate a Nest thermostat with Home Assistant, you’ll need to gather several prerequisites and verify compatibility. First, ensure your Nest thermostat is installed, connected to secure Wi‑Fi, and is controllable via the Google/Nest app. You’ll also need a working Home Assistant instance (on a Raspberry Pi, a dedicated PC, or a compatible NAS) with network access to the same local network as the Nest device. A Google account linked to your Nest is typically required to authorize data sharing with Home Assistant, along with any necessary two‑factor authentication. If you plan to use cloud-based bridging, confirm that your Google Cloud project is set up to support OAuth callbacks. Finally, maintain a stable power supply to your HVAC system and consider enabling 2.4 GHz Wi‑Fi for reliable device communication. In short, prepare Nest, Home Assistant, and your network before starting the integration process.
Security and Privacy Considerations
Security and privacy matter when bridging Nest with Home Assistant. This integration inherently requires granting Home Assistant permission to read climate data and send commands back to the Nest thermostat. Use OAuth-based authorization and minimum necessary scopes to limit data exposure. Regularly review the devices and automations that have access to your Nest data, and disable access if you notice unusual activity. Thermostat Care emphasizes the importance of keeping firmware up to date and using strong, unique passwords for both the Nest account and Home Assistant. If you’re uncomfortable with cloud-based data sharing, explore options to keep sensitive controls on the local network where feasible and enable logging controls within Home Assistant to minimize data collection.
Bridge Approaches: Cloud vs Local
There are a few ways to connect Nest with Home Assistant, each with its own trade‑offs. A cloud-based bridge uses the Nest API and Google OAuth to relay data between Nest and Home Assistant, offering broad compatibility but depending on constant internet access. A local‑first approach focuses on keeping as much data processing on your own network as possible, reducing cloud reliance but sometimes requiring more setup complexity. The right choice depends on your priorities: reliability during internet outages, privacy preferences, and how hands-on you want to be with configuration. Regardless of approach, aim to implement robust automations that surface meaningful feedback in Home Assistant dashboards while avoiding unnecessary polling that can tax your network or API quotas. Thermostat Care recommends starting with a cloud-based bridge to validate functionality, then exploring local options if privacy and latency are top concerns.
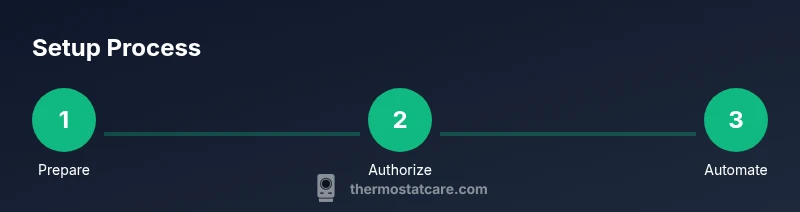
Step-by-Step Setup Overview
Understanding the general flow helps you plan the work. Begin by preparing accounts and hardware, then create Google Cloud OAuth credentials for the Nest integration. Next, enable Nest API access and authorize Home Assistant to read climate data. Once authorized, add the Nest integration in Home Assistant and verify the thermostat can be controlled from the Home Assistant UI. Finally, build initial automations and dashboards to expose temperature data, schedules, and energy insights. This high-level map keeps you oriented as you move into concrete steps.
Automations to Try
Start with simple automations to validate the connection and establish baseline behavior. Example automations include: (1) If you leave home, set thermostat to Eco mode; (2) If humidity exceeds a threshold, adjust fan or cooling; (3) Schedule a wake temperature that mirrors your workday routine; (4) Push a nightly report of energy use to your dashboard. As you gain confidence, combine triggers from occupancy sensors, weather forecasts, and calendar events to create smarter, energy‑savvy scenes. You’ll soon be able to balance comfort with efficiency across the whole house.
Troubleshooting Common Issues
If Nest isn’t showing up in Home Assistant, double‑check your OAuth credentials and make sure the correct Nest API scopes are granted. If authentication fails, re‑run the OAuth flow and verify that the Google Cloud project is correctly linked to your Home Assistant instance. For data discrepancies, ensure that time zones are consistent between systems and that the Home Assistant polling interval isn’t set too aggressively. If control commands don’t take effect, confirm the Nest device is online and reachable on the same network, and review any automations that might override manual changes. When in doubt, restart both devices and re‑authorize the integration.
Monitoring Performance and Energy
A successful Nest integration with Home Assistant enables you to monitor temperature, runtime, and setpoint changes in real time. Use Home Assistant dashboards to visualize energy usage trends alongside other devices like lights or smart outlets to identify opportunities for savings. Thermostat Care notes that trend analysis over weeks and months can reveal predictable energy peaks and off‑peak windows, guiding smarter automation. You can also export data for deeper analysis or share dashboards with family members to align everyone’s comfort goals. Regularly review dashboards to spot anomalies and fine‑tune automations for better efficiency.
Maintenance and Best Practices
Keep the Nest firmware and Home Assistant core up to date. Regular updates often include security improvements and new features that enhance reliability. Document your automation recipes and keep a changelog of major configuration changes. Use descriptive names for automations and provide concise, human‑readable hints in your dashboards so other family members can understand and manage the system. Finally, schedule periodic audits: verify OAuth tokens, confirm permissions, and confirm that your automations still align with your current routines and climate goals.
Tools & Materials
- Nest thermostat(Ensure it is installed, connected to Wi‑Fi, and controllable via the Nest app)
- Home Assistant system(Run on compatible hardware; keep software updated)
- Google/Nest account(Admin access for Nest device management and cloud API authorization)
- Google Cloud project with OAuth credentials(Create an OAuth client ID for the Home Assistant integration)
- Smartphone or computer(For configuring Home Assistant and monitoring dashboards)
- Stable Wi‑Fi network(Prefer 2.4 GHz band for Nest device compatibility)
- HVAC system with a C‑wire or other compatible wiring(Ensure adequate power for reliable operations)
Steps
Estimated time: 60-180 minutes
- 1
Prepare accounts and hardware
Confirm Nest is online and accessible via the Nest app. Verify Home Assistant is installed and reachable on the same network, and that you can access a Google/Nest account with admin privileges.
Tip: Test the Nest app’s device status before starting to avoid late surprises. - 2
Create Google Cloud OAuth credentials
In Google Cloud Console, create a new project and enable OAuth 2.0 credentials for a web or installed app. Save the client ID and client secret; you will use these in Home Assistant.
Tip: Use a dedicated project for this integration to minimize permission conflicts. - 3
Enable Nest API access and authorize
Follow the official steps to enable API access for Nest in Google Cloud and authorize Home Assistant to read thermostat data. Complete the consent flow to grant the required scopes.
Tip: Document the authorization URL and any codes in case you need to reauthorize later. - 4
Add Nest integration in Home Assistant
In Home Assistant, go to Integrations, search for Nest, and enter the OAuth client details created earlier. Restart Home Assistant after successful integration.
Tip: Have the client ID and secret handy during setup; ensure you’re logged in to the correct Google account. - 5
Authorize and connect devices
Complete the OAuth flow within Home Assistant to allow the Nest thermostat to be controlled. Verify temperature, fan, and mode controls appear in the UI.
Tip: If the flow stalls, clear browser cookies or try another browser; reattempt the flow from the Home Assistant UI. - 6
Create initial automations
Build a basic automation, such as setting Eco mode when home/away is detected. Create a simple dashboard card to monitor current temperature and setpoints.
Tip: Start small; confirm the automation executes before scaling up complexity. - 7
Test, refine, and document
Test all automations under different scenarios (home/away, scheduling changes, weather shifts). Document changes and review privacy settings.
Tip: Keep a changelog of automation iterations for quick troubleshooting.
Questions & Answers
Do I need a Google Nest account to integrate with Home Assistant?
Yes, most Nest integrations require a Google/Nest account with access to your thermostat. You may need to enable API access and authorize Home Assistant to read data.
You’ll need a Google/Nest account and grant Home Assistant access to your thermostat data.
Is the Nest API still supported by Home Assistant?
Support depends on current Google policies; you may need to update credentials or adjust your setup as policies change. Check the Home Assistant docs for the latest integration approach.
Nest API support can change; verify current guidance in Home Assistant docs.
Can I automate heating with Home Assistant using Nest?
Yes. You can trigger automations based on occupancy, schedules, or energy goals, and push temperature changes to Nest via the integration.
Automations are supported; you can set them to adjust temperature on triggers.
What about privacy and data sharing?
Only authorize the required scopes; review what data Nest exposes and adjust visibility as needed. Use local controls where possible and limit data collection.
Be mindful of data sharing; limit scope to essentials.
What if OAuth credentials fail?
Re-run the OAuth flow from Home Assistant, verify the Google Cloud project, and ensure the Nest account has permission to access the device.
If OAuth fails, retry the flow and verify project settings.
Does this affect energy usage data?
Integrating Nest with Home Assistant can help track energy usage more holistically; use dashboards to visualize trends and identify savings opportunities.
Dashboard data helps you spot energy savings.
Watch Video
What to Remember
- Plan before you start
- Use a dedicated Google Cloud project
- Test connectivity before automations
- Secure credentials and limit data sharing
- Monitor dashboards to find energy savings