Home Assistant Nest Thermostat Integration Guide
Learn how to connect a Nest Thermostat to Home Assistant, set up automations, and troubleshoot common issues with step-by-step guidance from Thermostat Care.

With this guide you will learn how to connect a Nest Thermostat to Home Assistant, enabling centralized control, automations, and energy insights. You'll verify prerequisites, authorize Google/Nest access, complete device discovery, and set up basic automations. By the end you can manage temperature from Home Assistant and your voice assistants.
Why this integration matters
According to Thermostat Care, integrating a Google Nest Thermostat with Home Assistant unlocks centralized climate management, bridging consumer comfort with automation. The Thermostat Care Team notes that homeowners who connect Nest devices to a smart home hub can coordinate schedules, occupancy sensing, and energy-saving routines more reliably than with standalone apps. This guide focuses on practical, safe steps to link Nest to Home Assistant, while respecting user privacy and data flow. By bringing Nest into Home Assistant you can run automations that respond to weather, presence, and time of day, without switching apps. This approach aligns with Thermostat Care's mission to help homeowners get more from their thermostats while avoiding complex, brittle setups. You will gain confidence in configuring, testing, and refining automations that reduce energy waste and improve comfort. Keep in mind that Google’s OAuth and Nest account linking are involved; follow the prompts carefully to grant access and then return to Home Assistant to finish device discovery.
What you need before you start
Before you begin, make sure you have the following ready:
- A Nest Thermostat connected to your Google/Nest account
- Home Assistant installed on compatible hardware with internet access
- A Google account authorized for Nest integration
- A stable Wi‑Fi network and a device to run the setup (phone or computer)
- Time to test automations and verify device states
Having these items on hand speeds up setup and reduces the risk of incomplete integration. Thermostat Care recommends performing the initial linking from a workstation or a phone with the Home Assistant app for smooth OAuth prompts.
Compatibility and privacy considerations
The Nest integration with Home Assistant relies on Google’s cloud services to synchronize thermostat state and commands. This means you’ll grant Home Assistant access to your Nest data via OAuth. While this enables powerful automations and cross-device control, it also introduces data flow through Google’s infrastructure. Thermostat Care Analysis, 2026, notes that most users accept cloud-based syncing for convenience, but you should review permissions regularly and understand what data is shared. If privacy is a priority, limit automation scope to local actions where possible and keep your Home Assistant instance secured behind a strong password and network protections.
Always check for the latest integration notes from both Nest and Home Assistant, as OAuth scopes and API endpoints can change over time. This ensures you stay compliant with current terms of service and minimize disruption to automations.
Configuring Home Assistant for Nest
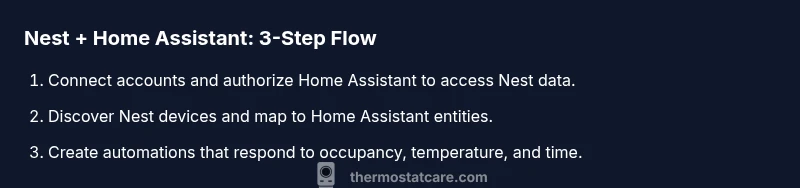
Setting up the Nest integration begins in the Home Assistant UI. Navigate to Settings > Devices & Services and choose Add Integration. Search for Nest or Google Nest, then follow the on-screen prompts to sign in with your Nest account. Authorize Home Assistant to access your Nest devices. Once authorization completes, Home Assistant will discover Nest thermostats and present them as entities that you can rename and organize in your dashboard. The key is to map each thermostat to a meaningful entity name so you can reference it clearly in automations.
After discovery, verify that state changes in Nest (temperature, mode, eco settings) appear in Home Assistant within a few seconds. If updates lag, check your network and ensure your Google account has not revoked access. Thermostat Care suggests documenting each entity name and room assignment for future automations.
Discovering Nest devices and mapping to entities
With devices discovered, create a clean entity map to simplify automation building. Group thermostats by room, then create scripts or automations that reference specific entities. For example, map Living Room Thermostat to climate.living_room and Bedroom Thermostat to climate.bedroom. This clarity helps when you design time-based schedules, occupancy-triggered modes, or climate hold actions. If you have Nest cameras or other Nest devices, consider separate groups to avoid confusion and keep your automations focused.
If you run into missing devices, trigger a resync from the Home Assistant Integrations page or re-authenticate the Nest connection. Thermostat Care recalls that device discovery can momentarily fail after OAuth changes, so a quick reauth often resolves it.
Automations for comfort and energy savings
Design automations that balance comfort with energy efficiency. Common use cases include scheduling temperature changes based on occupancy, aligning cooling and heating with local weather, and using hold modes during night hours. Example automations:
- If the house is unoccupied for 30 minutes, set Eco mode on all Nest thermostats.
- When outside temperature drops below a threshold, pre-heat the home before occupants return.
- If humidity rises above a comfortable level, adjust fan settings to improve air quality.
Testing these automations in small increments helps avoid unexpected temperature swings. Always provide clear triggers and safeguards to prevent rapid, frequent changes that could wear the equipment or create discomfort.
Troubleshooting common issues
If Nest state isn’t updating in Home Assistant, verify OAuth token validity and confirm that Home Assistant can reach Google’s cloud endpoints. Check for webhook or port restrictions in your router. If automations don’t trigger, review the entity IDs used in the automation, and confirm that the automation is enabled. Sometimes changes in Nest’s API require re-authentication. Thermostat Care recommends keeping a simple test automation to confirm the basic flow before layering on complex rules.
Security and data privacy best practices
Security starts with strong authentication for your Home Assistant UI and regular review of app permissions. Limit integrations to what you actively use, rotate tokens if you suspect a compromise, and enable multi-factor authentication where possible. It's wise to enable separate accounts for home automation tasks and personal use. Be mindful of remote access settings if you expose Home Assistant to the internet; use VPN or cloud-based secure access with caution. Thermostat Care emphasizes routine audits of connected services to maintain a secure automation environment.
Maintenance and updates after setup
Keep both Home Assistant and the Nest integration up to date. Periodically check for updates to the integration, especially after major Home Assistant releases, as these can affect entity availability or API behavior. Re-run key automations after updates to ensure they still perform as expected. Back up your configuration regularly so a rollback is quick if an update changes behavior.
Next steps and monitoring after setup
Once your Nest thermostats are reliably controlled from Home Assistant, expand your automation strategy. Add presence-based routines, integrate weather data, and explore voice control through Google Assistant or Amazon Alexa. Monitor energy trends over time and adjust schedules to seasonal needs. Thermostat Care recommends documenting your automation logic and keeping an accessible changelog for future maintenance.
Tools & Materials
- Home Assistant platform (core OS or Home Assistant OS/Supervised)(Ensure it’s updated to the latest release before starting.)
- Nest Thermostat(Any supported Nest Thermostat model connected to your Google/Nest account.)
- Google account with Nest access(Used for OAuth authorization to link Nest with Home Assistant.)
- Stable Wi-Fi network(Reliable network to keep the Nest–Home Assistant link stable.)
- Web browser or mobile device for setup(Needed to complete OAuth prompts and initial configuration.)
Steps
Estimated time: 45-90 minutes
- 1
Prepare accounts and prerequisites
Verify you have a Nest Thermostat linked to a Google account and that Home Assistant is installed and reachable on your network. Log in to both accounts and ensure your devices are on the same network for discovery. This step avoids common connection issues later.
Tip: Have your login credentials handy and ensure you have admin rights on the Home Assistant instance. - 2
Enable Nest integration in Home Assistant
Open Home Assistant, go to Settings > Devices & Services > Add Integration, and select Nest/Google Nest. The system will prompt you to sign in with your Google/Nest account to authorize access.
Tip: Choose the option to allow Home Assistant to manage devices; this enables control and automations. - 3
Authorize and complete OAuth flow
Follow the on-screen prompts to grant Home Assistant permission to access Nest data. Accept required scopes and return to Home Assistant to continue the setup.
Tip: If you’re prompted to select which Nest devices to share, choose all you plan to automate for better control. - 4
Discover Nest devices in Home Assistant
Trigger a device discovery; Home Assistant will list thermostats as climate entities. Rename them to reflect location (e.g., climate.living_room).
Tip: Clear, room-based naming prevents confusion in automations. - 5
Map devices to entities and organize
Create logical groupings for each room and ensure entities appear in your dashboard. Check that current temperature, target temperature, and mode reflect Nest state accurately.
Tip: Document each entity name for easier future editing. - 6
Create core automations
Set up a few essential automations: occupancy-based eco mode, time-based schedules, and weather-aware adjustments. Start simple and iterate.
Tip: Test each automation with a dry run before leaving it to run automatically. - 7
Test basic controls from Home Assistant
Manually adjust temperatures via Home Assistant and verify Nest responds within a few seconds. Confirm mode changes and hold settings apply properly.
Tip: If delays occur, check network latency and OAuth token activity. - 8
Validate security and monitor performance
Review access controls, enable MFA on accounts, and monitor automation logs for anomalies. Adjust permissions as needed.
Tip: Schedule regular reviews of connected services.
Questions & Answers
Do I need to link Google Nest to Home Assistant to get started?
Yes. You typically link your Nest account to Home Assistant via OAuth to enable two-way control and automations. After linking, Home Assistant can discover Nest devices and expose them as controllable entities.
Yes. You’ll link your Nest account to Home Assistant using OAuth to enable control and automations.
Is Nest data shared with Home Assistant private or exposed publicly?
Nest data is transmitted through Google's cloud services for this integration. Review the scopes requested during authorization and adjust permissions to limit data access where possible; enable secure access methods for your Home Assistant instance.
The data goes through Google's cloud as part of the integration; review permissions and keep security tight.
Can automations run entirely locally, or do they require cloud access?
Automations are created and stored in Home Assistant, but the Nest integration relies on cloud communication to exchange device states and commands. You’ll get the benefits of local automations, with cloud-assisted device control.
Automations live in Home Assistant, but Nest uses the cloud to share device states and commands.
What should I do if Nest devices aren’t discovered by Home Assistant?
Ensure OAuth flow completed successfully, re-authenticate if needed, and trigger a fresh device discovery from the Integrations page. Verify your Nest account has the thermostat accessible and is active.
If things aren’t found, re-authenticate and start a new device discovery from the Integrations page.
How do I troubleshoot authentication failures during setup?
Check that you’re using the correct Google account, confirm OAuth scopes, and ensure your Home Assistant instance can reach Google’s APIs. If needed, revoke and re-authorize the Nest integration.
Make sure the correct Google account is used and re-authorize if needed.
Watch Video
What to Remember
- Plan integration flow before enabling access
- Enable automations to optimize energy and comfort
- Secure credentials and review permissions regularly
- Test both Home Assistant and Nest controls after setup