Amazon Thermostat Install: DIY Step-by-Step Guide
Learn how to install an Amazon thermostat safely with Thermostat Care. This detailed, educational guide covers compatibility, wiring, Wi‑Fi setup, and Alexa integration for a reliable smart-home upgrade.

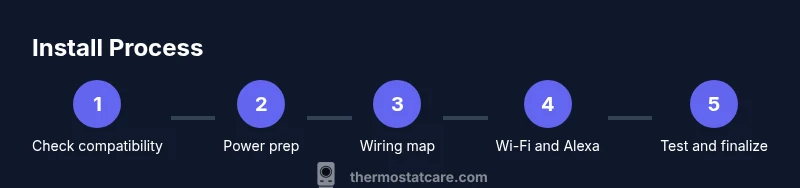
Goal: Install an Amazon-compatible thermostat safely and correctly. You’ll verify compatibility, shut off power, handle wiring, mount the base, connect to Wi‑Fi, and complete initial configuration with Alexa or Google Home. You’ll need a compatible HVAC system, a C-wire if present, and basic tools. This guide walks you through the steps end-to-end.
Why install an Amazon-compatible thermostat with Thermostat Care insights
If you’re upgrading to a smarter home setup, an Amazon-compatible thermostat is a natural choice. This guide focuses on amazon thermostat install and aims to empower homeowners to complete a safe, reliable DIY upgrade. According to Thermostat Care, a clear plan and accurate wiring are the two biggest factors in a smooth installation. In practice, you should verify compatibility with your HVAC system, confirm you have a 24 volt power source, and ensure your Wi Fi network is ready for a quick setup. The Thermostat Care team emphasizes that taking a little extra time to label wires and photograph the existing wiring can prevent miswiring and backtracking. When the system is ready, you can control temperature, scheduling, and energy savings using voice commands with Alexa or Google Assistant. In short, this amazon thermostat install guide focuses on practical steps you can perform safely, avoid common mistakes, and achieve reliable performance from day one.
Compatibility requirements for amazon thermostat install
Most modern thermostats designed for Alexa ecosystems require a 24 VAC heating and cooling system and a C wire for stable power. If your current thermostat is battery powered, you may still install an Amazon compatible model, but expect battery changes or power steal modes. Check that your HVAC equipment uses standard terminal labels like R, C, W, Y, and G, and confirm the thermostat supports your heating type whether conventional forced air, heat pump, or hydronic systems. The Thermostat Care Team notes that some systems with multiple stage cooling or heat pump configurations may need compatibility adapters or professional assistance. Before you buy, review the thermostat manufacturer documentation and compare it to your system wiring. A quick room measurement and a photo of the HVAC control board can save time during the install. Always ensure the thermostat is rated for your voltage and is compatible with your Wi Fi router to enable app control and voice assistants.
Safety and preparation: workspace, power, and basic tools
Safety first. Start by turning off power at both the furnace and the branch circuit to avoid electric shock while you remove the old device. Gather the essential tools and keep loose wires labeled for easy reassembly. Use a non contact voltage tester to verify that the wall is de-energized and a multimeter only if you want to validate the presence of a 24 VAC signal. Clear the wall area and lay out the wires on a clean surface so you can label them without mixing up their functions. Photograph the current wiring configuration from multiple angles before you touch anything. If you are uncertain at any point, pause and seek professional help rather than risking damage to the HVAC system or your home wiring. Thermostat Care recommends performing a thorough safety check before you begin any installation.
Understanding existing wiring and labeling wires before removal
Identify each conductor and label it with its terminal letter and function. If your old thermostat used colored wires, do not assume color equals function; wire colors can vary by installer. Label R, C, W, Y, G, and any auxiliary signals such as O/B for heat pumps. If the old stat has jumper wires, note which circuits were bridged and why. Take a photo of the wall plate and the control board inside the HVAC furnace closet for reference. Check if the C wire is actually connected; some homes rely on power stealing or battery modes. This step reduces the risk of miswiring and helps you choose the correct terminals on the new thermostat. If you do not have a C wire, plan to use the thermostat calculator mode, or consider running a new common wire with professional support.
Mounting base, attaching the wall plate, and aligning the display
After labeling wires, remove the old mounting plate and prepare the new base. Use a level to ensure the base sits flat against the wall and mark the screw positions. Drill pilot holes and attach the base with the included screws. Tighten until snug but not overdone to avoid cracking the wall. Mount the thermostat body onto the base and connect any required jumpers or adapters as per the manufacturers instructions. A secure mount ensures the display is readable from typical seating distance and reduces the risk of loose connections causing intermittent power loss. Store spare screws in a small container so you do not lose them during reassembly. Thermostat Care suggests verifying the alignment again after you secure the device to the wall.
Wiring the new thermostat: common scenarios and terminal mapping
With the base mounted, connect each wire to the matching terminal on the new unit. If you have a C wire, attach it to C and confirm R power is present on the R terminal. W and Y control heat and cooling, while G powers the fan. For heat pump setups, O or B signals may be required, and some models use an auto mode for changeover. If your old stat used a jumper between R and RC or RH, install it or use the thermostat's internal jumper as recommended by the manufacturer. If there is no C wire, avoid using power stealing features and instead select a battery-powered model or use a power extender kit if your thermostat supports one. After wiring, double check that there are no stray strands, and use a wire cap or tubing to secure exposed leads. The Thermostat Care guidance emphasizes that correct terminal mapping prevents misoperation and preserves energy efficiency.
Connect to Wi Fi and enable Alexa integration
Power up the thermostat and begin the initial setup via the touchscreen or companion app. Connect to a stable Wi Fi network, ideally a 2.4 GHz band for device reliability, though many models support 5 GHz as well. Create or sign in to your account and authorize the thermostat to access your location, energy data, and voice assistant integration. In the Alexa setup, link the thermostat skill to your Amazon account and assign it to a room in the Alexa app. Running a quick test of temperature changes and scheduling confirms proper communication with your smart home hub. Keeping your router firmware up to date helps maintain a smooth connection and reduces dropouts during routine scheduling.
Testing, calibration, and optimizing performance after install
With power restored, verify that the thermostat powers on and shows the expected room temperature. If readings look off, perform a short calibration run by setting a known room temperature and comparing the sensor reading after a few minutes. Program schedules and look for 24 hour cycle consistency to confirm correct operation. Check the fan mode, stage control, and heat pump reversing valve if applicable. Use the thermostat's diagnostics to test voltage, current, and communication with the HVAC controller. If you notice odd behavior or the thermostat disconnects from Wi Fi frequently, reassess wiring, reenter Wi Fi credentials, or revert to a factory reset and reconfigure. The Thermostat Care team recommends running a through post install check to ensure long term reliability.
Maintenance, safety reminders, and common post install issues to watch for
Keep a regular maintenance cadence to prevent issues: check firmware updates, verify schedules after daylight saving changes, and ensure the Alexa integration remains properly linked. Watch for common alerts such as sensor drift, connectivity drops, or unresponsive touchscreens. If at any point the unit refuses to power on, recheck the wiring, verify 24 VAC supply, and consult the manual or Thermostat Care support to avoid potential damage to your HVAC system. Having a solid installation process and clear labeling in place makes future thermostat upgrades easier and reduces the chance of wiring mistakes. You can extend this guide to other smart thermostats by applying the same wiring logic and app setup steps.
Tools & Materials
- Flat-head and Phillips-head screwdrivers(Phillips #2 and flat-head #1 for most mounting screws)
- Non-contact voltage tester(Verify power is off before touching wires)
- Multimeter (optional)(Use if you want to validate a 24 VAC signal)
- Wire labels or masking tape(Label wires as you disconnect them)
- Pencil or marker(Label on-wall notes for reference)
- Level and drill set(Ensure mounting plate is level; drill as needed)
- Screws and wall anchors(Use anchors if no stud behind the wall)
- Power extender kit (if required)(Only if your setup lacks a true C wire and your model supports it)
- Smartphone or tablet with the thermostat app(For app-based setup and Alexa linking)
- Stable Wi-Fi network(Prefer 2.4 GHz for reliability; many devices also support 5 GHz)
Steps
Estimated time: 60-90 minutes
- 1
Power down and prep safety
Shut off power at the furnace and the corresponding branch circuit. Confirm the wall is de-energized with a non-contact tester before touching wires. Remove the faceplate of the old thermostat and photograph wiring from multiple angles to capture color codes and terminal positions.
Tip: Double-check the tester reading and keep photos organized in a dedicated folder. - 2
Document and label wiring
Label each wire with its function using tape and a marker. Note terminal letters from the old stat (R, C, W, Y, G, O/B). A clear map prevents cross-connection later and makes terminal mapping simple on the new unit.
Tip: If you are unsure about a wire, stop and verify with the instruction manual before moving on. - 3
Remove old base and prepare wall
Remove the mounting screws and take down the old base. Use a level to mark new screw holes on the wall. Drill pilot holes as needed and insert wall anchors where there is no stud.
Tip: Keep screws handy in a small tray to avoid losing them. - 4
Mount the new base
Attach the new mounting base to the wall using the screws. Ensure the base is firmly anchored and perfectly level. This step prevents future display misalignment and loose connections.
Tip: Recheck level after attaching all screws and before wiring. - 5
Connect home wires to the new unit
Insert wires into the corresponding terminals on the new thermostat. If a C wire exists, attach to C. Ensure R has power, and place W, Y, and G on their lines. For heat pumps, connect O/B as required. Avoid using a loose wire or over-tightening terminals.
Tip: Trim excess wire length to prevent shorts and keep wires tidy. - 6
Attach the thermostat to the wall and secure the faceplate
Click the thermostat body onto the mounted base. Reattach the faceplate and verify there are no gaps. Ensure the display is legible and the unit begins its boot sequence.
Tip: If the display is unreadable, reseat the unit and retry the boot process. - 7
Power on and begin setup
Restore power at the furnace and on the circuit. Use the touchscreen or app to start the initial setup. Connect to your 2.4 GHz Wi‑Fi network, then sign into or create your account for app control.
Tip: Keep your router credentials handy for a smooth connection. - 8
Link to Alexa and test voice control
In the Alexa app, enable the thermostat skill and link it to your account. Assign the device to a room and run a quick test by asking Alexa to adjust the temperature.
Tip: Update the thermostat firmware if prompted during setup. - 9
Final tests and adjustments
Confirm that heating and cooling respond to temperature changes. Check that schedules run as expected, and that the fan operates correctly. Review energy-saving features and ensure timers are functioning.
Tip: Document any unusual behavior and consult the manual or Thermostat Care support if needed.
Questions & Answers
Do I need a C-wire for an Amazon thermostat install?
Many Amazon compatible thermostats can operate without a C-wire, but having a C-wire provides consistent power and reduces the risk of outages.
A C-wire is ideal for stability, but you can install without it if your model supports battery power.
Is DIY installation safe for most homeowners?
If you follow safety steps, turn off power, and adhere to manufacturer instructions, a typical homeowner can complete the install. Seek professional help if unsure.
Yes, with basic electrical safety and careful wiring checks, many people install themselves.
Will the thermostat work with heat pumps?
Most models support heat pumps; verify O/B and AUX wiring compatibility in the thermostat documentation.
Yes, many Amazon thermostats work with heat pumps when correctly configured.
Can I install this in a rental or condo?
Yes, with permission to alter the wall and HVAC wiring. Use non-permanent mounting methods if allowed by the lease.
Renters can install if the landlord approves the setup and wall modifications.
What should I do if the thermostat won’t connect to Wi-Fi?
Check router frequency, signal strength, and credentials. If needed, temporarily move closer to the router or reset network settings.
Make sure the network is accessible and credentials are correct; try a restart if it fails to connect.
How long does installation take on average?
Most installations take about an hour, depending on wiring complexity and wall conditions.
Usually around an hour, with some setups taking a bit longer.
Watch Video
What to Remember
- Verify compatibility before purchasing the thermostat.
- Label and photograph wires to prevent miswiring.
- Ensure a solid, level mount for reliable operation.
- Connect to Wi-Fi and link to Alexa for full features.
- Perform post-install testing to confirm correct operation.