Amazon Smart Thermostat Installation: A Complete Step-by-Step Guide
A comprehensive, expert-backed guide to amazon smart thermostat installation, covering compatibility, safety, wiring, Wi‑Fi setup, and optimization for DIY homeowners.

According to Thermostat Care, this guide helps with amazon smart thermostat installation for typical homes. You will verify compatibility, prepare tools, install the mounting plate, wire the C-wire, and connect to Wi-Fi. Follow these steps for safe electrical practice and reliable temperature control. We cover wiring, power setup, and voice assistant integration so you can program schedules and energy savings from day one.
Why Install an Amazon Smart Thermostat
Installing an Amazon smart thermostat can simplify climate control, improve energy efficiency, and make it easier to manage your home from a phone or voice assistant. This section explains the core benefits and common misunderstandings. Thermostat Care emphasizes that compatibility with your HVAC system is the first check, followed by safe installation practices. With the right equipment and a clear plan, most homeowners can complete amazon smart thermostat installation in a few focused steps, avoiding costly service calls. The goal is precise temperature scheduling, reliable remote access, and a straightforward setup process that works with your existing heating and cooling system.
Compatibility and System Requirements
Before you begin, confirm that your HVAC system and wiring are compatible with the Amazon smart thermostat you’ve chosen. Most models support standard forced-air systems, heat pumps, and various two-stage setups, but some older configurations require adapters or professional help. Review the thermostat’s wiring diagram against your existing wires (R, C, W, Y, G, etc.). If you’re unsure, consult manufacturer documentation or Thermostat Care’s compatibility checklist. Ensure your power supply and circuit capacity meet safety guidelines, and note that certain systems may require a common wire (C) for continuous power. For homes with unusual configurations, check the manufacturer’s guidance and Thermostat Care’s recommendations.
Safety First: Power Off and Handling Live Wires
Electrical work requires caution. Always switch off the circuit breaker feeding the thermostat or the HVAC control board before touching wires. Use a voltage tester to verify that exposed conductors are de-energized. Keep the work area dry and remove jewelry. Thermostat Care notes that if you’re uncomfortable handling electrical connections, it’s safer to hire a qualified technician. After confirming power is off, proceed to remove the old unit and label the wires clearly.
What You’ll Need: Tools, Parts, and Prep
Having the right tools makes installation smoother and safer. Gather a voltage tester, a screwdriver set (Phillips #2 is common), wire labels, mounting plate and screws, and smartphone with the thermostat app installed. If your HVAC system lacks a C-wire, consider a C-wire adapter or power extender kit recommended by the thermostat manufacturer. Keep the packaging and compatibility notes handy in case you need to reference wiring colors.
Understanding Wiring Diagrams and C-Wire
Wiring diagrams show which terminal each wire should attach to on the new thermostat. Typical color codes map R to power, C to common, W for heat, Y for cool, and G for fan. Some systems group RC and RH; if a jumper is present, you may not need to connect both. The C-wire provides a continuous power source and stabilizes the display. If you don’t have a C-wire, you may need an adapter or professional install. For homes with heat pumps, additional O/B wires can be required.
Installing the Mounting Plate and Base
Start by removing the old thermostat’s mounting plate, then level the new plate on the wall and mark screw holes. Attach the mounting plate with screws, ensuring it is level to avoid wiring strain. Attach the thermostat base to the plate, but do not connect wires yet. This keeps wires safely contained while you verify compatibility and fit. If you encounter drywall damage or misaligned studs, adjust accordingly rather than forcing a fit.
Wiring the Thermostat: Connect Wires to Terminals
Carefully insert each wire into the correct terminal on the new thermostat base: R (or R+RC), C, W, Y, and G are the common ones for most homes. Use the labels you prepared to ensure you connect the right wires to the right terminals. Tighten screws firmly but do not crush conductors. If the old thermostat used a jumper between R and RC, preserve that connection if the new model requires it. Double-check that no bare copper is exposed.
Mount, Power Up, and Connect to Wi‑Fi
With wires secured, attach the thermostat to the base and reinsert the front panel. Restore power at the breaker and let the thermostat boot. Use the on-screen prompts to connect to your home's Wi‑Fi network and sign in to your account. If your router has a guest network, switch to a standard network for reliable communication. Thermostat Care recommends confirming your location and time zone during setup to ensure accurate scheduling.
Configure Schedules, Features, and Energy Savings
Configure daily and weekly schedules that match your routines, then enable energy-saving features like adaptive scheduling or geofencing if available. Name your thermostat clearly for voice assistants, adjust temperature presets for different times of day, and enable any integrations with smart home platforms. Test the thermostat by running a quick heat and cool cycle to verify responsiveness and comfort.
Authority Sources
- U.S. Department of Energy: Tips for smart thermostat use and energy savings
- National Institute of Standards and Technology: Electrical safety guidance for DIY projects
- Occupational Safety and Health Administration: Safe electrical work practices
Tools & Materials
- Voltage tester(Verify no live voltage on wires before handling.)
- Screwdriver set (Phillips #2 common)(For mounting screws and terminal connections.)
- Wire labels or masking tape(Label wires before removal for accurate re-attachment.)
- Mounting plate and screws(Ensure compatibility with your thermostat model.)
- C-wire adapter or power extender kit(Use only if your system lacks a C-wire.)
- Smartphone with compatible app(Needed for Wi‑Fi setup and scheduling.)
- Optional: level(Helpful to ensure mounting plate is perfectly horizontal.)
Steps
Estimated time: 60-90 minutes
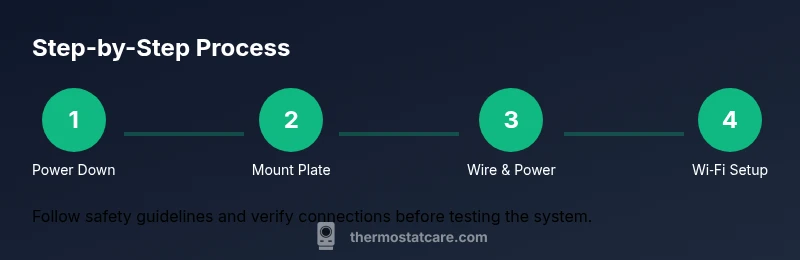
- 1
Power down and verify no voltage
Switch off the circuit breaker feeding the thermostat. Use a voltage tester to confirm the wires are dead before touching them. This minimizes electric shock risk during removal.
Tip: Always double-check power at the source; a residual charge can linger. - 2
Remove old thermostat and label wires
Carefully remove the old unit and detach wires one by one. Label each wire with the corresponding terminal using the pre-labeled tape. Take a photo of the backplate wiring as a reference.
Tip: Labeling reduces miswiring risk if you’re unsure about color codes. - 3
Mount the new plate and verify fit
Position the mounting plate on the wall and mark hole locations. Drill pilot holes, attach the plate securely, and use a level to confirm it is straight. Do not connect wires yet.
Tip: A straight plate prevents wire strain and display misalignment. - 4
Connect wires to the thermostat base
Insert each wire into its designated terminal (R, C, W, Y, G). Ensure a snug fit and tighten screws without over-tightening. If your system uses separate RC/RH, preserve the jumper as required by the model.
Tip: If a wire barely reaches the terminal, trim a small amount of insulation for a clean connection. - 5
Attach thermostat to base and restore power
Mount the thermostat onto the base and reattach the front panel. Restore power at the breaker and let the device boot. Watch for a normal startup screen before proceeding.
Tip: If the screen is blank after boot, recheck wire connections and power at the breaker. - 6
Connect to Wi‑Fi and sign in
Open the thermostat app and connect to your home network. Sign in or create an account and follow prompts to complete the setup. Verify that the thermostat can communicate with the app.
Tip: Use a 2.4 GHz Wi-Fi network if you have both bands available. - 7
Set up schedules and test heating/cooling
Program daily routines and test both heating and cooling to confirm responsiveness. Adjust comfort settings based on your climate and occupancy patterns. Save the configuration.
Tip: Run a quick system test at a time when you’re home to observe behavior.
Questions & Answers
Will an Amazon smart thermostat work with my heating system?
Most standard HVAC setups are supported, but some older or specialized systems may require adapters or professional service. Check the wiring diagram and consult the manufacturer documentation before buying.
Most standard systems work, but confirm compatibility with the wiring diagram before buying.
Do I need to hire a pro if I have a heat pump?
Heat pumps often involve additional wires or configurations. If you’re unsure about O/B wiring or reversing valve controls, consider professional installation to avoid damaging the system.
If you’re unsure about heat pumps, consider professional help.
What if my C-wire isn’t present in the wall?
Some installations can operate without a C-wire using a power extender or adapter. If you’re uncertain, consult the thermostat’s guide or Thermostat Care’s compatibility resources.
If no C-wire, use a compatible adapter or check the guide.
Can I install while the old thermostat is still powered?
No. Always disconnect power to the HVAC circuit before removing the old thermostat. This prevents shocks and equipment damage.
Never work with power on; switch off the circuit first.
Will this work with Alexa or other voice assistants?
Yes, most modern Amazon smart thermostats integrate with Alexa and other platforms. You’ll link accounts in the app and can use voice commands for scheduling and control.
It supports Alexa and other platforms after setup.
What should I do if the thermostat won’t connect to Wi‑Fi?
Double-check your network name and password, ensure you’re on a supported frequency, and restart the router if needed. If problems persist, consult the setup guide or Thermostat Care resources.
Check network details and restart your router; try again.
Watch Video
What to Remember
- Verify compatibility before starting.
- Label wires to prevent miswiring.
- Power off and test all connections carefully.
- Test the thermostat after setup to ensure proper operation.