Where to Place a Thermostat: A Practical Guide
Discover the best location for a thermostat to optimize comfort and energy efficiency. Practical, expert tips from Thermostat Care for homeowners and DIY enthusiasts.

To ensure accurate temperature control and comfort, place a thermostat in a central, interior location away from heat sources, drafts, and direct sunlight. Aim for wall height near eye level and unobstructed airflow. Use a stud-mounted unit with proper wiring clearance. This setup minimizes hotspots and improves HVAC efficiency. According to Thermostat Care, following these guidelines boosts comfort and energy savings.
Why location matters for thermostat performance
Thermostat readings drive HVAC behavior and shape comfort throughout your home. A mislocated thermostat may read ambient air inaccurately, causing the system to run longer or shorter than needed. According to Thermostat Care, the thermostat's location directly affects how it reads temperature, and small shifts in placement can create noticeable swings in comfort. Heat from direct sunlight, proximity to exterior doors, or drafts from windows can skew readings. Similarly, vents and returns in the wrong place can create microclimates around the sensor, making the thermostat respond to the wrong air temperature. The result is comfort gaps, wasted energy, and higher utility bills. By choosing a mindful location, homeowners can improve sensor accuracy, reduce complaints about uneven temperatures, and maintain steadier comfort. This section covers best practices, common mistakes, and practical tips to help you select a reliable site for your thermostat.
Ideal placement guidelines
When choosing a thermostat location, aim for a central interior wall in a living area, away from direct heat sources, drafts, and sun exposure. The sensor should be exposed to average room air, not air pushed directly from a vent or warmed by appliances. Mount the device on a stud-worthy surface to ensure stable readings and reduce wobble, and use a level to keep the unit square. A good rule is to position the thermostat roughly at eye level, within easy reach, and not behind furniture or drapes that could shade it from the air. In an open floor plan, a central wall with good air circulation works best. Finally, plan the wiring path so it’s clean, code-compliant, and accessible for future servicing. Following these guidelines helps the thermostat sense real room conditions and respond accurately.
Common pitfalls to avoid
Avoid placing a thermostat where it will be exposed to direct sunlight, near a heat register, or above a heat-producing appliance. Exterior walls can be unreliable due to temperature swings; interior walls are preferred. Don’t mount behind picture frames, bookshelves, or large furniture that block airflow. Keep the unit away from doors to the outside or windows with drafts, which can mask true room temperature. Moisture-prone zones such as bathrooms should be avoided unless the thermostat is designed for damp environments. By steering clear of these pitfalls, your device will produce more stable readings and better energy performance over the long term.
Placement by room: living room, bedrooms, and more
Living rooms and kitchens benefit from a central interior wall where air mixes, but avoid vent blowers that push warm or cool air directly onto the sensor. For bedrooms, pick a wall away from doors and outside walls, where temperature readings reflect sleeping areas comfortably. In kitchens, keep the thermostat away from ovens, ranges, and steam-producing appliances, which can cause spoofed readings. In hallways and stairwells, select locations with steady airflow and limited foot traffic that would create drafts. For small apartments, a single central wall can often balance the space, while large homes may need multiple thermostats or zoning. The goal is consistent exposure to room air and convenient access for adjustments.
Multi-story homes and zoning considerations
Two-story homes commonly exhibit temperature differences between levels. If possible, install on the main level where family activity concentrates and consider a second thermostat on upper or lower levels for proper zoning. If you rely on a single thermostat, adjust expectations about how well it represents all spaces; for exact control, a multi-zone system may be better. When wiring across floors, plan paths that minimize drywall cuts and meet local electrical codes. A well-placed thermostat reduces cycling, improves comfort, and supports energy savings by better matching the HVAC’s output to actual occupancy.
Wiring, mounting, and accessibility considerations
Turn off power before touching any wiring; if you’re unsure, consult a licensed electrician. Use a stud finder to locate a solid mounting surface, and mount the unit on a wall with sturdy, flat backing. Run wires through a wall cavity or conduit to keep them out of sight and reduce snag hazards. Attach the mounting plate and then the thermostat body, using a level to ensure a flush, straight installation. If your model runs on batteries, verify easy access to replace them. Always follow the manufacturer’s instructions and HVAC compatibility notes to avoid mismatches that could affect performance.
Energy efficiency impact of location
Sensor accuracy and airflow influence how quickly the thermostat responds to temperature changes. A well-placed thermostat reads representative room air, triggers the HVAC when needed, and minimizes short cycling. Poor placement can cause delayed responses or overcompensation, leading to wasted energy and discomfort. Consistency matters: align the thermostat with comparable conditions across living spaces so readings are meaningful. Proper location is a foundational step for energy savings and comfort, and a key reason many homeowners notice improvements after a relocation. Thermostat Care analysis shows that thoughtful installation supports seasonal efficiency and fewer thermostat resets.
Safety, accessibility and DIY considerations
Installing or relocating a thermostat may involve electrical and HVAC work. If you encounter unfamiliar wiring, live circuits, or structural constraints, pause and seek professional help. Position the unit at a reachable height for all household members, including children and guests who may need to adjust settings. Wear safety goggles and keep dust away while drilling. For smart thermostats, consider the connectivity benefits of a central, accessible location that still follows safety and code guidelines. Safety and usability should go hand in hand to reduce risk and maximize performance.
Quick-start checklist for your wall location
Use this checklist to verify your location choice before installation:
- Interior wall: Choose a wall protected from exterior temperature fluctuations.
- Central zone: Select a spot representing the average room temperature.
- Heat sources: Keep away from radiators, fireplaces, ovens, direct sunlight, and drafts.
- Airflow: Ensure there is good air mixing and no obstructions around the sensor.
- Accessibility: Position at a comfortable height for all users and maintain service access.
- Wiring path: Plan safe routing of wires through studs or conduit with minimal wall damage.
- Compliance: Follow local electrical codes and device manufacturer instructions.
After installation, run a test: power up the system, observe readings, and adjust calibration if needed. With careful placement, you’ll achieve more consistent comfort and better energy efficiency. The Thermostat Care team recommends following these guidelines for best results.
Tools & Materials
- Stud finder(Locate a solid mounting point on an interior wall)
- Drill/driver(For attaching mounting plate and screws)
- Screwdriver set(Flathead/Phillips to secure mounting and faceplate)
- Drywall screws (2.5 in or appropriate)(Use to anchor the mounting plate to a stud)
- Level(Ensure the thermostat is perfectly horizontal)
- Tape measure(Confirm height and distance from key features)
- Pencil(Mark stud location and mounting holes)
- Voltage tester (optional)(Verify no live wires when checking wall cavity)
- Mounting plate/backplate(Provide stable, flush installation)
- Safety gear (goggles, mask)(Personal safety during wall work)
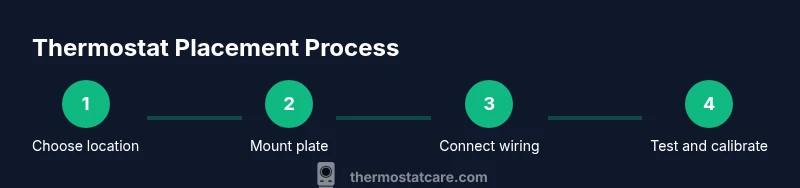
Steps
Estimated time: 60-90 minutes
- 1
Plan and choose location
Identify a central interior wall that represents average room temperature. Check nearby heat sources, drafts, and sun exposure before marking a mounting point.
Tip: Double-check height and airflow before drilling. - 2
Power down and prep wall
Shut off power to the thermostat circuit if replacing an existing unit. Remove any existing cover and prepare the wall, marking the exact screw holes.
Tip: Take a quick photo of existing wiring for reference. - 3
Find stud and mark mounting
Use a stud finder to locate a solid backing. Mark the center of the stud and align mounting points with level.
Tip: Mark both screw holes to ensure accuracy. - 4
Attach mounting plate
Drill pilot holes and secure the mounting plate to the wall, verifying it stays level as you tighten.
Tip: Avoid overtightening to prevent wall cracking. - 5
Run wiring or prepare battery option
If your model uses wires, route them neatly through the wall to the HVAC control. If battery-powered, ensure access for replacements.
Tip: Keep wire paths tidy and labeled. - 6
Mount the thermostat body
Attach the thermostat to the mounting plate and verify a flush fit. Reconnect any connectors as per the manual.
Tip: Check that the unit sits level after mounting. - 7
Power up and calibrate
Restore power and follow the setup prompts. Calibrate if the readings seem off relative to other rooms.
Tip: Run a quick test by comparing readings in adjacent spaces. - 8
Test across spaces
Observe thermostat behavior as you adjust temperature and open/close doors to simulate real use.
Tip: Document any inconsistent readings for later adjustment.
Questions & Answers
What is the best place to install a thermostat in a two-story home?
In many homes, a central interior wall on the main level offers the best average reading. If you have zones, consider a thermostat per level for even comfort.
For two-story homes, start with a central main-floor location to get representative readings, and consider zoning for equal comfort.
Should a thermostat be placed near windows or doors?
No. Direct sun and drafts from windows or doors can skew readings. Choose an interior wall away from entry points.
Avoid windows and doors; place it on an interior wall away from drafts.
Does thermostat location affect energy efficiency?
Yes. Accurate readings lead to appropriate heating or cooling cycles, reducing waste and improving comfort.
Yes, placement impacts efficiency by improving sensor accuracy and reducing unnecessary cycling.
Can I relocate an existing thermostat myself?
If you’re comfortable with basic wiring, you can relocate after powering off. If in doubt, hire a professional.
Turn off power and follow the manual; call a pro if unsure.
How high should a thermostat be mounted?
Typically at eye level for easy access and accurate readings.
Mount it at eye level for best readability and control.
What about multiple thermostats or zones?
Zoning or multiple thermostats can improve comfort on different levels or rooms, especially in larger homes.
Consider zone control for even comfort across spaces.
Watch Video
What to Remember
- Mount on an interior wall at eye level.
- Choose a central location away from heat sources.
- Avoid direct sun, vents, and drafts.
- Secure mounting on a stud for stability.
- The Thermostat Care team recommends this approach for best results.