How to Test a Car Thermostat: Step-by-Step Guide
Learn to safely test a car thermostat, diagnose common issues, and decide between repair or replacement with expert guidance from Thermostat Care.

This guide shows you how to perform a thermostat test for a car, ensuring the engine reaches and maintains the correct operating temperature and preventing overheating. You’ll learn safe prep, the tools you need, and a clear, step-by-step procedure to validate thermostat operation and decide between repair or replacement. By following these steps, you can diagnose common thermostat issues promptly.
What a car thermostat does and why testing matters
The thermostat in a vehicle is a valve that regulates coolant flow between the engine and the radiator, helping the engine reach and maintain its optimal operating temperature. A thermostat test car is a practical way to verify that this valve opens and closes at the correct temperature and that the cooling system responds as expected. According to Thermostat Care, regular testing helps distinguish real thermostat failures from sensor or cooling fan issues, reducing unnecessary part swaps. A failing thermostat can cause high engine temperature, reduced efficiency, coolant loss, and long-term engine damage. In many driving scenarios, a thermostat that sticks open will allow the engine to run cool, increasing fuel consumption and emissions, while one that sticks closed can cause overheating and warp engine components. The goal of a test is to verify opening behavior, flow, and response time, then compare with the vehicle’s service manual specifications. A methodical test also confirms the interplay with the radiator cap, the water pump, and the thermostat gasket. Throughout this process, keep a log of observed temperatures, times, and symptoms to guide your next steps.
From a practical viewpoint, documenting the exact temperature at which the thermostat opens helps you compare to your car’s spec sheet. The Thermostat Care team recommends performing tests in a shaded, level area and using a helper to monitor gauges while you focus on safe procedures. Always refer to your owner’s manual for model-specific guidance and torque specs when removing or testing any cooling-system component.
Symptoms of thermostat problems in a car
Watch for signs that the thermostat may be failing: the temperature gauge fluctuates without clear cause, the heater produces weak or no heat, the engine overheats or runs cooler than normal for long periods, coolant leaks appear around the thermostat housing, or the radiator fan runs continuously. Some vehicles show a check engine light or diagnostic codes related to cooling system performance. Early detection can prevent more serious damage. If you notice odd temperature behavior, a stuck-closed thermostat often leads to overheating, while a stuck-open one keeps the engine running cool and can increase fuel consumption and emissions. Distinguishing thermostat issues from sensor faults or water-pump problems requires careful observation of gauge behavior, coolant flow, and pressure.
Safety and preparation before you test
Before you begin any testing, ensure the engine is completely cold. Wear protective gloves and safety glasses, and work on a flat, stable surface with the parking brake engaged. Have a fire extinguisher or absorbent material handy in case of a coolant spill. Disconnecting the battery is optional for certain procedures, but check your vehicle’s service manual before disconnecting electrical connectors. Gather all tools and materials in advance, and keep a notebook to record temperatures and observations. If you’re not confident with cooling-system work, consult a professional. Thermostat tests can involve pressurized coolant and hot components, so proceed with care and respect the high-temperature hazards.
How a thermostat test is performed (overview)
A methodical thermostat test combines observing coolant temperatures, checking flow, and verifying the thermostat’s opening behavior. You’ll monitor the engine’s temperature as it heats up to the expected operating range, watch for coolant flow through the radiator, and consider a back-to-back test with the thermostat removed. You should also test for leaks and verify the radiator cap seals correctly. This overview sets up the step-by-step procedure that follows, ensuring you understand what to expect at each stage and why it matters for your car’s cooling system. Remember to consult your owner’s manual for model-specific guidance on thermostat location and service intervals.
Interpreting results and next steps
If the thermostat opens within the expected range and coolant flows smoothly, the system is likely healthy. If you notice delayed opening, partial opening, or no flow despite a hot engine, the thermostat may be sticking or failing. When in doubt, compare observed temperatures to the vehicle’s service specs, and consider replacing the thermostat if the symptoms persist after a controlled test. Always purge air from the cooling system after any work, and recheck for leaks. If you observed anomalies that indicate a related issue—such as a faulty water pump, a clogged radiator, or a bad radiator cap—address those before concluding that the thermostat is at fault.
Preventive maintenance to avoid thermostat issues
Scheduled maintenance is your best defense against thermostat problems. Regular coolant replacement with the appropriate specification for your vehicle helps prevent deposits and corrosion that can affect thermostat operation. Periodically inspect hoses for soft spots or leaks and test the cooling fan operation to ensure proper cooling at idle and under load. Use clean, distilled water and the correct coolant mix to avoid mineral buildup. Keep an eye on the thermostat gasket integrity, as leaks here can mimic thermostat failures. A proactive approach saves time and reduces the risk of overheating during hot days or long trips.
Tools & Materials
- Car owner's manual(Reference for thermostat location and specs)
- Infrared thermometer(Measure hose and block surface temps)
- Cooling system pressure tester(Identify leaks and test pressure)
- Distilled water(Safe coolant refill and purge)
- Safety gloves(Heat protection)
- Safety goggles(Eye protection)
- Rags or absorbent towels(Clean spills)
- Digital multimeter(Optional for sensor checks)
- Funnel(Refill coolant without spills)
Steps
Estimated time: 60-90 minutes
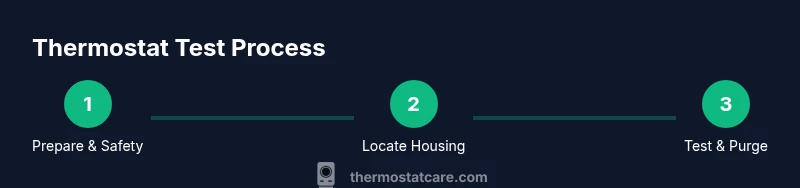
- 1
Prepare the vehicle and safety measures
Park on a level surface and let the engine cool completely. Put on gloves and safety glasses, and gather tools. Check the coolant reservoir and note any leaks or low fluid levels. This setup reduces risk and helps you observe genuine thermostat behavior.
Tip: Never open the radiator cap while the engine is hot; wait until the system is cool. - 2
Locate the thermostat housing
Consult the owner’s manual to locate the thermostat housing. In many vehicles it’s near the engine block or under the upper radiator hose. Identify electrical connections if present and plan for a quick path to the housing.
Tip: Label hoses or take a photo before removing components. - 3
Set up temperature monitoring
Place the infrared thermometer to read coolant hoses or the heater core inlet. If your vehicle supports it, use a scan tool to monitor engine temperature and fan status. Confirm ambient conditions won’t skew readings (shade, not direct sun).
Tip: Capture multiple readings as the engine comes to operating temperature. - 4
Run the engine to operating temperature and observe
Start the engine and monitor the temperature rise. Observe when the thermostat begins to open (coolant flow should become apparent). Note any sluggish rise or overheating signs and verify that the radiator fan engages as designed.
Tip: If the gauge climbs too quickly or stays low, document it for comparison. - 5
Optional: remove thermostat for off-car test
If symptoms persist, you can remove the thermostat and test it in a pot of water with a thermometer to observe opening behavior. This confirms whether the valve is sticking or opening too late.
Tip: Only perform off-car tests if you’re comfortable and the vehicle is properly supported. - 6
Refill and purge cooling system
Reinstall the thermostat, refill with the correct coolant, and bleed air from the system per the service manual. Start the engine, run to operating temperature again, and recheck for leaks and heat delivery.
Tip: Ensure the system is bled completely to prevent air pockets.
Questions & Answers
What are the signs my car thermostat is failing?
Common signs include erratic temperature gauge behavior, poor heater performance, and occasional overheating. If the engine overheats, the thermostat may be stuck closed. If the engine runs cooler than expected, it could be stuck open. Confirm with a controlled test and consult your manual.
Look for an erratic temperature gauge, weak heater output, or frequent overheating. A sticking thermostat often causes overheating when closed or extra cooling when open.
Can I test a thermostat without removing it?
Yes. You can perform a live test by monitoring engine temperature, coolant flow, and fan operation. For more definitive results, you may remove and test the thermostat off the engine with water to observe opening behavior.
You can test while installed by watching temperature and flow, but off-engine testing can confirm sticking.
Is it safe to run the engine just to test the thermostat?
Running an engine to test cooling system components is safe when done on a level surface with fans operating and a clear exit path for heat. Always observe temperature gauges and stop if overheating occurs.
It's generally safe if you monitor gauges and have proper cooling system access, but stop immediately if you see high temps.
How long does a thermostat replacement typically take?
Replacement time varies by vehicle but is commonly in the 1–2 hour range for a DIY task and shorter for a shop service. Always consult the service manual for model-specific timing.
It usually takes about one to two hours for a DIY replacement, depending on the car.
What tools do I need to test the thermostat?
Essential tools include an infrared thermometer, a cooling-system pressure tester, safety gear, and a copy of the vehicle’s service manual. Optional items like a multimeter can help check sensors.
You’ll want an infrared thermometer, a pressure tester, safety gear, and the vehicle manual.
Should I replace the thermostat with a coolant flush?
A coolant flush is not always necessary with thermostat replacement, but it can help remove deposits and improve cooling. Decide based on coolant condition and vehicle history.
Often, you don’t need a full flush with thermostat replacement, but it can help if the coolant is dirty.
Watch Video
What to Remember
- Test the thermostat before replacing parts.
- Document temperatures and flow to compare with specs.
- Bleed the cooling system after any work to prevent air pockets.
- Use the manual as your model-specific guide for locating the housing.